
|
Paracord 550 / Nylon Parachute Cord 4mm - Black (16 Feet/4.8 Meters) SKU: XCR-4360 $4.20 |

|
Sharp Flush Cutter Pliers - For Cutting Beading Wire (1 Piece) SKU: XTL-5600 $23.99 |

|
Fiskars 5 Precision Tip Scissors - Super Sharp SKU: XTL-5700 $7.45 |

|
Beadalon Large Beading Mats - Prevent Bead Rolling 13 X 18 Inch (Set of 2) SKU: XTL-9935 $6.75 |
Related Videos


Product Spotlight: Deluxe Kumihimo Kit
Whether you are new to kumihimo braiding or a seasoned veteran, you are going to love the Deluxe Kumihimo Kit from Beadaholique. This kit has every...
View full details

How to do a Half Hitch Knot Zipper Pattern in Macrame
In this video, learn how to use half hitch knots to make a two color zipper pattern in macrame.
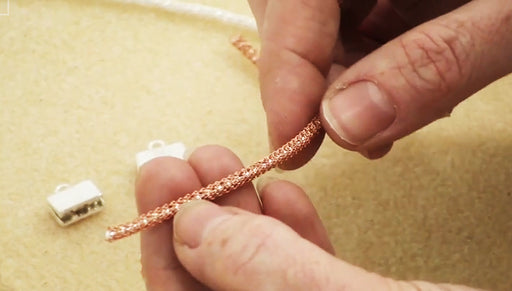
How to Use SilverSilk Pinch End Caps and Make a Bracelet
A wide variety of finishes and in single, double, or triple strand sizes. Also shown in this video is how to braid 3 strands, use the end caps, and...
View full details