Note: Components and tools listed within this INSTRUCTIONS box and the printer-friendly PDF, if available, may have been discontinued since
this project was published. Refer to the PURCHASE COMPONENTS and TOOLS AND OTHER SUPPLIES sections for current availability.
In addition to the materials listed, you will also need a popsicle stick and some paper towels to protect your work surface.
- First, watch our video on how to use Crystal Clay.
- Based on the instructions in the video, put on the disposable gloves that come with your Crystal Clay and mix one small, pea-sized ball of clay.
- Slide a popsicle stick under the open bezel of the ring and hold it in place. Fit your ball of Crystal Clay into the bezel and gently tap it down into a low dome (with your gloves on, so you don't leave fingerprints). The popsicle stick will keep the clay from squeezing out the back of the open bezel.
- Next, watch our video on how to make a textured Crystal Clay pendant using the JudiKins Clay Squisher. In this video you will see how to brush mica powder onto the swirly texture pad of the JudiKins Clay Squisher, and how to press the clay into the texture so it takes the pattern and fills out the bezel.
- Gently remove the popsicle stick from the back of the ring.
- Let the clay cure for 14 to 16 hours or overnight, and then your ring is ready to wear!
WHAT YOU'LL NEED: (scroll down for purchase options)
- TRC-251 - Crystal Clay 2-Part Epoxy Clay Kit 'White' 25 Grams
Project uses 1 piece. You will need 1 package.
- XTL-1162 - Crystal Clay Sparkle Dust - Mica Powder - Metallic Blue (1.5 Grams)
Project uses 1 piece. You will need 1 package.
- FRG-004 - Nunn Design Ring, Open Frame Itsy Circle Size 7, 1 Piece, Antiqued Silver
Project uses 1 piece. You will need 1 package.
RECOMMENDED TOOLS:- CSQ-1000 - Judikins Clay Squisher, Texturing Plate Japan Theme 6 Styles, 1 Sheet
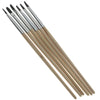
- XTL-880 - ICE Resin, Angled Paint Brushes for ICED Enamels & Paper Sealant, 6 Pack