How to Use Crystal Clay

SKU VID-0078
Designer: Julie Bean
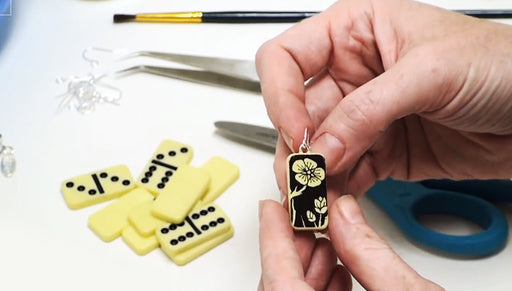
Learn how to use Crystal Clay along with Austrian crystal chatons to make beautiful jewelry. This two part epoxy clay has a 60 - 90 minute work time and cures fully in 12 - 24 hours. No special tools required and available in a wide range of colors. Make rings, pendants, cuff links, purse hangers, and more!

The brand name for the crystals shown in this video is no longer available. High quality Austrian crystals are now available under the PRESTIGE™ Crystal Components line.

Audio Transcript
Note: This audio transcript is auto-generated and may not be completely accurate.
Hi, this is Julie with Beadaholique.com Today I want to show you how to use crystal clay which is a two part epoxy clay. When it arrives it is gonna arrive in a package like this. It'll show the color on the top. It actually comes in eighteen different colors wide range of pinks blues purples browns anything you might need for your creative uses When you first open it up you take out you'll notice on the back side of the packaging a detailed step-by-step instructions for you to follow. It's really easy to do and I'll show you in the video just how easy. You're going to get your clay which is actually be in a Part A and a Part B Part B is the hardener Part is the color. You can mix various colors of PArt A together to create your own unique color palette. This one here is green take this out in a moment. You're also going to receive a toothpick with some beeswax on the tip. That's going to help you pick up your chatons or other objects and then you're going to recieve as well a pair of rubber gloves because this is sticky stuff and you're going to get a little sample baggy of chatons as well. I'm going to put these on the table so you can see what you're getting. These are going to be assorted. You see you get a nice little collection and you'll see how easy they are to pick up with the toothpick with the beeswax on the tip. All you need to do is find something to adhere your clay to. It adheres to any surface, into a bezel setting anyway you want to use it. I pulled some different samples to show you the how many choices you have. Here I have a compact with a nice bezel top to it, got cuff links, a little key with the decorative little setting in it that we can go ahead and put some epoxy clay in and the stones. These are a wide range of choices. For this particular project I'm going to take this ring setting with the round bezel. To begin what you're going to do is take out your clay. It's squishy. If it gets to the point where it's really hard which sometimes can happen with extreme temperature fluctuation such as extreme heat or extreme coldness all you need to do is take a plastic baggy put the clay in it, run it under hot tap water for about a minute and then it'll loosen back up and be usable again. So don't worry if that does happen. So I'm going to out my rubber gloves on and before hand I removed moved any rings and I washed my hands with really good because we're going to take the gloves off in a little bit we want to make sure we have clean hands otherwise any germs or dirt might get embedded in your clay. So the best way to go about this is open the packets You only want to take off as much as you need to use you have about sixty to ninety minutes to work with which is actually quite generous and then it's going to cure without needing to bake in twelve to twenty-four hours. So I have my setting here and I need to guessimate how much I think I'm going to need. I'm going to pinch off a little going to roll it into a ball just like so put the rest aside I'm going to do the same for my hardener and I'm trying to create two equal balls That's how I'm going to measure it. Part B looks a little bit more than my part A Going to pinch off a little bit more. When I'm happy that my balls are the same size I'm going to squish them together and I'm just gonna keep kneed them and what I want to do is kneed it until all the striations are gone you can see they're becoming marbeled just keep working with them That looks really good to me. So now I need to roll it into the shape of my setting. I have a round settings so I'm going to roll it into a round ball. If I were doing a square one I'd try to keep it more of square a shape. Same thing if I was going to do an oval shape or I was going to do this inset ring with a channel setting I would try to roll it into more of a tube shape. Since I'm doing a circle for this project. Now that I've got may ball put it in the center of my ring Once I put it into my ring setting I can tell that looks a little bit big and the beauty of this clay is if you have a lot of work time It was sticky in there but I could still remove it. Pinch it. Create a smaller ball. I'm going to put my extra into a another setting so it doesn't go to waste. Take off my gloves pick up my little ball put it in the center of my ring pat it down and now I'm gonna pat it into that setting. I'm not going to push it. I don't want it to spillover. Just pat it keep going lower and lower in the setting Look at how it's filling up this is why I wanted to make sure my hands where really clean before I started. I don't want any residue or hairs or anything to get into my clay because that would dry embedded in it I'm happy with that shape while I'm at it and I'm going to go ahead and put this little guy in as well to another little finding and pat Time to add some chatons. I'm going to take the beeswax toothpick and I'm going to grab a stone on it's surface and press it into my clay and then press it down so the top of the stone is just a little bit under the surface of the clay so that when it does dry it'll create a nice catch and my stones will stay in place. This is going to be a real random pattern. You can do whatever you want this one I wanted to just be fun and bright. If you need to turn your stones over if their tops aren't up to turn over with the beeswax. If you find that your tooth pick is actually causing the stones to pull up if you're having a hard time releasing the beeswax you want roll the tape off the stones and press it in and then it'll come up right away. I need to turn over a few more chatons to see what I have. When you're happy with how your ring looks you want to go ahead and take your finger and lightly tap and press everything into place. You want to make sure they're secure. Make sure that the form did not get destroyed when you where placing your chatons. Now I'm going to take the last couple of chatons that I had leftover and put them on here and make a great little charm. See what colors I have. There you go. It was really that easy to do. Now that my ring is done I'm going to wait for twelve to twenty-four hours for it to fully cure. There's no baking or firing required. It's going to be a solid piece. Here's a couple examples of items you can make using the crystal clay and crystal chatons. We have the ring which we just did in the video. Here are a couple compacts. You we've actually taken a piece of filigree put that into the crystal clay and then adorned it with the crystals. We have a video that you can see on how to do this exact project. Here is a purse hanger. We've done a random pattern of various sizes and shapes and colors of the chatons and here's a fun project. It's just a channel set ring which has a little indent where you can put the crystal clay around the exterior of it and we just laid in rows of clear crystal chatons. So these are a couple of ideas. The possibilities really are limitless. So let your creativity flow and have fun with the crystal clay and crystal chatons. Go to Beadaholique.com for all of your beading supply needs!

You recently viewed

Clear recently viewed