How to Mix Nunn Design Resin and Castin Craft Pigment to Use on Flat Tags

SKU VID-1586
Designer: Becky Nunn
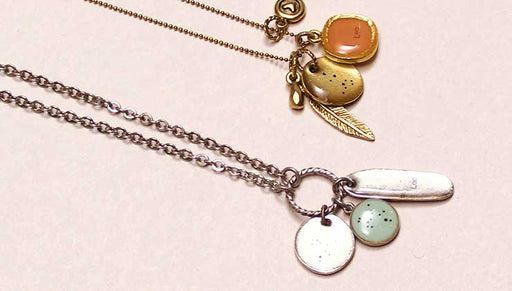
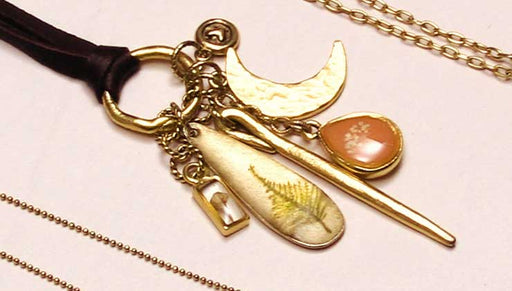
In this video Becky Nunn of Nunn Design shows you how to mix the Castin Craft pigments into Nunn Design resin and how to carefully add it to flat tags. Becky also shares some tips for working with resin to help you get a beautiful end result.
Audio Transcript
Note: This audio transcript is auto-generated and may not be completely accurate.
hi this is becky nunn with nunn design guest designer at beadaholique in this video I'd like to show you how you can use Nunn design resin and mix it with the casting craft opaque pigments and use the Nunn design flat tags to create fun pieces like you're seeing here here are some of the items that you're going to need in order to colorize your resin and put them on the flat tags you'll want to select some of the Nunn design flat tags there's a variety of ones that you can choose from I actually have some pieces that I put additional hole onto and I'm gonna be shooting a video showing you how to add a hole so that you could make even a bracelet like this using the flat tags the color that I'm going to make is I'm going after this pale dogwood and for that on these some casting craft opaque pigments in the white brown and the red and the Nunn design resin kit the Nunn design flat tags are cast and lead-free pewter and then plated with 24 karat gold 0.999 fine silver and copper we also put an oxidization on the pieces so I like to use some rubbing alcohol and a q-tip to wash the pieces of prior to putting the resin on them lay out a couple of business cards that'll provide a working surface so that when you are finished washing them you can put them on to the business cards and this allows you to pick up and move around the cards and not just disturb the resin pieces as they're curing open up your rubbing alcohol put a little bit on the end of your q-tip and then rub the surface and if there is any oxidization it'll release onto your toothpick or excuse me onto your q-tip and then you will have a nice clean surface we're just double-checking that all of our pieces are very clean prior to putting resin on it it'll help the resin adhere to the pieces easier and also it's just a good discipline to get into because sometimes sometimes you might have a bezel because this technique will also work great with pouring it into a bezel and you might have something on the side lip of your bezel some of that oxidization so we're just cleaning all the pieces up I chose these pieces I punched add additional hole into them so that I could link them into like a charm bracelet or into just a simple ID style bracelet but I'm actually going to use this side of the piece as you see on some of the flat tags these organic-looking ones they have an interesting pattern that make it look really handmade but on the backside this is nice and flat making it super easy to pour the resin onto it and for this one I'm going to show us doing it onto this backside in this example you can see that it had it started out let's see if I can find this piece this has a really sharp sloping edge on it and this is great but you want to let your resin cure for quite some time but and it's nice and thick before you start using it on pieces like this where there's a slide really strong edge just so that when you're starting out or a beginner it's best to start with the flat side and then I should get more experience or as your resin starts to get thick then you would want to use this side I'll show you what I mean in a moment so now we have our little tags ready to go we've cleaned them with a little bit of rubbing alcohol so putting our top back on and we're ready to move on to mixing our resin so let's set these aside and let's bring in all of the things that we're going to need to mix our resin inside the Nunn design resin kit you'll have a part a and a part B you'll be using and you'll have some mixing cups gonna need two of the mixing cups a couple of toothpicks and let's see what else you'll have your stir stick and I often reuse my stir stick so I had wiped this side off after I was done last time making some resin and I can use this side over here and let me just show you we're gonna making that dogwood so it's going to take a couple of these colors these three different colors but I have on the Nunn design website and I'll share with the beauty Hawley people so that they can show it to you all these different formulas for mixing the Nunn design resin with the variety of different colors of the casting craft to create all kinds of looks like you're seeing here and we're just doing this dogwood one and as you can see there's a formula written out for that panettone color and this is what we're going to be working off is this this formula so we'll need the red white and the brown so we'll keep that sheet out for ourselves so we're also going to need to have some sort of timer before we mix the resin so we're gonna go ahead and set our timer for two minutes that's the amount of time that we're gonna need so that's ready to go so the first step is we're gonna pour the Part A into the mixing Cup up to the 1 tablespoon mark and this has to be a 1 to 1 ratio a full cup two tablespoons worth in order to activate the resin and have you use it so Part A is up to the one tablespoon so I have that very visible so that I can see it open up the lid pour your resin in I have some wet wipes handy in my lab so that I can wipe the lid when I'm done as I start to get to that 1 tablespoon 1 tablespoon mark I'm starting to lighten up on my flow until I get right to that line kind of drizzling it in and right when I get to that line I lighten my flow by twisting the top of my cap and I'm right at that one tablespoon mark I like to use the wet wipe to wipe the top of my resin have that be nice and clean for the next time the cap on and now we're ready for the Part B now we're moving it pouring it in moving it up to the 1 the 2 tablespoon mark so we have a 1 to 1 exact ratio so I'm pouring pouring pouring pouring I'm getting right close to that mark twisting my top and right when I hit that line right there we have exactly what we need so wipe off the surface of the top put the lid on and now we have our resin I like to always put my resin onto plastic so I can keep my work or a surface nice and clean and I'm gonna set my timer for 2 minutes get to see my family there so I'm starting at 2 minutes and then with the fat tongue depressor stir stick that's in your resin kit you'll start to mix the resin together and at first you'll see it's very what is that goopy looking the two colors are mixing together and you're gonna mix it for the full two minutes and as you start to mix it those two part a and B will be a blend and it'll be clear you will have bubbles in it but it will be a clear mixture so scrape the sides you go slow you won't have a lot of overflow but if you do don't worry you can just wipe it off with your and wet wipe and as you go along you'll want to stop every now and then and scrape all of that excess resin back into the cup and then start to stir again and continue this for the full two minutes once you've mixed your resin for the 2 minutes and your timer has to gone off go ahead and turn off the timer and then you're ready to add the colorants so for this formula we're using this dogwood which has one tiny toothpick of a red eight toothpicks of white and five toothpicks of brown so let me show you what that formula means and how it works I'm gonna move my resin up here and I'm gonna pour a tiny bit of the you can do it this way you can pour it onto here or you can pick up the colorant from the actual top but I like to pour it on to a surface so I know I'm going to need a lot of white and I know I'm going to need just a tiny bit of the brown so I'm not going to pour that out I'll just pick it up from the surface and I'm going to need a little bit of the red so when you take the tops off of your pieces make sure off of your casting craps try to remember to put the right color back on there because otherwise you'll contaminate the top part so I have a full amount of resin that I've mixed and for the formula you only need one teaspoon of the two-part resin so I'm gonna off pour my resin my mixed resin into this cup for the 1 teaspoon mark this is why it's really nice to have a lot of pieces ready to go because as you mix this resin you're going to want to use it wisely and it only takes a small amount so we have the 1 teaspoon mark of the resin already mixed and we're gonna go ahead and now add our casting craft but let me show you one tiny toothpick of red looks like this because this is so incredibly potent it's going to colorize my batch so that's a tiny toothpick so swirl that in and then I like to lay my toothpicks right on this side right here with each color you're going to use a different color you're going to use a different toothpick so the next one is to is eight toothpicks worth of the white so this is a toothpick so you're going to go ahead and you can either do it this way where you add the eight to it in like this or you can actually with time you'll kind of have more confidence and you'll be able to squeeze it right into the mixture so that was three you think or that was five that was probably six seven and eight and if I didn't get it right you'll see me be able to adjust it as we go and then for the brown you're gonna want to mix your shake your Brown up before you actually bring it to the surface like that we only need five toothpicks worth of this so it's not quite I mean actually I don't trust that so I'm gonna actually use that's five toothpicks you saw how much I did of the white but I don't need quite that much of this I just know so I was two three four and five so it is not exact but I will see how I did now with another stir stick I like to use the skinnier stir sticks for this and I often just will cut them or break them in half so I'll be able to use that stir stick multiple times you mix these two colors together let's see how we did that's what I thought my Brown was a little bit heavy but it's actually looking pretty darn close to a pale dogwood it's a little bit Brown but I like that color let's see so this is kind of very similar but you can see I added a little bit more Brown if I wanted to I could add a little bit more white and add a little bit more red to get more of that act match so once your resin is mixed I'm gonna go ahead and move these things off to the side I can reuse those later I'm gonna put my caps back on to my Rua Maya casting craft opaque pigments the right top going on to the right pieces and now we're ready to move our resin pieces back in these are the pieces that we're going to be covering up I think we're calling it ABS do these two right here as I can show you how to do those all right so you have your colorants that you're ready to go with and you have your pieces on the little card so you can move them around and I like to have multiple toothpicks ready to go so that I can I can maneuver the pieces around while I'm colorizing the tags so it only takes a very small amount of the casting craft onto these tags so use I'm gonna get this out of the way so I'm gonna scrape it into the side here and put it on my other sheet and then use your toothpick to pick up a little bit of the resin I just dipped it inside of my resin and twirled it to stop the stream of flow and then you place it on to the flat tag when you're first starting you're gonna want to go slow cause it's much easier to go slow and keep adding on then to have to keep on cleaning up so I mentioned I put a second hole in this piece this flat tag normally comes with just one hole and we're gonna do that in another video but when you start to get close to the edge where those holes are you're going to just use your toothpick to guide it into place and move it around that edge right there and you can see I have some bubbles on this in this resin but don't worry about it I'll show you how we're gonna address that if you want to you can let this sit for five minutes and it'll make the the bubbles will naturally pop on their own it had a lot of bubbles in there because when I was mixing it quite rigorously it added some additional air into there so I'm using my toothpick to just drag the resin around to the side edges and around those holes and then as I have that part done I can just add a little bit more of the resin to bring up the dome if this starts to fill this is looking pretty close to it could flow into that hole right there what you'll want to do is just slightly move the piece and break that connection between this card and the resin and by slightly moving it it'll break the seal that's some filled in there and you'll be able to have that hole not have the resin in it so I'm going to move this off a camera and I'm going to show you you're going to use your breath to Huff gently on the piece and that'll help the release some of those air bubbles that are in the resin so by just using my hot breath you can see that it made all of those little bubbles that were in the resin release and now you're ready to go on to the next one or whatever amount of pieces that you want to do once your pieces are fully cured it'll take about 48 to 72 hours depending where you're located for the residents to beef rock hard and then you're ready for it to assemble them into finish jewelry here's some examples of how I used the Nunn design flat tags colorized resin with several of the Nunn design jump rings and some chain on these two pieces where you see that the resin is only in a certain area or have two colors I waited a little bit longer until my resin was quite thick before I placed it on to the flat tag then the resin will just stop wherever you drag it to or if you put two colors together it won't bleed together they'll just stay separate this is becky nunn with nunn design showing you how you can colorize resin the Nunn design resin with the opaque casting craft colorants and put them on flat tags I hope you enjoyed it

You recently viewed

Clear recently viewed