|
Hard Wood Oval Bracelet Sizing Bangle Mandrel Wire Wrapping Tool SKU: XTL-0155 $21.99 |

|
Beadalon Large Beading Mats - Prevent Bead Rolling 13 X 18 Inch (Set of 2) SKU: XTL-9935 $6.75 |
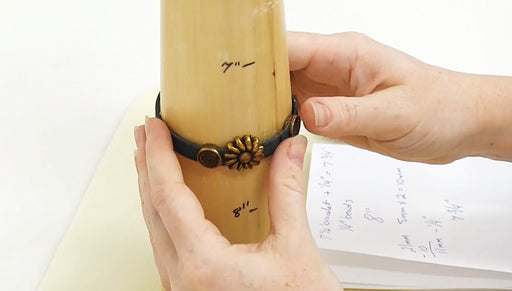
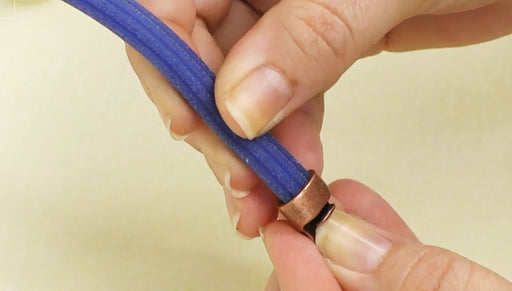
I have this is Julie with beadaholique.com Today I want to show you how to make a Regaliz corduroy rubber bracelet. I have a couple examples here of already finished pieces and you can see this one has a bit of bead weaving on it and they have some great clasps and I want to show you from start to finish how to make one I also want to talk to you a bit about how to estimate how much of this corduroy rubber you're gonna need to order it's great because it's sold by the inch so you can order just what you need but I always recommend ordering actually a little bit of extra because it's not very expensive and you're gonna need some beads I'm gonna make this bracelet here which is kinda like a peace and love theme you can do whatever you want. There's a wide variety of beads but have a peace symbol slider bead here I got these rubber o rings which are really flexible and they actual work as great bead stoppers and then I've got a clasp as well and then to glue my cord into my clasp. I have this product called Super New Glue It's very strong. It gives you a great bond. Oftentimes you'll hear me recommend E6,000. I do not recommend that for this particular project definitely pick up the Super New Glue. In terms of tools your basically just going to need a cutter and I've got this little cut by BeadSmith which works great see it's got this great diagonal blade which is gonna give me a really nice flush cut and then to help figure out the measuring and just two explain this a little bit better. I've got a ruler here I have a bracelet mandrel where I've gone ahead and I've made notes of the inches of how big of the bracelet along the way and then I'm actually going to do a little math with on paper hopefully to make it a little bit more sense. So we're going for a seven and a half inch bracelet which is a pretty standard bracelet size. You're going to want to measure your wrist to begin with to figure how big of a bracelet you want but your wrist measurement is not your bracelet measurement. A wrist measure is gonna be really tight and so you don't want that, you want to give yourself an extra half an inch or even a full inch so that you can wear these a little bit more loosely and they're not too tight on your wrist. So 7 1/2 is a pretty average size. I'm going to do that in the video here First off I wanna show you before I even start assembling this is if we're going for 7 1/2 inch bracelet one might assume that it takes 7 1/2 inches of corduroy rubber to go around it. So if that's my 7 1/2 inch mark. I want to show you what that equals on the ruler and you can see it's almost 8 1/2 inches. So right off the bat if you are trying to do a 8 1/2 inch bracelet you got to bump that up to 9 inches. If you're a 7 1/2 you got to bump it up to 8 1/2. You have to add inch. Now I'm just going to put these beads on and I'm sliding on the rubber o ring first. Now I'm going to slide on a couple of these great colorful beads another o ring and look what this does the o rings act as stopper beads. So you can put them as tightly up to your beads as you want or you can make them a little bit looser that's gonna be a great way of holding a bracelet beads together and where you want them positioned on the bracelet I've got them on and remember so we want a 7 1/2 inch bracelet and then automatically we had to bump that up to 8 1/2 inches of cord, just straight on the mandrel Now let's see what happens when we add our beads, put the bead in the back where that overlaps you see what's happening it's kinda causing it to bow away a little bit. That's something you're going to want to take into consideration this is where it's overlapped. If we put this down on our ruler that 8 1/2 now just added a 1/4 of an inch and it's more like 8 3/4. So we need to add 1/4 of an inch for the beads and you see how many beads I have here that equal that we did put a few more beads on. It wasn't that much of a difference. It didn't suddenly bump up to 1/2 an inch to 3/4 of an inch more needed but if you were going to chock this full of beads you would want to increased by even more than a 1/4 so right now as it stands it's 8 3/4 inches of cord for 7 1/2 of an inch bracelet but we need to add the clasp and the clasp is actually going to cause this to use less cord sorry for the math, I do apologize for this but I hope this helps so on the website we do list the length of each clasp. This particular one is 41 millimeters and then each side where your cord is going to fit in there's a glue recess and on this particular clasp each recess is 6 millimeters so we need to times that by 2 which will give us 12 millimeters. We times it by 2 because we've got one on each side so we're going now minus 12 millimeters from 41 which is gonna give us 29 millimeters and you'll probably remember that 25.4 millimeters is one inch. There's a lot of conversion charts online. You can even type in, convert millimeters to inches and you'll pop up a conversion chart online, if you want so I already did this and 29 equals 1.14 inches which were gonna call one and 1 1/8 inch and that is what we're left with that we need to subtract from our 3/4 inches because you're not going to have cork right here carcass can be filling these recesses but here's a gap and we still want to end up with a 7 1/2 inch bracelet we're gonna minus this from our cork total we had 8 3/4 which you can also say is 8 6/8 we're going to minus the 1 1/8 which is going to give us 7 5/8 inches and if you're saying I don't want to do all of this math, this is complicated if you have your wrist and you're just trying to fit it to yourself you can really just estimate on a larger scale of what you think you're going to need and then slowly trim down your cord until it feels comfortable but this is really good know in terms if you're making these for sale or you're ordering a bunch, it will definitely help. So I'm ready to cut. I know I need 7 5/8 inches. I'll lineup on my ruler. So there is 7 5/8 inches and I'm not concerned about making a mark on my cord because I'm going to stick it into the glue recess but I do wanna measure twice and cut once on this. I'm gonna cut it a little large just to be safe so let me put my clasp on and this is another good tip, don't glue your clasp right away. Put it on there and test it.I expect this to be a little big yep it's a little bit big. Now I'm gonna cut it down a little bit more and like I said if you're at home and you're making this for yourself you can just do this. You can purchase a little bit of extra cord and then just slowly cut it down in increments again I think this gonna be a little big, yup so I'm gonna cut it to that original mark I had. I did that to show you how easy it is to just cut down see the original mark, cutting it try this on hmm there we go. So we have 7 1/2 inches again our clasp is not glued yet. So now I'd be comfortable to glue my clasp and a good general rule of thumb when ordering the cord is roundup and order an extra inch. I would of rounded this to 8 and I would have ordered 9 inches because I would of added an extra inch just so I have some room to breathe a little bit and that's really good to if you're going put on a lot of beads. So now what you gonna do take your clasp off. This one nice and easy because it pulls apart take your glue, take the lid off go ahead put at drop in the middle of your clear recess. So swirl it around a little bit so that it covers the entire base. Take one end of your corduroy rubber stick it in and then make sure you hold it for about a minute once that's created a bond go ahead and repeat that same step on the other side then put the glue into the recess swirl it around, put the cord into the glue, into that half of the clasp hold it for about a minute and then what you're going to want to do is just let your project dry overnight, give it a good 24 hours just to make sure everything is secure and that is how you measure and assemble a Regaliz corduroy rubber bracelet and like I said don't be too afraid of the math. It can be a little bit intimidating at first but once you get the hang of it it's actually quite simple and then you can always order a little bit of extra Regaliz cord and then just slowly cut it down into the size you want. That's also a very easy method. Go to www.beadaholique.com to purchase beading supplies and to get design ideas!
Related Videos


How to Measure and Assemble a Regaliz Flat Cork Cord Bracelet
In this video, see from start to finish how to measure and assemble a Regaliz Flat Cork Cord Bracelet. These fun, on trend bracelets are a great al...
View full details

How to Attach Regaliz Clasps to Regaliz Cord
In this video, see how to use the Eurotool Super New Glue to glue your Regaliz cord into the corresponding clasps. This is the glue that we recomme...
View full details

How to Use Beadsmith's Little Cut Tool
In this video see how to use BeadSmith's Little Cut tool which is ideal for cutting Regaliz Corduroy Rubber Cord, rope, and other Regaliz leather c...
View full details