How to Do Flat Spiral Stitch Using SuperDuos

SKU VID-1327
Designer: Alexandra Smith
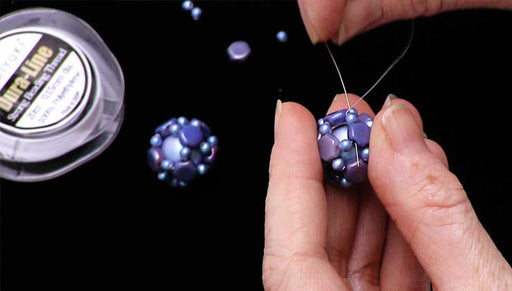
In this video, you will see from start to finish how to weave a flat spiral stitch bracelet using Austrian crystal pearls, Toho Demi Round seed beads, and Czech glass SuperDuos.

The brand name for the crystals shown in this video is no longer available. High quality Austrian crystals are now available under the PRESTIGE™ Crystal Components line.

Audio Transcript
Note: This audio transcript is auto-generated and may not be completely accurate.
hi this is Alexandra asking AHA League here to show you how to do flat spiral stitch using two whole super duo beads I want to start by showing you a flat spiral stitch bracelet at one of our designers here made and this is using single hole beads along the edge so standard flat spiral stitch design and what we're going to do in this video is incorporate two whole beads along the edge and then zip up the sides with seed beads so that's what I've done it needs to bracelet and you can see this is a smaller version than what we're going to do if you use mini duo's the leather no dummy rounds and a toe denia rounds and what we'll be doing is upsizing the bracelet to using super duos with a toe denne rounds and some six millimeter beads instead of four millimeter I'm really curious to see how this is going to end up looking we take in I've got my four feet of fire line here in that crystal color table too much myself and we'll go ahead and thread my needle and start by putting on a stopper bead I became inspired by this flat spiral stitch watching our other designer and video making this bracelet and it gave me the idea to incorporate the two holes ease and release about a five inch tail for when we're ready to attach our class and that's another difference I want to show you too is attaching a toggle clasp like Andrea did on this one and instead of the loop with purl so to begin I'm going to take two of my pros string those on and pull them down and then string on six eight odenie rounds then I'm going to put on one super zero now with each one I want to make sure both holes are clear every once in a while there will be a stop that bead you don't want to end up getting through your design and realizing you can't continue so I always get my B's all right I'm putting on six more pin around and pulling them down and then I'm going to loop my needle back through my first pearl coming up through the two of them so we've been back around like so so that my CDs hug the two pearls and then I'm going to do the same thing on the other side adding six demi rounds Warren super duo and six more stand around is it again I'm going to come down around the bottom of my pearls come through that first one again and through the second and create a loop of CDs on the other side of my pearls alright once I've gotten that far add another pearl the very same process as in the single hole beads it's only once we get to the outside of the bracelet that it changes so again once I've added one pearl on can add six in around one super duo six more then you're out and at this point again I'm going to come down to pearls so I'm leaving that first one alone now I'm going to come up through the second pearl and through the third and create a loop of beads that overlaps the first and I'll do the same thing on the other side you can see how the pattern is developing and I'm going to do the same thing you've been back through the second bead and the third and creating a loop of seed beads it folds around the opposite side and I continue all down the length of my bracelet in this way adding one Pro at a time doubling back through two of them and creating loops on either side let's seed beads into produce six one two six so I'll continue and meet up with you we've gotten to the end of this stage of the strings so I'm Bank having finished this portion of my wave which took about an hour and I'm ready to attach half of my class so to do that I'm going to begin by putting three of these o beads at the very end of my bracelet hold them down so they rest in between other views and here I want to show you the size difference between this up sized version of the bracelet and over here you see how I use the a dough beads for the smaller version and that's what we're going to be doing along the sides as well where there are eight o beads in between we'll be using the Oh beats instead so ready to attach half my clasp just going to loop through the best portion of that and double back in my opiates and also double back through a couple of my pearls bring my needle out through the middle let's get hooked my clasp on there and to tie it off for security I'm going to go ahead and bring the needle through a section of my Demi round beads below the two pearls I was coming through and now through my seed bead and I'm going to tie a little knot here once in twice and turning over I'm going to continue my needle through the rest of that section and it away from my clasp and also for security what I like to do is double back through I'm going to create another loop of thread over my clasp just for the wear and tear that it gets and they'll fire line is very strong I want to make sure it has plenty of support so my needle is coming through the center pearls he did them a couple at a time so that I could see what I'm doing here training my needle back in the direction it came from all the way up through those o beads to the loop of my class when I'll come through it again so and back where I started after having secured it with a knot double backs who knew those Obie's again and from this point going to train my needle through this sections down around this first section here and then begin zipping up the sides like so I'm going to come up through the second hole of my super duo I'm going to string on one 8:02 o Butte and then another a toe beat and then come through the second hole of my next super duo and this is what I'll be doing all along the side of the bracelet to zip up the side one 8:02 o beads and one more a toe coming through my next superglue so I'll continue in this manner and then meet you up the other enemies to add a second half of our class and then continue down the opposite side of the bracelet now I also want to point out here the difference in the design the spacing that I worked out was to add 200 beads here you'll notice in the smaller version it has an 1100 a toe and on the 11 though and that was to accommodate this size bead for the upsized version I've altered the count so I'll continue and then you deaf with you on the other side so I'm back having finished up sewing one side of the bracelet you can see I don't have much thread left so we're going to go ahead and tie off instead and add some more and for that I'm going to go through a few of my Demi round beads and create a little knot in between them should I get that thread between the two that I want my turn no go ahead tie that and spread it through a couple beads before I clip it mm-hmm oh I'm ready to take off my little bead stopper we've spread my needles going to test the second half of my class and then which will ready to rip up the other side I'll add more thread I'm going to string on three more of my boobs and then the back of my class and I'll double back through and tie this off come through both of this pearl the one at the time will be easier these Swarovski crystal pearls are beautiful colors alright I'm ready to thread up through just a few of my dummy rounds before tying a knot in between them again try to get that spread light where I will get the holes of these three rounds are a little bit wide so it makes the thread travel alright and then I will tie a nice knife here and a clip don't pat attach and then ready to add more thread to travel along that side of the bracelet and go ahead and add more thread here I want to do this I'm going to pick a spot nestled right against to be come in between and tie a double overhand knot you and thread through back to the end should some light up by the classroom to go ahead and reinforce that again come up through my Oh beats back through the loop of my class give it a little extra support is doubling back through start down the opposite side of the bracelet just for good measure and they give one more little knot right here before I start get it flipped over my feet all right they're ready to come through my dining rooms and up to the second hole of my super duo I'll start down this side and the same way I did on the first side with one 802 o beads with another a go through my super duo continue down the side and we'll just be ready to tie off the biscuit when we get done with this side okay so I finished my wave and I'm ready to tie off the final knocks of the bracelet we're going to double back through my section of any round come up toward the class I can go ahead and tie a knot in here between the Deni rounds in the LB I really like how this larger version of the super duo bracelet turned out and you know just for good measure I'm going to come up through the clasp again and right here when I can double back through the pearls I found that it's best not to not in between the pearls it just makes the bracelet lay a little less straight and they're tough to get in between there so I've doubled back to my final pearl got into thread nice and tight in there and clipped off we are complete so just to reiterate I'm going line these up all together so you can see the differentiation in size and types of beads used that super duos Eidos six millimeters and Obi's four millimeter 11 o mini duo in 8 oh yes all these project bundles are available at beadaholique.com thanks so much for watching you

You recently viewed

Clear recently viewed