How to Make Braided Kumihimo Jewelry with Soft Flex Beading Wire by Sara Oehler

SKU VID-1331
Designer: Sara Oehler
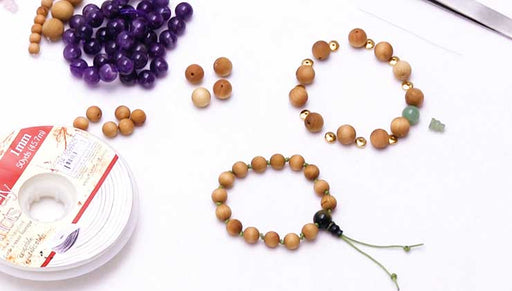
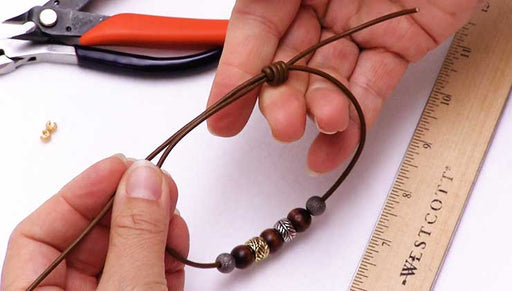
In this video, Sara Oehler of Soft Flex demonstrates how to use Soft Flex beading wire to make braided kumihimo jewelry. You'll see how to start your Soft Flex kumihimo braid, how to crimp the ends and attach a clasp. Using beading wire rather than thread gives your jewelry a different look and creates a more structural braid.
Audio Transcript
Note: This audio transcript is auto-generated and may not be completely accurate.
hello my name is Sarah eller and I'm the sales and marketing manager for soft wax company today I'm in the beadaholique studio and so excited to share with you a tutorial about using soft wax beading wire on a kumihimo disk everyone here was so excited when I pulled out some designs using our products on the kumihimo disk because it just looks so unique and fresh and special and I know they have a ton of kumihimo fans out there so I'm excited to be able to share this quick and easy tutorial with you so I already cut some lengths of wire and to start and we just went ahead and wrapped the wire into a bobbin if you've never used these bobbins before they're really easy they just fold out you wrap your wire around it and then you can close it down if you want added security you can even tape the wire inside of the bobbin and that will help ensure that it doesn't unravel as you're working with it and wire wants to pull free unlike thread you know that will kind of just sit wires going to want to unravel pretty quickly so you do have to be a little careful about that when you're using soft wax so I already have seven of these clipped into a bead stopper and I left the eight one just to kind of show you if you've never used a bead stopper before what that's going to look like so you can see I have each wire sort of in its own rung of the bead stopper and I'm going to be really careful as I add this last one not to lose all my other wires so I'm going to open it and just slide it inside so that it's in its own little special space and then I've got all eight wires attached to my bead stopper I have two types of discs here to show you I'm going to use the regular sized kumihimo disk and this is the double density so it's I think twice as thick as the original foam discs were when they first came out it's fantastic you're using wire not only our softflex beading wire but also soft looks craft wire and because it does really dig into the kumihimo desk it really helps to have that extra thickness to really hang on to the wire and it comes in two different sizes the mini is great if you're doing any traveling or you just need a smaller board they kind of work in a very similar way and they have the same output one is just smaller and one is larger and I'm going to use the larger one today so I'll just set this menu on aside I just wanted to let you guys know that it was an option so to get started I'm going to take all eight wires and I'm going to sink it down in the middle of my kumihimo disk and then I'm just going to take my top wire and I'm going to sink it between 31 and 32 on the left-hand side of the stock here and same with my second wire I'm going to sink it on the other side of the black dot at 32 and then I'll take my next wire and in my order here and I'll go over to the side above 24 and my next one on the other side above 8 and I'm just going to keep going around every dot so below 24 the other side of 8 and you can see I really have to kind of dig in to get the wire inside there but that really helps with tension I don't normally use a weight but I know one of my co-workers really likes using a kumihimo weight and you could actually attach that right to your bead stopper and then as we're braiding it's going to give it a little extra pull I offer pretty good tension on my own especially with these new double density boards so I don't personally use away so starting here at the bottom I'm going to take the bottom left and bring it up to the top left the top right bring it down to the bottom right and then I'm going to move bored counterclockwise so that I have eight at the top 24 at the bottom and I'm going to do the same thing bottom left to top left top right to bottom right so you will see this is exactly the same and you just keep repeating this is exactly the same as when you have a thread the difference being is that saw flex is a stainless steel beading wire so we've got 49 strands of stainless steel running through this wire with a nylon coating this particular one has a copper color nylon coating so you're just going to get a completely different type of output than you would with a thread and what's really lovely about it is when you're using it with beads especially big crystals you won't have to worry about the crystal on the edge cutting into the threader port that you're using and breaking because you've got a really strong stainless steel base and that looks really beautiful when you leave it all by itself but also lends itself well to adding beads and other items to it so I've showed you how to get started now I'm going to show you how to finish this design off because it is a little bit different with soft flex you're not just going to tie it off like you would with a thread or glue it into a cone of some sort and so I've actually done oh and an entire piece here and you'll see that I've cut it off the board entirely but I have a pretty long length on both sides and I'm just going to use a crimp tube to attach this simple clasp here and so it can be a little wonky on the ends if you prefer you can always use a cone this doesn't usually bother me too much you can kind of see here on this design that's similar kind of a feel but once it's in a design and it's pulling and with the weight of it it is going to pull that weave down just a little bit too so I'm going to go ahead and undo one of the sides where I just had a bee stopper holding things in place I'm going to push down my crimp all the way to the end of the braid and then in this particular design I'm just going to take a couple of these strands and because it is a fairly large class one maybe two or three of them you don't have to do all eight I'm going to take three of them and I'm going to string it through the jump ring on my clasp and then back into this big crimp I'm using a three by three millimeter crimp tube I believe this particular one is sterling silver and I'm just going to pull this down so that all of my links are even here at the top and we're going to use a pair of mighty crimpers to crimp this tube so my Z crimpers are a lot like regular crimping pliers they have two holes one has a little tooth and one is round I'm going to use the tube first to create a divot in the crimp tube and then I'm going to round it in to sort of fold it in onto the wire so tooth first it's going to put a divot into that crimp tube you can see sort of like a deep well and then I'm going to turn it on its side sort of like it's a C shape so that I can crimp that in and then just like any other crimping plier I like to go around it several times because the idea of crimping is that you're cinching that metal into the nylon coating of the wire and you don't want to lose a single bit so get it all nice and tight and secure and then you can come in and I'd like to do one wire at a time and trim off all these excess wires on both ends so I'm trimming the three on the bottom and then there's actually five up top that I'll trim off just get it nice and close if you wanted you could always add a crimp cover to this as well or you could paint it with a patina to make it a really fun color quick and easy and there you have it you would do the same thing on the other side if you are making a simple bracelet or a necklace just using another three by three millimeter crimp tube and the mighty crimpers to finish the design off I have one more design that I want to show you and then I'll let you go for the day but this is another kumihimo design that's just loosely knotted and so it actually has a little bit of give to it but it's also using a thread so you not only can use the wire but you can intermix in other materials as well so maybe four strands of soft looks beading wire and four strands of a yarn or a metallic thread or something else that's going to give it a different kind of texture so I hope you learned a lot of useful tips today in our kumihimo demonstration with soft luxe beading wire and I certainly hope that you'll give it a try sometime soon you can check out all of these products by going to beadaholique.com and definitely give it a try thank you you

You recently viewed

Clear recently viewed