How to Make a Multi-Strand Bracelet using Strand Reducers

SKU VID-1316
Designer: Julie Bean
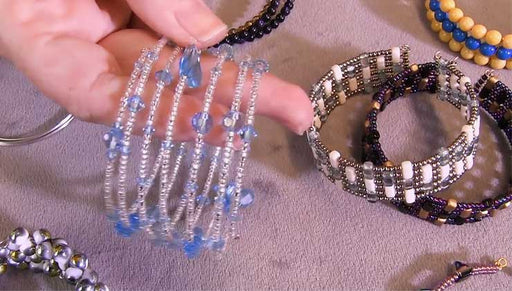
In this how to video, learn how to make a multi-strand bracelet using strand reducers, beading wire, crimp beads, and pretty Czech Glass donut rondelle beads. You can use the techniques learned in this video to create a wide variety of strung jewelry projects.
Audio Transcript
Note: This audio transcript is auto-generated and may not be completely accurate.
how's the business Julie a beautiful week and today I'm going to teach you how to make a multi strand bracelet using strand reducers so if you're not familiar with what a strand reducer is this is what it looks like so usually they'll have multiple loops anywhere from two to four five six whatever number on one side and that's what you're going to connect your beads to and then on the other side you'll have a single loop usually and that's what you can connect your clasp or a chain to a lot of different ways you can use strand reducers and in this particular application I'm going to make a multi strand bracelet so I'm going to use these pretty Czech glass donut beads and a four millimeter size and I'm going to be using a strand reducer the pair of them some beading wire some chain a little lobster clasp some jump rings crimp beads and crimped bead covers so that will be my supplies and then in terms of my tools I've got some bead Stoppers couple pairs of chain nose pliers a crimping plier and a cutter so let me clear some of this out of the way and we can begin our project so I'm going to show you real quick when you're picking beads to use with a strand reducer you want to look at how they're going to line up and that's in relation to the space between the loops on the strand reducer okay so this could be my beads and you can see just by eyeballing it here they're all going to fit really nicely now if I had beads that were quite a bit larger they would push out on the sides which might not fit too well with this particular strand reducer so keep that in mind when you are planning your project so to start I've got four lengths of beading wire and I'm using this beading wire right here it's beadalon and the 19 strand point zero one five inch width so 12 inches each for my links and I've pre-cut them because I want to have six inches of beads so my concept here is going to be to have six inches of beads of each type on the inside and reducers then I'm going to do a little clasp on one side and then I'm going to do a little piece of cut chain I'll cut this shorter on the other side this is an adjustable bracelet so let me cut a bead strand here just so you can see so we ended up cutting those off and this is going to be the first one we're going to put on before we can put it on we need to go ahead and attach our beading wire to one of our strand reducers so to do that put a crimp bead on to the end of it and feed it through one of the loops take the tail wrap it back around and going through the crimp bead and then pull that crimp bead down towards the loop so you just have a little loop and you wanted to still move so you don't want it too tight now we're going to crimp it so if you're not familiar with how to crimp a crimp bead I'll show you right now this is a pair of crimping pliers and if you look at the nose you'll see there's two notches one is like a kidney shape or crescent moon and one is more oval so we're going to use the one that's closest to the handle the kidney shaped one first to go ahead and create an indent in our crimp bead so it's going to squish it and they're going to use this oval shape one two fold over the crimp and that's going to secure the beading wire so here we go I'm just holding it in that back notch and squeezing so this is what we've got to begin with and then I'm going to fold it over I'm going to put it up right in that oval notch and fold and then in this case what I want to do cuz I've already pre planned my project I'm going to go ahead to make life a little easier I put my crimp cover over it to begin with this is my crimp bead cover you see it's got an open side just like an open bead just going to put it over my crimp bead and squeeze so now that's hidden so it looks like we have just a really nice pretty decorative bead on the end and here's a little trick if you are making a multi strand bracelet go ahead and do all your strands of beading wire first that will give you a nice foundation to start with so I'm going to do the exact same thing on all four of these loops alright my last crimp cover and I'll show you what we've got all right here we go so we've got all four strands on there you knows I have not trim the tails yet because I want to feed the tail through at least one of the beads just for a little added security on each strand and another reason I like to do it this way is because it's a lot easier to get in here on a strand reducer with the crimping pliers when there's not a bunch of beads here already so another little little shortcut little trick that makes it life a little bit easier so I'm ready to string on the beads so I'm just going to go to the end of my beading wire on one of the strands and I want to have six inches of beads so I'm just going to string them on and like I mentioned I want one of the beads at least to go through the tail and I'm going to trim the tail at the very end so that you'll see the next one will just go right next to it but the tail will stick out so six inches of beads right once I think I've got all the beads I need I'm going to line them up against a ruler and I am happy with that so that looks good I'm going to take one of my bead Stoppers not bead stopper is great because all you do is you squeeze these little loops and it spreads out like an accordion and then you just go ahead and secure that to the ends of your beading wire so it just goes right through one of those little loops and it holds your beads in place so now I can move this around and my beads are not going to go anywhere so now I'm going to the identical process with my other three strands of beads so let's quickly recap where we are at this point we've got all four strands of beads strung we've got bead Stoppers on their end and then this is actually done for us with the exception of trimming the tail so we've got all the crimp beads crimps all the crimp covers on and all of the tails head through one bead so now we're ready to do the other side to do that go ahead and take one of your bead Stoppers off and place a crimp bead on to your strand so it just slides right down next to the beads they're already there now pay attention to where your strand is secured on the original strand reducer because you're going to want to also secure it for the same hole on the matched pair on the other one so feed it through in this case an end loop and then loop back down through that crimp bead and one more bead just like so and pull now you want to do at this point what you want to do if you want to make sure you have no big gaps of wire and to achieve that just pull your tail and it's going to cinch it right up so you don't want it too tight but you also don't want those gaps so this is about right you can see a little little bit of wiggle room here it's still flexible I'll still move on your roof but we're not seeing big gaps of wire either so holding your tail in place with one hand and your strand reducer with the other we're going to crimp this crimp bead same way as before so we have that nice crescent shape we're going to stick it up right in the Oval notch so that it folds over on itself this little hard angle right there there we go and now what we're going to do is we're going to take a crimp bead cover put it over it and make sure it's sitting in there and squeeze there we go so that strand is complete so at this time if you want you can go ahead and trim your tail so you're just going to trim it really right close word exit to the bead and when I do that on the other side as well if you do have a little bit that sticks up it can always go right into the next bead so one strand is complete so you're going to do the same exact process on your other three strands again make sure you look at the orientation here this is needing to sit in there there we go alright so make sure you look at the orientation of your bead strands on the first strand reducer so they do line up on the other strand reducer so you don't have a criss cross thing happening unless that is your intention we're ready for our very last crimp cover so we've got all the other ones secured so I'm just going to pop this guy on here-here's and tim our last two tails all right so we have all of our beads on our bracelet that's what that looks like and now we need to actually be able to put the bracelet on us so what I'm going to use is a little bit of chain couple jump rings and a lobster clasp and I chose this chain so that the lobster clasp can attach to it at any link so that is the second half of our class actually it's going to be the chain so let's just first start by putting on the lobster so we're open a jump ring slide it onto the loop on the strand reducer and a little loop on the face of the lobster and then close the jump ring all right half done so you can either try this on your wrist at this point if you wanted to you can be look at it here and then see where it goes now I have a particularly small wrist so I would not use much chain at all but you can use as much as you like and if you're selling these it's always nice to maybe add two to three inches so would appeal to a lot of different people because a lot of people have different sized risks of course than what you do so that's what they always keep in mind if you are selling jewelry is make it for your customer not necessarily for you all right another jump ring open and then chain link and close it and here is a finished bracelet you can see we've got the four strands all going to the strand reducer and that single loop is what allowed us to attach our chain and our clasp so you have a complete multi strand bracelet using strand reducers you can find all the supplies you saw in this video as well as many others at beadaholique.com you

You recently viewed

Clear recently viewed