Beadaholique Live Class: Camp Beadaholique Summer Jewelry and Crafts

SKU VID-1314
Designer: Design Team
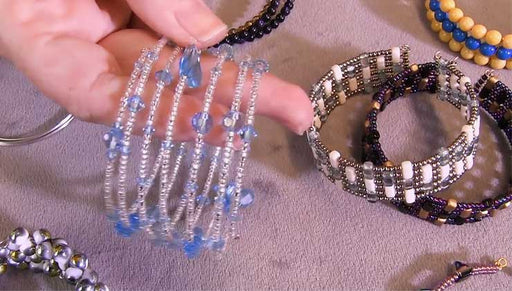
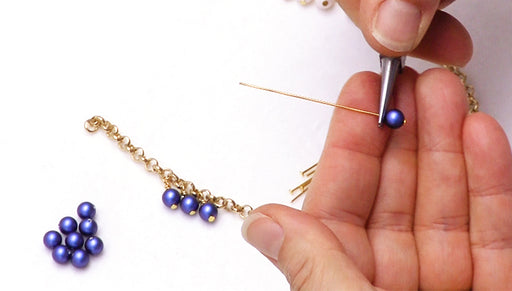
In this Beadaholique Live Event Event, join designers Kat Silvia and Alexandra Smith as they talk about making summer jewelry and crafts inspired by the joy and fun of Summer Camp. Watch as Kat creates a tassel bookmark, perfect for summer reading, while Alexandra shows you a new way to wear a traditional knotted chevron cord style.
Audio Transcript
Note: This audio transcript is auto-generated and may not be completely accurate.
hi everyone it is Kat and Alexandra and we are back for another Facebook live class and today we're going to be doing can't beat a Holly so we are really excited to dive in and just talk about all the different things and crafts and some things that you can learn and do all summer long so so if you've joined us before you know that we always have a giveaway so I want to start by showing you what giveaway we're doing today so for today we have the rapid loom and this is one of our exclusive beadaholique.com and we do have refill kits so if you enjoy making this you can definitely purchase the refill kits and you'll just get all the beads and items to make it so this is a really great little piece of the giveaway and then if you joined me earlier on Facebook live I showed you some of the paracord and this is a new color that we have but I also want to give away this really great little book and this comes with some paracord and a couple of buckles for you to kind of experiment and have fun with so in this you'll get the project book so you'll be able to learn all kinds of different things and of course we do have our tutorial videos to show you those as well and then in addition to that we're going to be doing a little bookmark here and I'll show you what that is so you'll get this bookmark but you'll also get all of the supplies to make the bookmark that I'm about to show you and then we also included some cotton cord here and a nice little magnetic buckle so you can kind of play around with this stuff these are just a couple of the colors that our website offers so be sure to check that out so you'll be getting all of this it's a $50 value it's actually over $50 but you can win this and all you have to do is leave a comment below watch us live we'll announce the winner at the very end of our live broadcast here but let us know where you're tuning uniform or if you have a question but that counts as a comment too but if you don't have a question to be like hey I'm tuning in from Iceland and just say hi so that's all you need to do to potentially win this giveaway so I will bring a little bit later for anyone who might be joining it but I won't go ahead and dive into a couple of the traditional projects that you think of when you think of camping or camp or summer camp or anything like that so I'm going to toss it over to Alexandra and she is going to show you a really great community website so I think having a great time working with the Chevron wheat which is like the traditional friendship bracelet weave and you can see I've worked up some here here's the band's banded weave and then the Chevron so the projects that I'm working on here is an earring and it's a variation on a pyramid here so what I'm going to be doing is just finishing at the last band of weaving and then adding beads to my fringe and then I'll show you how to put the ribbon crimp in your hook on so here I am I've got my tying station and we've got a nice video on this what's a little tangled to that time station is really nice yeah your word loved it before I discovered it I was taping my work to the table you can also do you know the traditional way of just canning your work to a safety pin on your jeans and your nuts how we always get it at camp yeah but this is a great way to go so I'm using s long cord which is nylon and it works really well as an alternative to the embroidery floss that I always used to work with a camp but the nice thing about the S LAN is it comes in sizable schools so you get plenty to work with a lot of different colors and I love the color palette you have EQ yes and our website has color combinations to where you can buy like four spools in a pack and it gives you a nice color palette to work with too now I'm working backwards just to describe a little bit here what I'm doing is I'm kind of making a backward four and bringing my thread through holding on to the alternative thread and pulling the color I'm working with up it so this is a crash course here again we've got a video that goes over all of this and also how to attach the ribbon crimps which I'm excited to show you how to do so I'm just finishing up my last band of color and I'll begin my beaded fringe yeah we do have a lot of videos showing you a many of the techniques that we have here but if there's something that you guys want to see or want to have a video on let us know and we're happy to take requests that's how we do a lot of our videos it's just kind of you know what you guys really want to see done so if we don't have it then let us know because we want to make it for you the trick is just keeping the dance in orders which I think I have done scheanette here so I'm coming in Reverse and when I get to the center what you'll see here is I take the two blues and I go through the same process at the back word for coming to do each one twice and then it goes in Reverse like that if I were to continue I would just be making my band just as I did so now that I've done my bands of color I'm going to go ahead and cut down to about four inches so that I have easier lengths of thread to work with as I'm getting my beads on and I've decided to use metal seed beads which have a little more weight to them and I'm going to just one by one slip those on I'm doing slide onto each thread and then I'll go ahead and measure so that they're kind of graduated falling down the length of the edges yeah those metal seed beads are really great in the colors that we offer are really nice and saturated so they give you that kind of boho chic sort of style and I love even just the beige ones because sometimes you might look at a beige seed bead and go oh gosh how am I going to use that but in this particular design I love the way that you're accessing it so it's a little bit more than you did Talent what I want to do is take it off so I can measure here and I'm going to leave a little bit of play so that the bee tank down of it otherwise they would kind of bunch out funny so I'm going to leave a little bit of play and time I bought them not sorry about that and you can see that I had a pretty easy time stringing them on which is surprising that you can get such a small hole bead onto regular thread without a needle so just like so that's going to fall down slightly a bit from the weave and then I'll do the same thing on each of my threads and then come back and show you how to put on the top so I'll throw it back to cap all right yeah well you finish up doing a little bit more so strands I am going to show you how to make and this is a tutorial that is on our website right now and this is a bookmark it is the mark of royalty bookmark I love fantasy books so I always wanted to do something I have the other one with the kingdom so I made this one and it has these royal purple little tassels and on here these are Swarovski crystal and they are the crystals dark rainbow so just really fun and beautiful and I made mine in ghoul so I'm going to recreate this and this is the project that you'll wing with the giveaway so we'll go ahead and dive in to show you that we want then go aside so I have four tassels and for each tassel I have one of my trusty crystal bicones and then I've already pre-cut my chain but I have a quarter inch 3/4 inch one inch and one and a quarter inch so you can make yours however you want I do recommend kind of graduating and that's how you'll get that nice little swing so but to start I'm going to string on one bicone onto my eye pin and using round nose pliers just go ahead and make a simple wire loop Bend that back wrap it around wrap it across and then I'm just going to take my flush cutters and trim that up and I have one and now I'm just going to repeat that three more times and I'm moving just a little quickly because I just kind of want to show you the end result here but this is a very simple beating technique and this is a great little gift if you wanted to kind of make something for someone but I know people are always wary of trying to make a bracelet or a necklace you don't know what people want in terms of you know sizes or colors sometimes but this is a really easy kind of summer craft that you can make for people I know a lot of kids have summer reading lists or this is a great little gift for back-to-school if you want to get a little gift for a teacher just kind of lots of fun little stuff to do nice idea for a teacher I like that yeah really pretty bookmark and we do have several different ones I'm just going to as I finish this up kind of draw your attention down here as you can see that we have different styles and different sizes so if you're reading a big old book you can use the big one there and that's a beautiful copper it almost looks like a rose gold actually it's so so light and beautiful and we also do have silver and gunmetal I just hadn't pulled those out here for you but you can definitely check those out on the website all right so just finishing up the last one there okay so now that I have that all set to go what I'm going to do is I am going to add a jump ring to the top here now just go ahead and take a pair or two pairs I should say of chain nose pliers and just crank that open there and now I'm going to slip it on to the jump ring that's on my tassel and I'm going to slip on my simple wire loop and go ahead and close that up and I'm extending mine just a little bit in the initial one that I did I did not add the jump ring here at the bottom but I just wanted to give it a little bit more length you can just kind of see the difference of what I'm talking about so I'm doing a little little variation there you can see that here you just adds a simple wire loop right there but I'm adding that extra jump ring in between so it's up to you just you can kind of have a lot of fun with it and play with it and we do have a lot of colors of these tassels so you can personalize this you can add it to whatever crystals or if you like gemstones or just any kind of bead really I would just say that you want to get something that's probably going to be about six millimeters or bigger that way you'll really get it to show up and really play against these tassels so I'm just continuing this if you have any questions shout them out on Facebook and we're here to listen all right I just been talking about the fun that I've been having working with these materials the neat thing I think is to be able to dress up these techniques in kind of grown-up ways so that stuff that you're spending a long time working on you can really make them nicer you know by incorporating different crystals like you're doing or yeah metal findings and that sort of stuff yeah that's you know and like I was saying with the metal seed beads I just love those they're really saturated and beautiful and I think sometimes people think that oh like it's summer it's crafty you know it's going to look chintzy but it really doesn't have to it you know there's a lot that you can do that is just really exciting stuff okay so now I have my jump rings moving on to the next step here and I'm going to start adding my chain so of course those teeny tiny piece of chain first and just right onto your jump ring and right onto your simple loop there count and so that's one angle that is all set to go there and have another one am i moving really really fast here but you can check out this tutorial but this is just kind of a you can see how fast this works up together and being a little sloppy with my loop bad designer sticks that really quick sorry sorry camera all right there we go all right yeah you said I used to love going to camp I was I was a theater kid so I always went to theater camp so we always made you know costumes and costume jewelry and all kinds of fun stuff and you know it was just all about being creative and running around burning up that energy as a kid so did you make jewelry for your shows ever I did actually I I was in a little show and it was all based in the 50s so we had to make really fun like poodle skirts and he made all kinds of fun little jewelry just like stretch jewelry and stuff like that and there was also believe it or not a princess in that play very odd play but there was a princess that we had to make tiaras and I remember sitting here out for two days making tears Oh summer camp alright so for the last little bit here I'm just going to be adding jump rings to the ends of my chain and then putting them all together so again this pardon me this bookmark all it is is just opening and closing jump rings and making a simple wire loop so if you're new to jewelry this is a great little intro and you don't need to worry about sizing or lobster clasps or anything like that so this is a great intro how is it going with you Alexander very well and on my last strand here and my strings are changing there's only one that I needed to kind of clip the end to get it once it had started frame just a bit yeah mr. process yeah goodness one by one but I'm on my last and I work out pretty quickly as well yeah I think that's the key for the summer it's like you want to stay busy but you want to you know kind of make something and get outside and play keep finding the balance yep but really sometimes it gets too hot to go outside so oh yes in California it has been very hot this week Reds I think we've been trying to stay cool and indoors which you know I haven't been to the beach yet this summer so I'm trying to get there maybe this weekend maybe I'll go all right if that were my last and frankly I did not measure these I did them by eye this is not my third pass around so I kind of familiar with the process that our written instructions do have measurements for you all right I've got this on I've created my fringe there and I'm going to clip the end confident at my doctor sturdy and I'm leaving you can see I'm leaving just about them eighths of an inch off the tip there kind of contributes to the fringe look my flush cutters for these small tips go all right now the trick is going to be to knit the top and I want to make sure that my glue is at the ready here I'm going to type in my work station to this I've got my GI type of cement make sure that's open oh I'm going to be brave and just with my scissors here clip that knot off I could try to undo it but I know that it's been tied on my station for a while if it's a bit tough I'm doing like so right away I'm going to take my glue dab the edges just to keep it from unraveling in the few seconds before I can get it to this ribbon crimp that I'm going to put on there and I think the GHI postman is probably the best glue that I would recommend for this problem if your hips nice and close in yeah so also though with my Clippers I need to take off a couple of these gangly ends before I swing my red and crimp on like so and you can see I've got three ten millimeter wide which works well with the number of bands I've created for my we use my flat flower just going to squeeze that down over the glute end portion and if I have any extra sticking around again I can take my flush cutters and just trim those leftovers oh is that and then I can flip on my ear wire all these all done it's fun no wonder I need a jump ring in between have accept that this was wider than the loop of the ear wire little issues you run into with jewelry making yes I close this up it it works and you may want to add a little jump ring something yeah just give it a little more swing actually what I love that cue it's that I would have never thought of doing a friendship earring okay so I do want to show you a few other projects that I've done using this technique so briefly I just showed you over here there's a bracelet with a focal connector that's got the same within crimp findings attaching this the clasp and the circle and then a choker that I came up with using a similar technique and here is the Chevron weave with the button closure and that's the basic video that shows you how to do the weave on that so that's the fun that I've been having with friendship bracelet weaving and what's next well let me finish up on my bookmark here so the last thing is is that I've kind of started to rearrange my little strands to make sure that they want to lay all nice and fun and just kind of dangle in a right way so you can see that I put my longest one and then a shorter one and my medium one and my shortest one kind of so that's the order that I want to string them on for this particular one you can do whatever you want it's being a dealer's choice so last thing is I'm going to take one last jump ring here and just kind of open that up and now I'm just going to string on all four in order have those jump ring to my main jump ring here and it's going to get a little crowded here for a second so just careful with your pliers and now I'm going to flip that on to the hole of the bookmark there and again like I said it's a little crowded so just sneak your plier in there and close that up so it's nice and tight and then our bookmark is all done so it's just really fun to do this like I said we have a lot of different colors the tassels and this Ruffy crystals you can actually make this exact design in your own favorite color and I extended mine with that extra jump ring I just wanted to kind of show that to you and the difference I'm just kind of how you'll see it so it is entirely up to you oh we do have a question hi Andy so she's asking if the ribbon cord ends will cut the string and I'm going to say the answer's no they're actually gripper a little piece are little teeth in there and the weave of the fabric you create itself is pretty thick so it's really not going anywhere maybe you can see the the width of it yeah that's a little tease help grip on and the glue also ceases yeah I was gonna say holding with a glue you don't need to press so much with your pliers so you don't need to really really really pinch it even though it is a crimp end yeah I think that it wouldn't cut the s1 because you'll have the little glue there so you can just kind of close it nicely yeah but that was a great question thanks Andy all right yeah so I want to jump in and talk about some of the other really fun stuff that we've been doing here we've been trying to do a lot of new videos and I'm going to talk to Alexandra she did a really cool project and it's a fishtail braid and it's using leather cord so I want to kind of start over there alright so these two bracelets the way that I gripped on to the ten strands of a brown leather that I used for those was with this multi strand what do you call it a third of our food stoppers thank you and enjoy pinching it open I'm just threading each length of leather in there I was able to keep all the cords in order for creating music bladed patterns so we've got a good video on that with other leather piece I was working on with this one and it's just how to make a slide knock so we'll have a video on that coming soon that's great for adjustability yeah and then we've been doing a lot of fun stuff with pom-poms they are so colorful and so adorable and so we did some memory wire as you can see there and we also Rachel our designer did a wonderful video on how to do blanket stitch which is how she attached those little pom-poms to that cotton cord so it's a great little technique and it's something that we've seen in the summer trends and the magazines and so we wanted to kind of show you guys how to DIY that so that's one of the things and then I just want to draw your attention so we'll just finish up over here really quick this gemstone necklace this was just a strong it necklace and it's a very simple kit that we have and we have it in several different colors so it's something really fun if you're wanting to do a little bit more advanced jewelry making as opposed to knotting so but that just kind of draws the attention to our exclusive beadaholique.com when you purchase a kit Lulla there's a couple of another things over here before we move there's a video I did on these which are chain woven bracelet using curved chain and just cross stitching and whip stitching in between with some faux suede so that was fun to learn and then just I was have been having a really good time braiding beads I didn't realize it was so simple to just stick Anita on each cord as you go and so I've followed one of our videos and learned that pretty quick use one of our preacher test buttons for that and then yeah I guess we can move on now oh and I do want to bring up what Alexander was talking about is the cord necklace so we do have sort of color-coordinated s LAN mixes and this is great to purchase you'll get you know kind of a little bit of a discount when you're purchasing this as opposed to individual colors but it's color coordinated for you so you can make a friendship bracelet and this is just one of the colors that we have but we do have packs that are four and twelve and so it's lots of fun stuff but it's great if you want to get started and kind of make several them blend the Purple's blues greens and you can see how much you get on there so yeah so these are these are the full spool so you get 77 yards of each color cord so very cool significant question okay they are made of polyester I don't know I've never made an oil diffuser I would have to assume that you'd have to use cotton sorry to repeat the question Andrews a scan use the pom-poms as an oil diffuser as the soaking mechanism these are not very absorbent as in Yahoo you know honestly we've never tried yeah just because they're polyester I wouldn't quite know on that I apologize Angie I can try to look it up for you and just in case you're joining us just now I want to show you a giveaway and Angie's question just reminded me of it so if you guys want to leave a question a comment let us know where you're tuning in from just say hi whatever you want but this is going to be our giveaway for today we're giving you the rapid loom and this is one of our exclusive tips you'll be able to make this bracelet with the components that you'll receive and then you're going to be getting a fun new color of the paracord as well as the paracord booklet and other colors and a few buckles so this is a really great project booklet you'll also receive a little bookmark here and we have some colorful cotton cord and you just saw this with that pom-poms over there and we also are giving you a nice flat clasp so it's kind of summery and as techie and then you're also going to be receiving the components to make this bookmark that I just made here on the Facebook live class and this is actually a tutorial that is live on our website right now and I apologize it is out of stock so if you do want this you're definitely going to have you do win it alright so that is what our giveaway is going to be today so just leave a comment but to continue on I want to dive in and start talking about some of the other crafts and I'm going to draw your attention down here and these are beautiful little Sun catchers now the nice thing out this is you can see a smaller size frame here and these are actually called snowflake frames but I thought it would be so pretty to turn them into a nice little flower and I do have a video showing you how to do this so you can just choose your favorite color and put that together and then I also did a version where I wire wrapped it so I wanted to make a little butterfly so I just wire wrap some beads in between there and could you imagine if you did all kinds of colors in between you'd create a really beautiful Sun catcher right there and I did a patriotic one so a little firework so if you're getting ready for fourth of July or want to do some decorating you could do that as well and then just a really beautiful rainbow one so that all those beautiful colors will dance in your window you have that one yeah so these actually come in several different sizes and I have one back here and this is the largest one that we have it is 9 inches wide it's really gorgeous you can kind of see the different size here so how tiny just one is but you can make a bigger one and we do have more sizes even than just these three that I'm about to show you and we do have to pay anyone you know when I'm looking at this little ones this little ghost look at goddess ease and it's actually soldered in the center which is really handy because something I've been working on is a wire wrap of God's eye and as soon as I saw this I thought that would make a really neat five-pointed gods eye which is also something that I wanted to show you how to start so I've got another little project yes I haven't really I think this was variety we really found out just to show you what I've come up with we'll have a video on the beaded version coming soon but I've completed this tear of just the plain wire and that's what I wanted to show you and has to be again I'm going to cut some 20 gauge wire I'm going to give myself about 5 inches on each arm so I have plenty to hold on to I Pat there so that's the 20 gauge for the frame and then for the wrapping I'm using 24 gauge and I'll give myself a good foot I would say so I'll pre-cut that as well and the way I'm going to begin to create my frame is to bend one of these pieces just shy of half like so and that's going to give me a grip in that angle to bring my other piece through and coil it around kind of loosely I'm not getting super tight here it's not going to hold it completely but I want to get it as as sturdy as I can to grip it into the channel idea of a cross or an X there so once I've got that connection started I can pinch it with my fire and then bring in my 24 gauge wire and with the edge of this I'm going to coil it twice or three times around the center again it's a loose connection to begin with it's just a rudimentary attachment here this is just a crafty way of altering the idea of the Gods I'd excuse is done with fabric or ribbon or comfortable cord and yarn yeah hospital six and yarn said this is a neat little kind of jewelry version makes dancing with yes keep checking the edge when we do two contrasting colors of wire so you can see real well as I turned around and with my pliers I would probably come in and straighten this but I want to get started here I'm going to come around my first arm wrap it once twice and then bring it to the next on one and twice and continue twice and as I was adding beads into this configuration I realized that the number of times that I coil gives a better amount of space for seeing the beads separate and lay straighter oh that would make a lot of sense here you want to do an extra coils or using perhaps a larger good babies it's gonna want to leave that extra same is it a crash-course rough version with it demonstrate but you can definitely see how beautiful it looks when you pretty refined with it yeah yeah I just because I just love especially the tassel it's a very classy and it's very boutique I really love this so and I love how you added these to the little ends there so even if you're not adding these as you go in the center adding a little beads towards the end is a really nice little time add that little touch is going you just get your mind working about all the different things you could do with it yeah the different types of beads different textured wires and it's a lot of fun so let me just share it and I'll be running out of wire shortly so this will not be a finished project if it's just for fun I thought just gives you an inkling of the process and I'll be doing again probably doing the video of the beaded earring yeah that's that's really unnatural so and we call that our Santa specific myself a little bit of space on the edges maybe a little more if I were to add a bead as I did with the earrings and then create a simple wire loop just like so close those up looks kind of like a spiderweb we'll have to make another one come halloween' make fun window catchers or moments I'm gonna say especially if you're adding like Krystal EB again Victor thought justice a yes and here's why you could see I was playing with different combinations of beads too as I was learning so yeah very nice right where were you you were talking about Sun catcher yeah I was talking about the Sun catchers and I was going to dive into the macrame and as I kind of show you this so macrame is sort of it was my first introduction really to making jewelry so this piece right down here is a really nice little example of showing three macrame pieces and you can see the one in the center has those beads and this is just a square knot so it's just really nice and tiny and this uses that s lon but if you want to see a little bit of a bigger version here this is using the hemp cord and this is really what I started on I'm a child of the 90s so I started with the hemp cord and the fun wood beads and adding like I had like I think a little choker with a dolphin charm I was so cool when I was sick you know I was a college in Santa Cruz and I saw a lot of that type yep or like with operatio uh I always wanted to know how to do it too if you know it's actually it's really fun you kind of get addicted you like like what can I put in here like what bead or what material so I love using the hemp the S lon you can actually even use the Chinese knotting cord because that's really colorful and kind of fun so but yeah and then we also have this one here and this is really simple I'll tell you how I did it it is just that same square knot there but then you take your outside cord and you're outside cord and add little beads and your two inner cords and you add that little beads there so you kind of get this kind of neat little D D chain and I wanted to use fun summery colors so I use some neon no neon I think is definitely a reserve for some kind of a color but it's really fun and speaking of something that's very similar to macrame we have paracord now these are two of the newest projects that we have on our website it and this is a fishtail and I use the Patriot version here if I wanted to create a little fourth of July something something so and then we have the ladder which uses two different colors and it's really fun you can actually kind of see on the inside there that it creates even a really cool we yeah and this is actually a new buckle so it's got a little compass on it which I think it was kind of cool but if you didn't want to make a big bracelet we do have fun little lanyards and I made this for a cousin of mine she was going off to college so I was like ah this would be perfect for your keys and that kind of thing to just keep everything together so it's a great little box nut and it is the same believe it or not as this so Rachel made this bracelet and so this uses that Chinese knotting cord that I was talking about which you'll see right over here and this is our neon color but we do have a lot of other colors as well but this is that Chinese knotting cord and doing that box knot and we do have a video showing you how to do this and how to add beads to it so it's again like a really nice little neat fun technique so the other thing that I want to kind of touch on and it sort of goes with the macrame is that we actually have well this actually goes with the macrame we have the mini macrame board and this helps you anchor your work and you can bring your strands out to the side it also helps you measure now this is the miniature one and this is the one that I take when I travel because I love to do something with my hands on a plane but you can't bring tools on a plane you can't bring scissors but if I set up my macrame board I can add my beads and do all my nodding when I when I travel and it's also great for the car you can keep everything together so it's not just laying around yes I know you ever tried to bring a bead mat and the carpets does not work so this is the mini version we do have a little bit of a larger version too if you're working on a bigger piece but this is great for bracelets and you can actually orient it however you like so this is a really great little tool what else beyond that Mary I have some other goodies back here alright so I was talking a little bit about the s LAN packages and we have the four colors like I would say earlier but we also do have colors and four of a lot of the hemp chords now this is just one of the widths we do have other with other colors but these are great little starter packs so if you don't really know what to get started with what size beads you're working with how big the holes are it's I know for a lot of people when you're trying to shop online it's a big guessing game but hopefully we've tried to take some of that out of the way for you by some of our projects and letting you know which beads fit with which chord so but this is a great little example if hey I don't know which Brown I want to use get this and you'll be able to have all of them and also you can put them all on the same design and they look really cool and I'm great with that jump a little bit for the friendship bracelets and it did not work that doesn't work so the French deadline it is aesthetic for that I think as the S one is probably going to be a little bit smoother the hemp is going to be a little bit more organic so you might have some just natural knots in there but alike magically I guess that works really well yeah you know and I think when I was doing this the nice thing is is that the wooden beads if you need to core them you can actually just use one of the files that you would use with like a pearl so you can just kind of get in there because sometimes would be just naturally have little striations in them you can kind of clean it out and hold it sometimes that happens with wood beads I think it's just because they're so natural so and then one of the other things that I have here and this kind of goes with that paracord book that I was talking about we have the lovely knots book and this is a pair of earrings that you can make with this book so you'll get this beautiful style and I just love this book I'm going to flip through it really really quick just to kind of show you some of the things so this is just a really basic introduction to doing some of the beautiful maps that you'll see here and you can use the Chinese mounting cords they've also been using the satin rattail for a lot of this as well but there's just some beautiful little additions and this you can purchase a cork board it's called the dazzle it and it's a Chinese knotting and it's a cork board that comes with pins so you can actually pin your work down see if you've seen somewhere in here of course I think I just passed it so that's it lots of fun little project inspiration here but wasn't yeah show you really quick oh yes you can see up in this raishin but they have some pins there so when you purchase the board you'll be able to kind of pin it down and it will help you with your knot but this is a really really really fun thing to do but and I want to just make the classic little Chinese meditating it looks so professional so and I love the red just so classic so we have lots of books were just a couple of the books that we have on some of this stuff and then I want to talk about the rapid loom now I don't want to talk too much about it because me peak oil earlier our next class and August is going to be all about the rapid loom so I just want to touch really briefly on it though because we just released the rapid loom Pro so if you bought the rapid loom you'll notice that it has one track here and this is the one that you'll get with the kit but the pro gives you the extra track so that you can make wrap bracelets and if you joined me on Wednesday you saw that I actually added a third track so let's say you already bought your wrap and you're like oh I don't want to buy the rabbit pro so I can make it but you can make triple wrap bracelets now which is what I did on the Facebook live on Wednesday so this is a very simple triple wrap and this you'll need the three tracks for so you can just kind of build and build and build you could make it four and they just keep on keep on linking together so it's really neat but if you have the regular wrap it going to put this down so I can show you some of the projects you can use to whole beads which is just really really lovely in this one I used diamond duo's and this is that white leather and the tierracast buttons are really great for this technique so you can do that and then the cord the blue cord on the outside there is Griffin silk and that is a that is a size four it depends on the project that you're doing you can use different sizes of the Griffin silk and this is another example with those two hole beads this is the tango beads so this is just really fun and I have a video showing you exactly how to do this and that is that natural color of the leather cord I'm just really exciting about these if it's almost marketed to children I mean it comes with big colorful beads that they would love and you can again you can adult them by you know semi-precious stones like you've done will be either yeah you can do gemstones really dress them really really lovely so take your lovely look yeah and in this one I thought this was really neat so I combined bugle beads Miyuki cubes and Toho rounds and that's size eight but I just wanted to kind of create a really fun little dynamic look but I wanted to add those bugles to give it a little bit of interest so yeah so there's a lot that you can do with that as well okay so I'm going to kind of move on to this section here and this is more of the craft section so if you aren't into jewelry or don't want to try to make jewelry that's okay we got you covered um so I've discovered it that you can do really fun things with these little bottle caps now I have made a bottle cap here and this is a little flower ones and I just used crystal clay and Swarovski crystal and I just added a little magnet so you have enough grip on the back and this is the flower power magnet so if you're looking at our website now most people are like oh you made a magnet with rusty crystal yes I did this is so pretty but I use just crystal clay and that's a really easy thing crystal clay does not need heat to dry or anything like that it cures in about 24 hours so you just mix equal parts a and B it's very simple and put it in you'll have about a half an hour of work done and then you'll be able to let it cure for 24 hours and then it's nice and hard and then I'd like a glue you don't use any glue yeah and you just put builder shoot ons in there so you can just sort of place those in there and it will just really just attached to those hope we have a question hi Alejandra yes unfortunately you do but like I said you will they're at the same price which is really great but you'll be able to add on a third if you want to so when you purchase the pro oh I'm sorry her question was do I need to purchase the rapid Pro with the two to make the longer bracelets and answer is yes with the regular racet you'll only get as far it's about this big so you'll be able to make the once-around but if you purchase the duo you'll be able to make the double wrap and if you already have one the regular wrap it comes with the beads and cord and the wrap it pro does not but it does come with the two tracks so you'll actually have three tracks which is kind of great because then you can make a you know long longer pieces so but unfortunately you do need the the pro series to do the longer bracelet but they're on our website and we have lots of fun projects oh yes okay so I was talking about magnets so we have other bottlecaps magnets and these will kind of have different little shapes to them so this one is kind of that hammered look and it has like yellow backing and I wanted to put a little cabochon in there just to kind of the little little bird so you can add a larger magnet or a smaller one it's up to you this one I wanted a really good grip because I was going to give this to my little cousin because she is in high school so she's like oh I want to decorate my locker it was like cool I can do that we're gonna so these are little magnets that I'm making for her the last little cousins in school I'm the oldest kid so but another thing to do with the bottle caps is you can actually use a glue on bail to create a necklace so let's say you had an image that you wanted to put in there you can use a clear cabochon if you have a photo or any image that you want you transfer sheets anything like that you can use a glass cabochon and make it into a little pendant necklace you know I found a four-leaf clover the other day and I'm pressing it in and also again we put that in that would be perfect yeah so and you get a lot of these bottle caps in each lot so you'll have a lot of fun playing playtime with that so that is one example and I'm speaking of that glue on bail I actually added it to a scrabble tile so I wanted to do just a little initial necklace and again it's just really really simple you just use a little dab at you 6000 and dab it on to the glue on bail and put it on to a scrabble tile and you can actually spell different words let's say your name is Sal you can glue those ends together or you know glue them going down let's say your name is Sam I feel like there's probably more Sam's when they're ourselves nowadays but yeah you can do a little some things you can turn this into a little keychain or a little lanyard keychain if you want so just kind of some fun fun stuff if you're going away to college and you're going to s I am College I don't know what that would be pretend this is a U and they're a university or college or something but that could be kind of fun too I've also seen crafters cut out collage images and then enamel or cabochon over yeah we actually do have a kit that has the epoxy stickers and you can do that and that's really really fun and this is if you join us on our Facebook live classes before you've actually already seen this but this is cabochons with the magnet backs and I just think these are going to do they're really beautiful and fun to decorate your fridge or your locker or any other magnetic surface they came with the image already attached you don't have to yep get or glue it's just like these ones here so this is a blank version of that so it came with the image and it's backed in that white so you're not going to see any clear through it so one of the other things that we've been noticing this wildly trendy is purse charms or tassel charms or embellishments whatever you want to call them so I did a video a little while ago about making a tassel with ultra suede so your ultra suede fabric looks like this so you can just kind of turn it into a neat little tassel by putting it into a like that an endcap and then just adding it to chain and making yourself a nice little tassel and you can just add this really big nice little lobster clasp here and that will sort of of course not I can open it there we go so you can just kind of loop it around your purse and attach it like so that's very classy you can still have some super trendy ones here made with pom pom which are very hungry and fun so yes yeah and this is I love this on one of these like straw purses because it adds a little bit of that color and just kind of fun and this is this is that beautiful cotton cord this is the flat cotton cord and we also have a round version so you can really kind of personalize it to whatever your bag is you know it's great for a beach day I can yeah so I keep all your valuables in there so alright so last couple of things that we want to talk about if there's any questions shout em out now we're almost done but i speaking of tassels i did this leather cord tassel one here and i just added it to a very easy strung necklace and these are the czech glass pastels and we watched these a few weeks ago and they've been really really popular so I just wanted to kind of add a little interest by changing up to five but yeah there's just some more of those tassels there and this is just a really pretty summery look also this here is a leather choker and I'm just going to sort of take this off the bus here so you can see it now this is a little dreamcatcher and it's a slider piece and those are roughly crystals on the bottom and a very beautiful turquoise I wanted to keep it very traditional but as you can see on this faux leather cord it is a little slider and then this should look familiar to you this is that little clasp that you're going to get with your giveaway win so this is sort of how you use it on to one of those cords and I have another example of how to use something very similar on that cotton cord here and this is just another style of that class and I just did a really simple wrap rounded version so that you can kind of add this to your wrist and I know we're still in that huge trend of stacking your jewelry so this is kind of great with that and nursing some really neat bangle bracelets over there with the colorful cotton cord and that is it cupchain shown on there oh yeah really taking the other these are beautiful yes so this uses Griffin silk and this is that thicker cord that I was telling you about so we do have it in many different sizes and I just love that saturated color of cup chain and this is that round cotton cord now the ends I see the Griffin is wrapped around and then is it just glued on mm-hm it's tied and glue and our designer Julie did a video on this so this is out there for you to kind of really see how that looks great now similarly up top I see another couple of bracelets that have wrapped cord in how it's done yeah so this the cord on the center that you're seeing there that is actually a s1 as well so kind of to you know deconstruct this I'll kind of show you the back here now this has a little knot and it's just been glued and it's a little worn because I've actually worn this a few times because I love it but this beautiful teal color that you're seeing right here this is climbing cord and we have a lot of different colors in this so this is really beautiful and it's just easy to put together with this nice little Arrowhead clasp so that one statement piece yeah you know I I was noticing a big trend with stuff like this and I don't usually wear big bulky wrinkles like this and I just thought that was so mean so I wanted to kind of recreate a little bit of that but I instead of using the arrow head I used a thinner cord and a magnetic clasp to create this bracelet so but very same technique and we do have a video showing you how to just do that nice little tight wrap but it's very very simple alright and then the other a couple more paracord ones this is again that ladder stitch so you can just kind of see how it looks in different colors and this is the one that I actually did in the video so you can see that it is a little bit different because it has those jump rings in there as opposed to this guy here that has larks head knot on either side now in the project right up for this I did explain how to do these large head knots but it works very similar to this one here it's just a very it's just a different look because I wanted to get compass buckle in with this one here so and then of course a classic of summer is these beautiful little stretch bracelets here and these just feature some of that charm chain and some tierracast little charms and these are perfect if you can kind of see here they have the right orientation of the whole so you can string on that charm just in between a couple of these and it lays really really nice in there so those are really fun and this is just some gemstone here and some metal beads but again that stretch cord I think is also a really great introduction for people who want to get into shoulder making and then another beautiful craft that we have and we you know we love it here is our kumihimo and these two pieces here these are using our designer pallets so we have our cinnamon stick and this uses that really nice little magnetic clasp so we have our designer pallet in cinnamon stick and cabo cruz and those are really meant as kits where people get the board they get the cord to get the clasp all it comes together well we do have kumihimo kits but these in particular these are just projects that are using those designer pallets that you've been designing for you guys and that's another great thing actually if you haven't found our website in a little while be sure to check out the exclusive designer palette and let us know if there's something that we're missing we have some pink we have some red we have some turquoise and gold and rose gold but if there's some kind of palate or some color combination that you would love to see in a palette let us know we are happy to create it for you so but yea kumihimo is a great thing and we do have a ton of kumihimo kiss everything from beginner to necklace to starting you know so you can really explore kumihimo and I think it's a great thing so interesting how similar this is box not yeah it is a kumihimo now is this one boxer or kumihimo this heart this is kumihimo as well so this is where you have left feeds on each strand so you really see sure so you really see the beads come in there and then we have these large whole European style beads here and that just kind of fits right it right on so we have a question okay I would recommend a GSI postman first you can use these 6000 e 6000 tends to be a little pliable GF hypo cement I think kind of sucks it all together also I would use the opal on cord I find that that's the best and when I'm trying to make a stretch bracelet what I'll do is I'll string all my beads tie my surgeon's knot and then take my two tails and go all the way down and then do it again so you'll actually have two strands now that always depends on if you can have your beads do that if your strands will fit through another time but I always like to try to kind of double mine up because for the most part when you're getting a stretch bracelet on you don't need to stretch it really all that much to kind of roll it over your wrist to get it to sort of fit so it's just kind of like I try not to leave too much slack but I think the other problem that people have when they go to make stretch bracelets is they actually try to pull it really tight so that your stretch cord is already stressed when it's not even on something and I hope that I hope that's clear so when you're making your stretch bracelet make sure that you're not really tightening tightening that first knot because then you're just you're putting extra stress on that stretch cord so I've also put crimp covers over my knots so that they hold the knot in with the glue inside is it what you could do yeah I would just caution to be careful when you're crimping it to make sure that it really goes over the knot and doesn't try to cut the cord but that's just technique technique based so you would just want to cut it or pull it so that it kind of covers it without cutting it so but that's my recommendation is I always try to go at least one more round and I would recommend trying Gia's hypo cement I think it's a little bit of a stronger bond also place you're not next to a bead that is large enough to slide the bead over the knot so if you're if you're knotting and you have a big bead here try to add your little dab of glue and then kind of slide that big bead over across so that way you're not is sort of glued into the center of that bead that's another little trick that I try to kind of adjust and usually you can do that on the first one there no hopefully that helped right and we are going to be giving away our giveaway so last quick little bucket here I'm going to show you the giveaway one more time we have some beautiful paracord and you're getting that lovely little booklet you're also going to be getting the materials to make this bookmark here the rapid limb and this is an exclusive kit be sure to check out all the other colors that we have and you're going to get another little bookmark here a little finding and some cotton cord and here is that little magnetic clasp once again alright so as soon as we are done here man pick a winner and any last questions that you guys have about anything you want to see or talk about I also wanted to add that we were talking about how almost all of these projects have videos mhm and so if you have any questions about what the projects are called we can let you know all right sounds good yeah and if you have any requests please shout them out in the comments and if you're watching this after our live broadcast we are still here to answer questions so please feel free to add them there you just won't be eligible for to giveaway but we still want to hear your thoughts where you're tuning in from if you have a favorite project or a favorite thing that you want to see let us know you like to hear all right so our giveaway winner is Melanie lemon swoop I hope I said that right oops look I like that's a really fun dessert so Melanie what you're going to do is you are our winner so send us a private message and we will get your address and we will send that giveaway off to you today so thank you so much for everybody joining in and asking questions and we love to hear that you guys are tuning in from all over the world it's so exciting for us and be back with us on August 4th and we will do an entire class all about the rapid loom so we're going to get a lot of new videos up in the next month showing you just different little techniques and if you guys have questions leave in the comments below here and we'll be sure to address them on our next Facebook live class all right well that this was so much fun to prepare for I yeah cause it would be so colorful got the kid in you it really does alright thank you so much for joining us everyone and we'll see you next time bye you

You recently viewed

Clear recently viewed