Audio Transcript
Note: This audio transcript is auto-generated and may not be completely accurate.
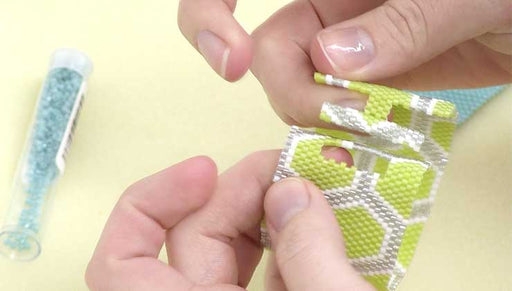
Hi this is Megan with Beadaholique.com and today I'm going to show you how to do tubular herringbone bead weaving I'm going to use a 10/0 delica seed bead but it will work with any seed bead you need some kind of base to work off of. I'm just using a straw. Your bead weaving will be just a little bit wider, thicker then whatever you use as a base so find something that is a size that you want to work on you can use pencils straws thick wires, anything that's it's not going to bend too much on you and that is nice and straight and round I've even used larger noodle beads depending on what you're looking for so go ahead and thread a beading needle and the tubular herringbone much like regular herringbone, flat herringbone it starts with ladder stitch as a base to work off of we're going to create a ladder stitch that's long enough to wrap around your form thread two beads then go back through your first bead go through the next bead again string a bead go back through if you're not familiar with ladder stitch I'm just going to gloss over it here so you can also watch a video on how to do ladder stitch on beadaholique.com if you need a little bit of an in-depth tutorial go through then a bead I've already measured mine around and I know that I need about fourteen beads for the tubular herringbone, you do need a even-number of beads go ahead and create your ladder stitch and test to see how long you also might have to experiment with what you use as your structure you're cylinder form because you do you want it to have a good fit also with an even number of beads not be too loose or too tight, if it's too tight it's gonna not give you a solid bead weaving, if it's too loose it's not going to provide you with as much structure but too loose is probably better than too tight if you can get a nice fit once you have your ladder stitch the right length that will meet around there just reinforce that ladder stitch, it's going to be the base for your whole tube so it's going to be nice and strong, so just stitch back-and-forth, back through the ladder stitch all the way back to the beginning, that's gonna keep your bead straight too. Keep them from kind of zig-zagging back and forth give you a stable base then you're going to bring your beads around into a ring go down through that other end bead there to create a loop then continue back through the original bead and then reinforce that as well you're going to go ahead and put that on what you're using as your form If you're familiar with the flat herringbone stitch it's going to be worked pretty much the same way except it goes around the form instead of flat back and forth you want to get your base row as snug around your form as possible here don't wanna leave a gap so the first thing is pick up two beads and go down through the adjacent bead to the one that you're coming out of you can hold your tail for the first part, it's going to help you hold it steady pull that down then you're going to go back up through the next bead in the foundation pick up two beads and go back down through the next bead in the foundation row pull it tight up through the following continue like that around which is why you need an even number of rows because it's gonna be two beads at a time in herringbone stitch if they don't lay nice and evenly you can pull the thread in the middle of the needle and pull it back down back up through the next bead pick up two beads down through that one keep going all the way around and as you can see I've got a little tiny gap there in my foundation row give it a tug, here is where it's important because you're going to now join the next row, so you're done with your second row you're going to go back up now not only through your base row bead but also through the bead in the first row that we just stitched. Go through rows one and two and you're going to step up to your next row that way and now we're gonna start with row three add two beads and go down only through the second row bead right there and then up through the next bead over add two beads down through the next bead don't go all the way back down through, just through the one in the previous row up through the first row and don't be worry if it seems like it's lifting away from your foundation the last row of herringbone will not be quite secure until you put the next row on top of it it will get a little bit more secure once you go in and use the next row to stabilize it down through the next bead, up through the one next to that add two seed beads down through the next one continue around until you finish row three at the end of the row again you're going to go through up through the bead like normal and out through the first bead in row two and step up every row just the same way and do the same for row four so just continue in that way until your tube is as long as you want it to be when you finish and you tube is as long as you want we're going to ladder stitch the last row together so that it matches the front so go ahead and go right through next bead over and back up back down and onto the next bead around and you're going to continue just that, if you're familiar ladder stitch then it'd be really simple and that will make your beginning and ending uniformed and it will secure the last row of beads since herringbone does need the next row to kind of really secure it down just all the way around once you get back to the point which you started I'm going to go ahead and connect those ones with a couple of loops as well and then just tie off and weave in your threads that's going to be how you finish that too once you slide it off your form you'll have a nice tube of herringbone stitch. Go to www.beadaholique.com to purchase beading supplies and to get design ideas!