|
The Beadsmith Bead Loom Kit For Beginners - Weave Necklaces Bracelets And More! SKU: XTL-6110 $13.99 |

|
Fiskars 5 Scissors for Beading Cord SKU: XTL-5700 $5.99 |

|
Beadalon Large Beading Mats - Prevent Bead Rolling 13 X 18 Inch (Set of 2) SKU: XTL-9935 $6.75 |

|
Set of 6 Big Eye Beading Needles in 4 Sizes - Easiest Needles To Thread! SKU: XTL-3165 $22.69 |

|
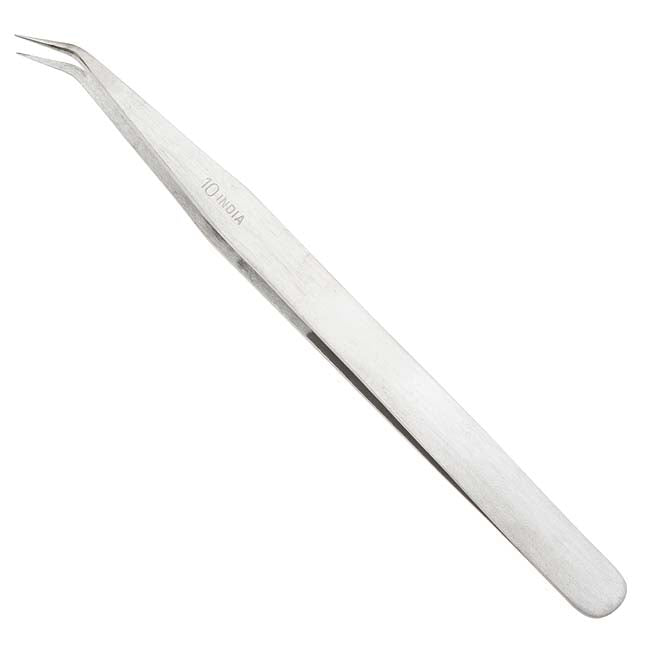
The Beadsmith Bent Fine Point Tweezers For Bead And Pearl Knotting SKU: XTL-4001 $4.17 |

|
NYMO Nylon Beading Thread Size D for Delica Beads White 64YD (58 Meters) SKU: XCR-23FJ $2.89 |
Hi this is megan with Beadaholique.com I'm going to show you how to use a bead loom. And we have two different options right now available for bead looms. We have this less expensive BeadSmith beam loom and then we have this really nice wooden bead loom and assembled this is the wooden bead loom and it's as you can see it's quite a large and the metal one is quite a bit smaller if you're just starting out you can definitely start with the smaller less expensive bead loom. If you do a lot of beadwork you might want to invest in the wooden one the main difference as far as the size goes is you will be able to make a much wider project on a loom with a wider area for the work threads this loom you can only do your product about that wide so you can see how much more space you have to work with here. The length is not an issue I'm mostly going to work with this one but I will also show you how it would be different you're working with this one So with the BeadSmith loom you also get instructions, some seed beads, thread, needle, and a needle threader the needles that come with it are a little bit short and a little bit thick and how wide your work is you may want to use like a size twelve beading needle they would give you a little bit more length to get through in one past you can also use a big needle which come in very long lengths and you just put the thread the end and thighten and this would allow you to get through even a wider piece of work in one passage. You don't have to come out. so there's two different ways to thread them and which the way you use will depend on how long the piece. You're going to do with this if you're going to do it piece that would fit between the edges of your loom then there's a really quick and easy way to thread your loom you would just tie your thread to one of the little nail head here and then you start by deciding how wide you're going to have your piece be and you start going across the loom around the nail head and back and put your thread, one thread between each coil in the wire and go back-and-forth this is going to be, if you don't need to have any extra thread or slack and you're going to work with this length here that's a really quick and easy way to do it however if you need it to be longer then we have to do it a slightly different way that's not quite as quick but it's not too hard so if you're going to create a longer piece you need to do a slightly different method of threading you loom I actually switched to Nymo nylon beading thread for this because you don't want to get it tangled up and the cotton thread is kind of tangily so for this your thread length need to be about two feet longer than the piece that you're going to create and anytime that you thread your loom you want one more thread across than the number of beads than you want to use for the width of your piece for the purposes of this demonstration I'm only going to do five beads across so I only need six lengths of thread so once you've measured your strands to go across as you work threads just go ahead and tie a knot on the end and an overhand knot then you're going to divide your threads in half just after the knot so I'm using six, I would just put three each side and divide that half you're going to put one half of you thread to either side of the little nail head you're going to go all the way down to the other end and tie another knot on the end and take that split in the thread you're going to lay that with one half of the thread to either side put that on the nail head you're going to loosen the dowel here and you just want to start rolling it back and as it rolls around it will tighten the threads across the loom and you don't want to pull them super tight because we still need to redistribute them throughout the coils just where it has a little bit of give left tighten that up and this part can be a little tricky it helps to use a pair of tweezers and you're gonna start on the side of the loom that has the excess tread on it so that it doesn't get all twisted up I'm gonna put each thread across into it's own coil get them nice and flat and then you're gonna carry each coil each thread across to lay it in a coil on the other side of the loom it's getting a little twisted on this end. That's not a problem as long as it's straight across it's a little to loose you can pull this dowel a little tighter it will stay in place so when you're all done placing those go ahead and loosen up that screw so that you can pull your threads pulled across and screw it back down nice and tight so that they don't move on their own when you're ready to work you should have your threads evenly spaced spanning across you're loom like that so to thread this style of loom it doesn't have the little nail heads what it has instead is a bar that fits into this dowel so you would thread this by laying your threads across and then using the bar to secure them so you wouldn't be able to do the super quick method on this one just going around the nail head you would just need to cut lengths for this lay them across put the bar down and secure them and then it's is the same principle of loosen that through and turn this to tight it next thing you gonna do is cut a length of thread as long as you're comfortable working with you can always tie off and add your thread later and we do have an instructional video on how to do that also if you're not familiar on how to do that so go ahead and pull the thread through your needle, leave yourself a tail on one side and then for the purposes of the demonstration I'm gonna use the beads that came with this loom little note about the size of the beads your using the looms are really fast and easy to use when the beads are about the size between your threads and you'll notice that this this little has a little bit larger space between the coils than this one does. So this one will probably be a little bit more suited to smaller beadwork so you can use beads that are smaller than the width between your threads when you pull it tight it will just condense the width it can just take a little bit longer to get each bead in where you want it to go. When they're about to right width they just pop right in between the thread just something to keep in mind so I have six threads that's enough room for five beads so I'm going to go ahead and start by picking up five beads on my needle I'm not gonna do this in any pattern for the demonstration just keep in mind if you do want to use a pattern they usually are shown on a grid they have a little couple patterns on the instructions here they also have some graph paper which I scribble on it already trying to test out a pattern or if you're following instructions from a different project or pattern they would usually involve a grid like that and you just work along the strips of the grid as you go where you can make up your own as you go well I'm going to put them in randomly just to show you how the loom works start by pulling your thread and needle under the strings of the loom take the pad of your finger underneath your beads you just push them up from below through strings and you see with the beads the size that fits just in there. They pop right through the threads if you have smaller ones you will need to kind of help them along this is super easy when they are the right length and you want to pull your thread until you have about a six to eight inch tail on the end and then you're gonna take your needle and you're going to go back through the way you came the big key important thing to remember here is that you got your needle and thread underneath the work threads on your way that way you need to go above the work threads on the way back. So they're going through the beads again but you need to make sure that you needle is above every one of these threads otherwise the beads will fall out and gonna leave this tail and just it tie off and weave it in later and now you're ready to do the next row just pick up five more beads put your needle back under and push them through bring your needle back just like that your work will spread out a little bit you can just use the side of the needle kind of push them together make them nice and straight within spaces between them and you can just keep working until it gets as long as you want just for every row bring your thread under push the beads into they're space and bring the needle back and if you bring it back over and the bead falls out that means that you didn't get the needle over your work threads so you just need to take to pick the row out do that row all over again when you're going to use the extra access of your thread to make your piece longer you actually, I didn't do this the right way, you actually want to work towards your extra thread if you're gonna work left to right you would want to have your hundred extra thread on the right not on the left if you want to work right to left then you put it on the left if you're working across this way and you get to the end here and you want more thread you loosen up both of the screws a little bit and you turn the last one and the right one towards each other and you can see that it advances your work over and you keep working and if you want it really long if can pop up over there as long as the beads on the end will keep it straight just remember that when you're done moving the dowels that you tighten them back up so that it stays nice and taut beadwork that you do on a loom does usually need to be mounted onto something else so and that is because when you're done with this beadwork you can tie off your width threads, these threads here that go this way with you can tie them off and weave them in but your work threads are between each bead and it would be really bulky on the ends to have all that trying to weave back in. So usually what you do when you're done with a piece of the bead weaving off of a loom is you cut it off of the loom and you take these treads and you tuck them behind and you would either tape them in place or a glue them in place to keep them in one place. I usually will glue them down you glue then down and then you glue this onto a foundation and then all you see on the top is the bead weaving. You don't see all those messy threads on the back and that is how you use a bead loom Go to Beadaholique.com for all of your beading supply needs!
Related Videos


How to Use Triangle Jump Rings
In this video, see how to use triangle jump rings to hang pendants in a clean, subtle way.


How to Use Cord End Caps
In this video tutorial, see how to easily finish your braided and knotted jewelry used cord end caps. The particular caps featured in this video do...
View full details

How to Properly Cut Gemstone Chain
Gemstone chain is a great time saver. In this video, see how to properly cut gemstone chain to get the most out of this beautiful product.
Customer Reviews
You recently viewed
Clear recently viewedExcellent instructions. Megan is an amazing teacher.
