Audio Transcript
Note: This audio transcript is auto-generated and may not be completely accurate.
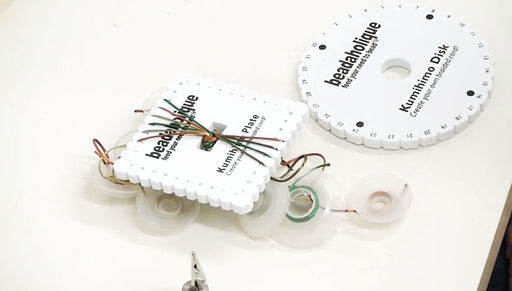
Hi this Julie with Beadaholique.com and I'm going to show you how to finish off your Kumihimo flat braid ends. So I have a bracelet here that I made and as you can see I've got the ends which are finished off. I'm using ribbon crimps to finish off the ends. If you're familiar with round braid Kumihimo you know that we can have a couple different options for finishing off those ends. Either wrapping the braid several times using like an S-Lon or a different type of thread or using tape. Those methods don't really work with the flat braid because they make it too chunky to fit into your ends so we need to find a different way of finishing it and the way we're going to do here is going to be using a needle and thread which I've threaded right here Any type of thread will do. I happen to have some nymo thread around It's going to work fine If you have a sewing machine you can sew the end in the same manner we're going to hand stitch it. Not everybody has a sewing machine. I'm showing the hand stitch method so if we were just take our Kumihimo Braid. I've got a flat braid here and I actually going to do a double wrapped bracelet if we were to go ahead and take this off of our disk here or cut the knot we would end up with this and this is not going to work, there's no way you're going to be able to fit a ribbon end and put it over this so what we need to do is we need to sew a line to stitch your cords together so first off go ahead and remove the Kumihimo weight from the knot and go ahead and place it up top so now we can safely remove our strands from our Kumihimo my disk I've already removed the bobbins but this is going to stay put now. Scoot this just a little bit up further just so that it's got all these loose ones on top. We have a nice solid braid. It's not pulling apart right below the alligator clip here in our Kumihimo so we now need to do is we need to determine what size of an ribbon end cover we're going to need and to do that I have a digital caliper. Now you can just do this with a ruler but I want to show you with a digital caliper because it's more graphic for the video so we're going to measure the width of our Braid and its nine point nine so it will work perfect for the ten millimeter ribbon cord end I actually brought over a sixteen millimeter one as well but I can tell that it's just gonna be to big for this particular Braid. So I'm going with a ten millimeter one and so what I want to do is, you don't want to cut any of your cords yet you want to sew a line first using some needle and thread and what we're going to do is I used black for the video sake. You could see a little bit better but you should use a color that would blend in with your Braid Go ahead and start by threading your needle and thread, tie a knot at the end and in the middle of your Braid towards your knot go ahead and just start a stitch line and it doesn't have to be the most beautiful stitch in all the world, you want to try to get this straight of a line as possible This is gonna get covered up. You don't have to be too concerned with how it looks it's more important that it's straight. You're gonna have to cut very close to the line so we don't want it to be too wobbly go back and forth you when you get to the end I want you to whip around and over and pull snug go back in the other direction If it would help you, you can go ahead and just draw a line with a marker just right where you want to stitch so you can make sure you just stitch on that line Make sure that it blends in enough with your Braiding just in case you end up seeing it a little bit I got to the end and I'm going to whip around and pull and now go back again and I'm going to do this about three times and go back and forth, back and forth, back and forth I'm using pretty thin thread so it's not going to the bulk of my braid I want to catch any of the little loose threads because if you're using a rattail you can see that it kind of shreds a little bit so you wanna make sure that you catch those loose threads, we are gonna cut that right up along the edge Once I passed over about three times back and forth actually it's six times, I went two, three, four, five, six, and go back in the middle and I am going to go ahead and make a knot with my thread. I'm going to grab under one of my thread bridges hole go through it twice actually pull down and I'm going to do that again I'm happy with that I'm going to stitch into it a little bit for a added measure Snip it off with a pair of scissors We're done with that part I've got my line here. It's not beautiful, it's not perfect, you'll be using a thread that blends in now what I can do is I can go ahead right up close to it but not cutting any of my thread cut off this end I can actually trim it a little bit too and see how that's not shredding so that's keeping that really nice and contained now what we need to do is we need to apply the ribbon crimp end cover here to the Braid but what need to do to that is use some glue and I've got some E6000 right here which is my favorite glue I've got a head pin, you can use crack use a scrap piece of wire, a tooth pick anything you like basically we want to be able to put a little bit of glue on the inside of the ribbon crimp apply this to the interior of the crimp just going to give a little added security there and make sure the ribbon stays in there go ahead put the braid into the crimp the glue is going to squish out, just wipe that off get all the loose little hairs and fibers from the thread to stick inside there and now I've got a pair of nylon jaw pliers and I'm just going to crimp the ribbon crimp and that is going to stay secure on there and now again it actually helps if you have the glue because the glue is going to help to keep those little ends secure and tucked away and then we just finished one end of our flat braid kumihimo go to the other end and do the exact same things. You're not going to remove your kumihimo or whatever you're using to secure your end until you've actually stitched this end. Use the same exact method go ahead thread a needle with some thread, stitch back and forth, back-and-forth when you've got that secure cut it and you'll just apply the other ribbon crimp the same way you did on this end and that is how you finished a flat Kumihimo braid. Go to www.beadaholique.com to purchase beading supplies and to get design ideas!