How to Make the SuperDuo Wrapit Loom Bracelet Kits by Beadaholique

SKU VID-1785
Designer: Kat Silvia
In this video you will see how to make this kit from start to finish. Follow along with the instructions on the box for the full set up of the Wrapit Loom. Once your loom is set up use the SuperDuos, silk, leather and button to construct this bracelet. Choose your favorite color way and get creative with the pattern to make your design unique.
Audio Transcript
Note: This audio transcript is auto-generated and may not be completely accurate.
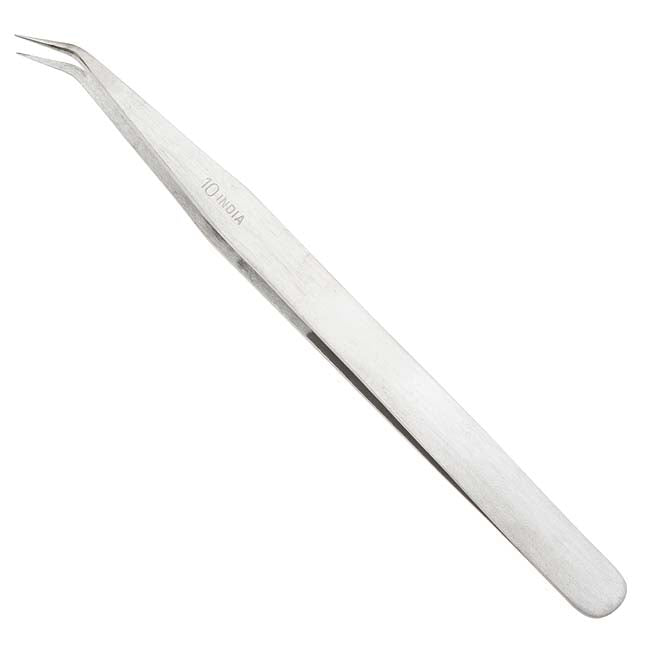
hi this is kat with beadaholique.com now these kits we have four different colorways here and no matter which color you choose you'll be able to follow along with these instructions to make any one of them so here are the four different varieties that you can choose from we have some beautiful silvers and golds there for you and lots of beautiful little color mixes of those super duos so what you'll get in your kit is you'll get your Griffin silk you'll get your leather cord you'll of course get your super duo mix of beads you'll get your button you'll get a twisted wire needle which is right here you'll get your e6000 and then you will of course get your rapid loom which you can see right here in frame alright the things that you won't receive that I recommend you have on hand is you'll need a pair of scissors I recommend a pair of bent nose tweezers that can just help you get through some of those tiny holes and then I have a couple of little toothpicks here and those are gonna help us with our glue later alright so you can actually choose to get the full kit or you can choose a refill kit now really briefly a refill kit is going to mean that you already have your loom and your glue and you'll get everything else that you would in a regular kit now of course that doesn't include the tools here but the refill kit is great because if you decide that you really like the design and you want to make the other three colorways you can just purchase a full and then purchase the other refills that you desire alright so if you have everything ready to go let's go ahead and get started okay so the first thing I want to go over is how to set up your loom here now this is really simple we have our two little feet here and these just pop right in you can follow along with the instructions listed on the box but it's very easy you just pop those into those two little sections right there and this piece come slides onto the back and this piece just pops right down on to that front there so just follow along with the instructions and you'll be all set to go and this has that little rubber band right up at top there so that gonna kind of give that that little jaw clamp right there alright so let's go ahead and set that aside I'm gonna set my scissors and kind of can I clear the way a little bit here give me some extra little room I'm gonna set our glue aside because we're not going to need that until a little bit later and I'm going to just remove these out of the way so we have plenty of room to work all right so let's go ahead and we're gonna take off our little Griffin silk off of the cord off of the card rather and take our cord off of the card so let's go ahead and just remove that now one thing I want to talk about is the row of beads that I have at the bottom when you receive your kit these will come all mixed up together and the one thing I recommend you do very first before you even start is separate the beads so that you can see the pattern that you want to create now we've given you a mix so that you can have the opportunity to just sort of create whatever you desire now this is the version I'm going to be making here so let me kind of pull this in and show you how to think about your pattern so if you look we have a nice little chevron pattern here and if you move your way up the side they're counting the outer beads so let's say we're counting each color row like color Chevron right there you're gonna get about twenty three to twenty four beads depending on how long you want to make your bracelet there so when you're doing that each Chevron has five beads in it so go ahead and you can kind of separate and count out exactly how many rows so you can see that there are six different colors for this particular mix but those two blues are really similar so what I'm actually gonna do is I'm not gonna use this sort of duller denim blue in my design here so I'm just gonna kind of shove those off to the side there I'm not gonna use those guys but they're good to have on hand in case you need anything alright what I'm gonna do is I'm gonna do my Chevron and I've decided that I'm gonna do it in this pattern I'm just gonna kind of follow along exactly what I did here so I'm gonna move my way along now go ahead and look so let's see if you're looking at this purple here we have one two three four five sets of that purple so you can go ahead and separate out to make sure that you have twenty-five of the purple beads so that's sort of the gauge that I'm using and whatever you use first in the chevron might want to be you might want to think about its to have that be the bead color that you have the most of so when you're deciding your pattern that's something to think about and also don't forget that you can actually create little diamonds in here and even when you get to the end here let's say you didn't want to add that one less little coral bead you can make all four of those beads blue and it would still look really nice you can sort of end on a little diamond so there's a lot of fun things you can do that's why we've given you the mix and let you kind of run wild with what you want to do for your design alright so the very first thing we're gonna do is we're going to take our leather here and we are going to kind of just stretch it out there take on our little button slide that onto our leather and we're going to slide that to the very midpoint of our leather cord here so find that midpoint perfect and now we're just going to tie and us very simple overhand knot just go ahead and tie that slip that button through and we want to end up with a nice even knot so you might have to kind of just wiggle it in your fingers a little bit and we want it to be as close to that button as possible because this is gonna be our nice closure perfect that's our little button now the other tool that you might need is you're going to need a little ruler here so I have my ruler so going from knot to the next knot here it's gonna be about six inches so I have it on my finger here so now I'm gonna come to this side and tie another knot and I'm kind of eyeball and see where that is then get to this point and tying the knot here and lay it back down and mine's way too far way too far so I'm just gonna wiggle it this can take a second and you can see that I have one that's a little more slack than the other so I'm gonna want to fix that as well so as I'm kind of pulling that knot together go ahead and make sure that both of those cords are gonna be nice and tight we want to make sure everything is even that's going to give you the best result possible alright go ahead and tie and tighten that one and tighten that one alright let's go ahead and kind of wiggle that down perfect I'm a little too far alright let me just adjust that really quick and you can take your time with this this is where you really want to make sure that everything is nice and set up so let me just kind of come back in here and adjust now you're probably wondering oh well I want a longer bracelet I'm gonna show you how to do that and the best way to do it is not with the beads you can with the beads you can absolutely extend if you have the right number of beads but if you want to extend a little further that's good I'm happy with that alright six to six about perfect if you want to extend further what you're gonna see here is I'm gonna create another little knot there and that's gonna be for the button and I've clipped these off but you can create another knot at the end there to sort of extend to create another optional button loop so if you're giving this lets light as a gift that's another thing you can do as well alright so let's go down here we're gonna do another quick little overhand knot and now this time we want to make sure that it's only wide enough to fit that little button through so I'm gonna kind of tighten that and you can just come over here and eyeball and that's gonna be perfect for that little button to slip through alright so I'm gonna leave mine like this you can always add that extra knot now or you can leave it you can see that you have plenty of extra cord to play with there all right so what I'm gonna do is let's get my ruler out of the way I'm gonna kind of push some of this away keeping track of that little twisted water needle it's very fine we want to make sure that that has a nice place to be and I'm actually just gonna kind of scooch all these up a little bit can I get these out of the way now again you can create whatever color pattern way that you want this one you know be just because I had that extra blue I wanted to go with the the brighter aqua color but there's nothing saying that you can't put all six in there and create your own little color pattern all right so now on our loom here let me just get this kind of set up all right there we go so Arlene here what we're gonna do is we're just gonna simply come to the jaws here at the top and we're gonna slip that little button in and we're gonna kind of make sure that that button is there and the knot is exposed and then sliding down here to the other end what we're gonna do is we're gonna slide in our little knot in between that first and second knot and we're gonna go ahead and pull that back until it clicks here see if I can get that there we go so now we can see that we have both of those lines taut so you can see that it doesn't truly matter that I had one that had a little bit more slack cuz those are gonna open up nicely and we're gonna be able to put our beads in the center all right so now sorry let me just make sure that you guys can really see this because this is the most important part all right so just gonna slide those to the side perfect all right so now we have our rapid loom ready to go so what we're going to do is we're going to take our Griffin silk and we're gonna lay it right over the top just like so now take the one that's in your right hand and wrap it around the right hand cord there and go ahead and bring that out to the side and take the other cord here wrap that around the left hand cord and bring that out to the side so what you're looking at is you kind of have a little a little bit of a bridge on top and then wrapped each around their individual cords now go ahead and scoot that up towards the top there and you won't be able to see this but off-camera what I'm doing is I'm just making sure without lifting up my loom I'm just making sure that those cords are just about even I actually did a pretty good job all right so - this right handed cord here is where we already have that Griffin silk with the twisted wire needle attached to it so I'm going to let that one sit right there and to this other side here this is where we're going to attach our other twisted wire needle so this has a really small little eyes slip it through there and go ahead and bring it down a few inches or so and then what I recommend is just kind of pulling it and you'll see that that I gets really tiny just go ahead and kind of give it a little pinch make sure it's not going to go anywhere okay so now we have our twisted while and wire needle attached to our left-hand side there okay so for the first colors that we're gonna do here we are going to start with a purple bead so now here's what I recommend the beads the holes on these beads are actually rather small so I always recommend going with the cord that has that doubled over cord there first so go through and just slip your needle through and you're gonna bring that all the way across to the other side and now you're gonna take your other needle and you're gonna go back through that exact same hole and you're gonna bring it across going it to the other side now I'm holding the bead with my finger because I don't want it to kind of slip through because we want to keep it nice and centered so make sure again that your cords are all the way up at the tippy-top perfect and go ahead and kind of pull that through pull that down alright so this is what we're working with now next we're gonna take both of our cords and go through the center and just loop it around that outer cord and go out to the side and you're gonna do that on both sides just like so all right now to continue our chevron pattern we're now going to take what is now in our right hand we're going to slip on one of the super duos and now we're going to go through the second hole of the super do that we already have there sliding it through and before we pull that all the way through we're going to attach one more super do of the same color we go and just slide that through and now we're going to pull that cord all the way out to the side and here's where if you need to give a little more slack you can kind of kick the back a little forward because now we're trying to build up the cord here and separate those two leather pieces alright get those nice and nestled in there perfect alright so now we're going to take the cord that was in our left hand with that Griffin silk needle attached and now here comes the tricky bit we're gonna go back through what we just strung so we're gonna go back through that one super do there and sometimes it helps to kind of go through a superdude and kind of thread through each one especially in this beginning part this is the most I'll say frustrating part however once you get past this little point here you'll see that they'll come together it nice and easily alright and through one more there alright and pull that through all the way through and kind of as you give it a nice little tighten up there there we go alright make sure everybody is nice and happy perfect now make sure that both of those cords are coming on top of that leather there and what we're gonna do is do the same thing wrap each one up and through and around ok now remembering to start on the side with the doubled over cord which is now on our left what we're gonna do is we're gonna pick up another purple slide that through there we go go through the purple here and kind of make sure that we sneak our needle through because we don't want to go straight through now now it was where we're going to add on our next color and for my pattern here it's going to be the green now I can slip on that green bead slip-on and three oh that purple be it again making sure that we are landing up and over the top all right there we go and before we finish we need to add one more purple bead there we go again making sure that every one is not twisted there oh and one more purple bead to that cord and we are just going to slide that all the way down to the side oops pulled my needle off if that ever happens if you ever pull your needle off and you need to kind of re open up this little notch here this is where you can use those little tweezers so yeah so I just lost my new I pulled a little too hard that can happen don't get frustrated it happens and then if this tail end of the Griffin silk ends up getting a little frayed you can always snip it off a little bit but you're going to need all the Griffin slope you can so try not to snip too much all right there we go and finally now we have our cord all the way down there at the bottom okay so now what we're gonna do is we're going to take the cord that was on the right hand and we're gonna go all the way back through and kind of bring this up there there we go we're gonna go all the way back through all those beads we just had so through this bead here and don't worry if it kind of looks like it's walking it out to the side it'll all come together you can see when you tighten things up that they kind of all come together okay now what I'm doing here is I'm just making sure that my needle is nice and straight so that it can go through now oftentimes you'll find that it will be able to kind of slip through two beads really easily and have trouble kind of getting through one by one of the other ones that's perfectly normal this is what happens when you're doing really tight weaving like this get frustrated it just happens take your time it will work alright and go ahead and slide that last one through again making sure that we are coming on top of that coming on top of that leather cord there means tell that it's getting really tight in there and this is again why I recommend that you tried to do the cord with the silk on it with the original I'll say the original needle you try to do that one second alright so there we are now mine is looking a little bit wonky so what I'm gonna do if this happens to you and I'm kind of glad this this is a little bit of a mistake but it happened to me so this is where that extra slack cord was a little bit too slack so I'm gonna come down here and adjust this knot so I'm just gonna take that out and kind of adjust it but now you are all set to continue the pattern so you just continue to wrap through always make sure you do your wrap around and now you're just gonna go back and forth and kind of shoot those little needles criss crossing them back and forth through creating that pattern for the super deuce alright so if you need to adjust anything adjust it now finish your beading and then when you get to this other end here I'm going to show you how to finish tie it off and add our glue and then we'll be all done okay so once you've done the length here you can see that since I've adjusted it it looks much better there at the top and now we're down here at the bottom so the final thing is that once you get to this point you can start to see how much space is left in between this little sort of triangle down there at the bottom so you'll have to gauge if you want to add a whole other row if you have that space or if you don't you can just go ahead and keep adding but if you feel that you are done you can go ahead and see the last three blue that that are there what I'm gonna do is I'm going to string through one side just like so pull that through and then the next color I'm gonna add it's gonna be one of these coral colors so I'm just gonna string that on there and go through the other blue side here slip that through all right and now I'm going to go back through that same thread path looks like I caught the first two and I'm just going through that last hole there on the blue one and bring that all the way across all right and now here's where you're gonna need to kind of sneak your needle down through here there we go to do the wrap because you won't really be able to get your fingers down there so just use the needle to kind of come up through and do that wrap just like that and then I'm this side here just as we did in the beginning we're gonna send one needle through this fire and the other side through this way okay so yes you can see that it comes down to that nice little point right there and we want a little bit of space because now we're going to take each side just as we were doing before and string it down through or rather string it up through there we go and now we can kind of pull this all nice and tight we have our last little loops there and now because I have a little bit of extra space I'm going to do that once more just wrapping around and kind of getting this right up towards that next knot in the leather there and through the center okay very good so we have our nice neat little wraps and now we're just going to take our two cords here and we're going to tie a nice little overhead not bringing a nice little knot there and down there at the bottom and we're gonna do a second little knot perfect for added security we're gonna use our East 6th ousand go ahead and take that off and just a little dab of glue there you don't need much very tiny little dab and just go ahead and add that down there to her a little not close my glue up there all right and just make sure that it's nice and coated there at the bottom all right perfect now we can release our loom here and get this out of the way now there are a few things I want to show you all this is drying just for a moment here I do want to show you how many extra beads you really have so this does not take a lot but it is important that you plan out the pattern so that you get the right style that you want but you do have enough beads here that you can actually you know even make another one or anything like that so you can use those in other projects but you will get plenty of beads to complete this you just need to be careful of the pattern that you want to achieve okay so I recommend letting this dry fully before you do this next little step but just to show you I'm gonna trim off those little tails there and you see that you have just a little bit of the trimmed tails so you'll be able to add a couple of rows but just be careful not to add too much because you won't have as much Griffin silk and then I'm gonna leave this without adding that extra knot here down at the bottom so just go ahead and take your scissors come in here and give that a nice little snip and we are all done so thank you for watching you can find all of these kits and their refill kits by heading over to beadaholique.com you

Customer Reviews

Based on 3 reviews Write a review

You recently viewed

Clear recently viewed