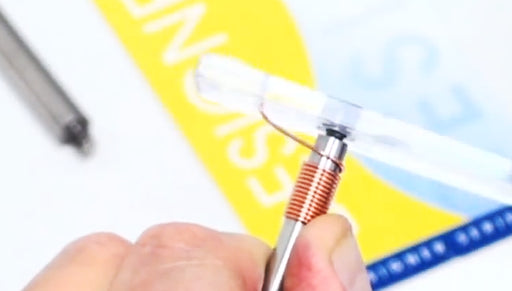
How to Make Earring Hooks with the Easy Ear Wire Maker

SKU VID-0307
Designer: Andrea Morici
Making your own earring ear wires can be fun! Beadaholique's Andrea shows us how to use the Easy Ear Wire Maker to quickly, easily and economically turn out as many identical ear wires as you need. We advise using 20 or 21 gauge wire for earring wires.
Audio Transcript
Note: This audio transcript is auto-generated and may not be completely accurate.
Today I'm going to demonstrate how to use a little gadget called the Easy Ear Wire Maker. And it's very fun and easy to use and I think once you get the hang of it you're going to really like it 'cause I know I do. To begin with I'm using twenty gauge wire and just for practice and using artistic wire before I move on to your precious metals such as sterling silver, fine silver or gold filled. So I picked this lovely peacock blue color and I'm going to quickly straighten it using a pair of nylon jaw pliers. I'm going to insert this wire into the measuring groove on the easy ear wire tool. Use your flush cutters to cut off a measured piece of wire. Take that premeasured piece of wire and make sure your machine is in the start position. Which means that this little gadget right here is the kicker it's called, that is parallel to the measuring groove and that the other part of it, this handle, is at a ninety degree angle. Insert your wire so that it is laying on the kicker and ending right where the serrations end. Now you're gonna take this clear disk and as you can see it's got a little metal pin on it. And the little metal pin fits right in the this little crescent shape right here. And snaps on like that. Holding firm on my wire and I'm going to twist counterclockwise on the clear disk until you feel some resistance. So right about there. And I'm going to remove my finger from the wire and gently hold on the clear disk and then use the handle to rotate the entire thing to the right. You're gonna notice that the kicker is gonna go to the left slightly at the very end of it. And that's all there is to it. And you remove this clear disk. Remove your newly-formed ear wire. Once you've removed your ear wire from the device, you need to do just a couple more things to it. If the wire that you're using is soft such as copper, sterling silver, you're gonna want to work harden it. Which means you're gonna want to tap it with a chasing hammer on a bench black. Or you can use a device called a Wire Whacker. The second thing you need to do is get rid of any rough edges on the edge of the wire, the part that's going through your ear. And you can do that by simply using a diamond file and just gently removing the rough edges. Or you can use this handy little thing and this is called a Cup Bur. It has just a little filing cup right on the end. The wire goes right in there. You just give it a few twists and it is all set to wear. That will help strengthen and firm up your wire form. And that's it. Go to Beadaholique.com for all of your beading supplies needs!

You recently viewed

Clear recently viewed