
|
Open Back Bezel Pendant, Circle 25x30.5mm, Silver, by Nunn Design (1 Piece) SKU: PND-08249 $3.99 |

|
Wire Elements, Tarnish Resistant Silver Color Copper Wire, 26 Gauge 34 Yards (31 Meters) SKU: WNT-2630 $9.75 |

|
Vintaj Special Edition - Wire And Rivet Flush Cutter SKU: XTL-5606 $10.99 |

|
Baby Wubbers Quality Fine Chain Nose Jeweller's Pliers SKU: XTL-0020 $32.99 |

|
Eurotool Nylon Jaw Pliers Chain Nose- For Scratch-Free Wire Work SKU: XTL-0074 $14.49 |
Related Videos

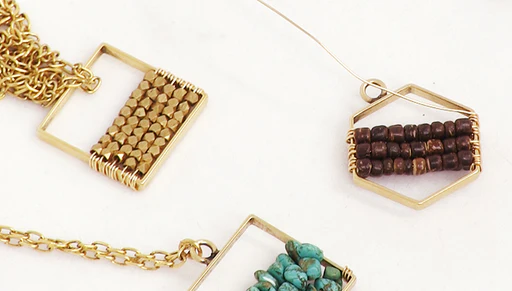
How to Wire Wrap Beads onto a Nunn Design Open Frame Pendant
In this video see how to wire wrap beads onto a Nunn Design open frame pendant. These open frame pendants are soldered completely around and have a...
View full details

How to Wire Wrap a Bail for Gemstone Donuts
In this video see how to wire wrap a bail for a gemstone donut. The technique in this video uses 20 gauge twisted artistic wire, but you can use wh...
View full details
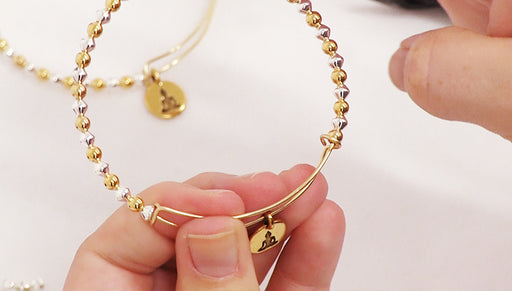
How to Add Beads and a Charm to an Expandable Charm Bangle made using the Artistic Wire 3D Bracelet Jig
In this video, you will learn how to add beads and charms to an expandable charm bangle made using the Artistic Wire 3D Bracelet Jig.