Audio Transcript
Note: This audio transcript is auto-generated and may not be completely accurate.
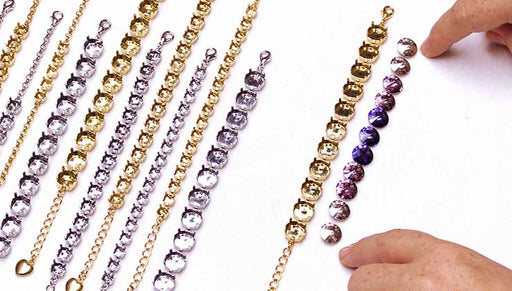
Hi, this is Kat with beadaholique.com of my stones while they're not set in there just yet I just wanted to kind of get the design set in my mind so we are gonna be using this beautiful graduated crystal pendant there so you can see it in gold that I'm using and this is actually going to be the version in silver so you can just see that it's a nice connector and we have those nice big loops up at the top to connect it to our finished chain necklace that I have here as well but this also works if you just want to do a single stone we have some different shapes and sizes here now when you look at beadaholique.com and you look for your geeta setting it'll tell you the exact Sourav Sookie crystal that fits inside so there's no guessing involved now today I'm gonna be using the prong settings but we do also have a little connector here that just has a cute little well in it so that's you're just gonna use some e6000 for that one alright so I have my stones all set and ready to go so I'm actually gonna kind of take them out here and just sort of set them to the side there we go and what I want to do for this particular connector is I want to set that center stone first so the only tools that I'm going to be using today I have some popsicle sticks and then I have some flush cutters and a couple pairs of chain nose pliers just to help me when I get to that center part with that chain alright so we're gonna actually just start by taking our popsicle stick now this is something that's really great to use because it won't hurt the stones at all so you can press pretty hard but you have that nice sort of malleable wood piece alright so again if you're doing this piece I recommend starting with the center stone so I'm just gonna pick it up and all I'm gonna do is I'm gonna do a kind of rolling motion on top of that prong so as you can see because of the way the prongs are set I just need to kind of get my little popsicle stick in there and just kind of roll it over the top there to just sort of help it set over and then I'm gonna move across the way and just roll it again there we go so you can see that they've sort of bent in there all right and now this is where it helps to be both right and left-handed but I'm just gonna kind of come over the top here and just kind of roll that down on top and then do the same thing on this side so you just kind of work your way around and if you notice that some aren't as laid down as you like them to be just go ahead and go back with the popsicle stick alright so he's in there nice and good all right so now I'm gonna move to one side and I'm gonna set the next size over here so just kind of place that in there and the same thing we're just gonna hold it and kind of get our popsicle stick in there and just sort of Bend that prong down move across the way and Bend that one in that one looked really really nice that one went very easily for me move across the way here and again you just have to kind of just be gentle with it this is why I wanted to do this one it's a little bit more complicated all right that one's giving me a little trouble so I'm gonna actually just place it down there we go and just roll it in all right you just kind of got to get the right angle with your popsicle stick so sometimes you just got to put it down and figure it out all right so that one's in there nice and tight so now I'm gonna move across the way and I'm gonna go to my other setting here on the other side and again just sort of making sure that it sits nice nicely in there there we go there we go all right and we're gonna do the same thing just rolling those prongs in and you can choose which ever colors you like and I just love this one because it gives you the option for three or you could even do five different colors as well alright and now to the outside here we're just gonna repeat that one more time this one might be a little easier cuz those prongs are on the outside for me and just make sure you got a good grip on your stone there we go across all right now this one's a little tricky there we go because it kind of comes from the inside there so just be patient with it yeah there we go and that one is in there nice and tight and last but not least my other stone over here on this side yeah we're just gonna set him in there and get that turned down you can also roll it kind of away from yourself as well feel free to just take your time with it just making sure that you get a nice coverage on those prongs and again we're getting to that little tough one that's on the center there but the popsicle stick can really get in there this is where you don't want to use fire scoops because I probably would have just scratched my stone but because I'm using the popsicle stick it's much softer you can just see that I you can just bend it in your hand and you can actually see that I have some little divots on my popsicle stick now but no stones were harmed and everybody is nice and tight in there so that is how you do the setting part so the next part that we're gonna do is we're just gonna take a finished chain necklace here and I'm gonna come in with some flush cutters and I'm gonna find the center link and I'm just gonna snip that so that I get a nice little connector there alright so now what I'm gonna do is I have some oval jump rings here and opal jump rings are really great to use with this type of technique just to kind of keep that nice elongated chain happening there so what I'm gonna do is I'm gonna come in these are 21 gauge 3 by 4 millimeter if you're curious I have my chain nose pliers and my bent chain nose pliers so I'm just gonna give it a little gentle twist I'm gonna add it to the last link of the chain there now this is a tiny Rolo chain but it does fit and then what I'm gonna do is just string on our link there come in with my pliers and I wanted to use a nice small sleek jump ring for this there we go perfect so just close that right up and now we're just gonna simply repeat on the other side here there we go and I find it because the chain is so tiny I want to hook it on to the chain first I'll just make it a little bit easier alright there we go and then slip it on to our connector and now just come in and close that it so now you have a really beautiful little focal necklace there that was really easy to make and this is such a wonderful line to be able to customize again you can choose your favorite stone you know you can just do one big stone you can actually link some of these together so if you want to kind of create your own focal connector you can do that as well I hope you enjoyed this video you can find all of these supplies by heading over to beadaholique.com and if you're new here be sure to hit that subscribe button below you

You recently viewed

Clear recently viewed