
|
EuroWood Natural Wood Beads, Round 6mm Diameter, 200 Pieces, Multi-Colored SKU: BWD-1028 $6.29 |

|
Silver Plated Open Jump Rings 5mm 20 Gauge (100 pcs) SKU: FJR-5150 $5.39 |

|
Open Eye Pins, 2 Inches Long and 22 Gauge Thick, Silver Plated (50 Pieces) SKU: FHP-6267 $3.89 |

|
TierraCast Alphabet Charm, Uppercase Letter 'A' 16.5x11.5mm, Antiqued Silver Plated (1 Piece) SKU: PND-0860 $2.69 |

|
TierraCast Alphabet Charm, Uppercase Letter 'C' 16.5x11.5mm, Antiqued Silver Plated (1 Piece) SKU: PND-0862 $1.99 |

|
Earring Findings, Leverback 13x11mm, Silver Plated (25 Pairs) SKU: FEA-6005 $18.29 |

|
Bright Silver Plated Bicone Beads 4mm (100 pcs) SKU: BMB-1334 $7.39 |

|
Silver Plated Rolo Chain, 3mm, by the Foot SKU: CHA-9970 $4.49 |
Related Videos

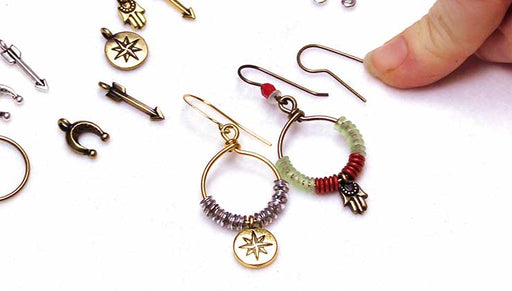
How to use a TierraCast Beadable Wrapped Wire Hoop to Make an Earring
In this video learn how to use a TierraCast beadable wrapped wire hoop to make an earring. At first glance these hoops look like they have wrapped ...
View full details

How to Make the Wanderer Memory Wire Bracelet Set
In this jewelry making how-to video you will learn how to work with memory wire and how to make a gemstone chip memory wire bracelet accented by Ti...
View full details

How to Make the Tanzania Bracelet
In this video you will learn how to make the Tanzania Bracelet from start to finish. This design uses Zola Elements charms and connectors as well ...
View full details