How to Make a Beaded Connector Link

SKU VID-1227
Designer: Alexandra Smith
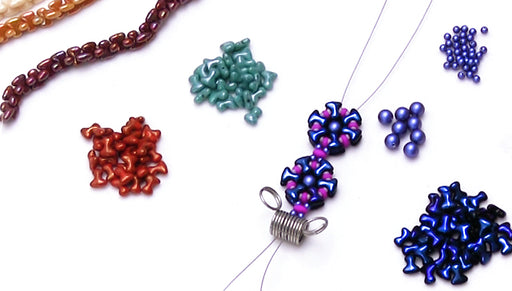
In this video, you will see how to create from start to finish the Looplink Earrings in Champagne. This project features beaded connectors made of Toho Demi Rounds, CzechMates 2-hole beads, and Austrian crystal pearls.

The brand name for the crystals shown in this video is no longer available. High quality Austrian crystals are now available under the PRESTIGE™ Crystal Components line.

FEATURED IN THIS VIDEO
Audio Transcript
Note: This audio transcript is auto-generated and may not be completely accurate.
hi this is Alexandra with beautiful week you'll see here I've designed a couple pair of earrings the loop great earrings using some Demi round Toho beads in the eleven oh and eight oh eight and four millimeter beads and so we're going to do this second earring to this pair the light gold version using this röszke faux pearls and I've got some dark matte copper tin rounds have almost a greenish tone that I like the Montana's and the eleven oats and then I've incorporated here some brick checkmate to whole beads which are just a little more angular than the checkmates to all Rula beads so they both work equally well for this design so to begin I've got my fire line here the for contest is good for these small projects and size twelve beading needle and I'm going to go ahead and string on nine of the 11 O's with eight of the a toes alternating I came up with this design to just try to figure out some alternative uses for beads and figure out all the fun ways that they can fit together count that you're going here - after I've got those on I'm going to put on one of my - holgie is just by going through either as a whole pull them all down I haven't bothered with a stopper bead because the first thing I'm going to do is just tie a real sturdy not create my first loop for this I like to start with the surgeon's knot where I go around twice and I bring the beads tight together and then double loop of the not really helps to keep it tight when I come around to finish it rather than having the beads kind of slip out got that tight nice little loop before I clip off my tail I'm going to leap through the hole of the two whole bead and just reinforce that not make sure it doesn't come undone on me so I'm going to do another knot on this side of the bead now I'm ready to clip a little bit I do the same thing on the other side the reason I do two separate loops is to make sure that the the knots are nice and taut and that I have good tension I'm good at the seed beads stay together in my designs i'ma do the same thing get nine of my eleven O's and eight of my a toes slide one onto my needle these would also lend themselves well to necklace building so I have a design in mind that incorporates chain between yeah many do I have there just one more 11 oh they'll be ready - lets go to the second hole my tool beat I'm just going to get a same thing bring my end around once and twice then I take connection here again and you know instead of clipping like I did before I'm going to go ahead and add my to formula meter beads in between so first let me get this tail out of the way I'll take up my 4 millimeter so pearl place in between by looping threading the needle through the other hole of my brick bead coming around and the second one through the second hole again just again to make sure it's strong and so that the holes end up straight up and down I like to double back through the Pearl and do sort of a almost like a square stitch I'm coming through the Pearl and through the second hole of the bead which is better to purl one more time to get the hole facing the same way just finish it off here I'm going to go threads finishing on my Danny round before I tie my knot twice around once I'm finished with this we'll hang the 8 millimeter grenade and put on that earring hook thread come we did to show you this thing I like to do with extra bits of wire which is to create my own head pin I've got about a three-way intersection here that I'm going to grip it's my round nose pliers and create a little loop on the end just tuck it flush against itself you can tighten it up so it's a good sturdy loop there turn my bead on it gives you kind of a artisan crafty look I like that - make my loop a good size so I'm lifting it up towards the back of the tool so that it will string over my Demi round when I'm connecting it on and complete my wire wrap by gripping flat here again I like to create a bit of an artisan look by nesting the wire back over itself after I've done my initial coiling the extra now I'm ready for my third wire again I open wide to the side so that it will accommodate my bead and it's going to rest just between those two top 8 o beads like so there's the loop link earrings these project bundles and all the components are available at beadaholique.com thanks for watching

You recently viewed

Clear recently viewed