
|
Eurotool Super New Glue - Heavy Duty Adhesive - 3 Gram Bottle SKU: XTL-1059 $7.45 |

|
E6000 Industrial Strength Glue Adhesive (0.18 fl oz) SKU: XTL-1054 $2.99 |

|
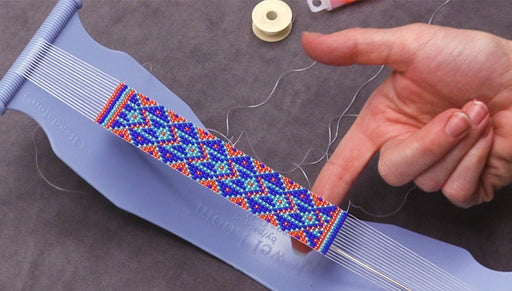
Beadalon Jewel Loom Kit - Weave Necklaces Bracelets And More! SKU: XTL-6119 $19.99 |

|
The Beadsmith Tools, Thread Snips 4.25 Inches Long (1 Piece) SKU: XTL-5614 $2.85 |

|
Fiskars 5 Precision Tip Scissors - Super Sharp SKU: XTL-5700 $7.45 |

|
Tulip Loom Work Beading Needles 90x0.5mm - 3 Needles SKU: XTL-3021 $5.99 |

|
NYMO Nylon Beading Thread Size D for Delica Beads "Grey" 64YD (58 Meters) SKU: XCR-8903 $2.79 |

|
Toho Round Seed Beads 11/0 #611 'Matte Opaque Gray' 8g SKU: JSK-0112 $2.75 |

|
Toho Seed Beads, Round 11/0 Semi Glazed, Navy Blue (8 Gram Tube) SKU: JSK-0407 $2.99 |

|
Toho Seed Beads, Round 11/0 Semi Glazed, Rainbow Clover (8 Gram Tube) SKU: JSK-0415 $2.89 |

|
Toho Round Seed Beads 11/0 #53F 'Opaque Frosted Gray' 8g SKU: JSK-0248 $2.55 |
Related Videos


How to Repair a Dropped Bead in Loom Work
As you are doing bead looming, it can easily happen where a weft thread accidentally misses going over a warp thread and the result is a dropped be...
View full details

How to Finish Off Traditional Loom Work and Add a Slider Clasp
In this video learn how to tie off your loom warp threads and add a sleek slider clasp. This is an easy finishing technique that gets around the co...
View full details
How to Tie Off and Add More Thread in Loom work
In this video learn how to add more thread in the middle of your loom work and then go back and tie off your old thread. This is handy if you are m...
View full details