|
Czech Glass SuperDuo, 2-Hole Beads 2x5mm, 8 Gram Tube, Dark Neon Emerald SKU: BCT-566 $4.25 |

|
SuperDuo 2-Hole Czech Glass Beads, Dark Neon Purple, 2x5mm, 8g Tube SKU: BCT-564 $4.55 |

|
Toho Round Seed Beads 11/0 #PF557 'Galvanized Starlight' 8g SKU: JSK-0277 $3.95 |

|
Czech Glass Druk Round Beads 4mm Opaque White (100 pcs) SKU: BCP-7405 $2.99 |

|
Slide Tube Clasps, Two Rings Strands, 22K Gold Plated (4 Pieces) SKU: FCL-5501 $5.79 |

|
FireLine Braided Beading Thread, 4lb Test and 0.005 Thick, Crystal Clear (15 Yards) SKU: XCR-1280 $6.95 |

|
Fiskars 5 Precision Tip Scissors - Super Sharp SKU: XTL-5700 $7.45 |

|
The Beadsmith English Beading Needles Size 12 (4 pcs) SKU: XTL-3006 $3.99 |
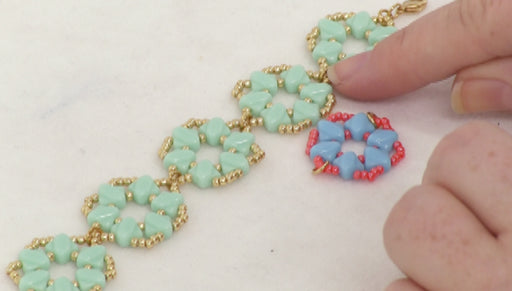
Hi, this is Kat with beadaholique.com odda fication to account for the two holes and I wanted to make sure that you didn't really see my thread paths so I'm going to show you kind of how to do that in this video so to complete this project you're going to need fireline crystal in a size B I'm using size twelve beading needles you'll need a pair of scissors here I have a two hole tuba clasp and they slide out just like so I'm using 11 o tuhoe seed beads four millimeter round druk czech glass and then over here I have the super duos and these are Czech glass and I have these in a beautiful dark emerald neon today so I have my needle and I have a length of thread you will need to probably add on more thread as you weave we do have a separate video showing you how to add on and weave in your your tails and thread but for now I'm just going to start with this length and then we're ready to go so as I previously explained what we're going to be doing is we're going to be building a little unit and then building on to it and keeping going as if you're familiar with right-angle leaves you'll understand sort of how this works so to begin what I'm going to do is I'm going to pick up one seed bead one four millimeter bead one seed bead one two hole bead another seed bead another four millimeter another seed bead I'm going to push these down off my needle and now I'm going to pick up another two whole bead another seed bead another 4-millimeter another seed bead push those down another two whole a seed bead four millimeter a seed bead and finally another tool bead so what you have here is you have starting with a seed bead and you have your basically alternating until you have four of each so what I'm going to do now is I'm going to move this towards the end of my thread I know the thread is hard to see because it's crystal on this white background but you'll see in just a second and what I'm going to do is I'm going to because I'm starting I'm going to leave a fairly long tail because as you notice the tail will come out here and that's exactly what I'm going to use to attach my clasp so when you first begin you're going to want to leave a little bit of a long tail as you get to the center you don't need to leave as long a tail because you'll just end up leaving that in it's a little tip for you so you're going to take your needle and you're going to go back through the first seed bead four millimeter bead and seed bead that you storm and what you're going to do is you'll see and it will kind of come together as a nice little unit some people like to tie a knot at this point I personally don't so I'm just going to keep and I'm going to leave all the way around one more time I'm just going to follow my thread path and just go back through and that is going to secure it for myself and I personally like to make this first unit really tight I think it just helps give the structure to your entire bracelet so I get my thumb out of the way for you and let's back up to the top there we go now as you can see my two threads have come together here now is where I'm going to tie a knot just to secure that in place just a simple overhand knot to give it a little bit of strength there we go now it's nice and tight so now what I'm going to do I have my tail here and my thread coming out here I'm going to see if I can show you this easily I'm going to sort of bend my two whole beads so that they come into the center just like so I'm going to take this thread and I'm going to go into that second hole in the second hole bead right there keep my tail out of the way and pull that in got my tail stuck in there just push that through there we go okay so now what I'm going to do is I'm going to pick up one seed bead and I'm going to go through the second two whole bead pick up another seed bead and go through that second the third excuse me the third to hold to hold seed bead oh it's tongue twister pick up another seed bead and go through that fourth one and then pick up one more and I'm back home and now what I'm going to do is because I want to leave this thread where it is just flip that around I want to leave this thread where it is so that I can attach my clasp so what I need to do with this thread is to get it around to where I can build on a second unit so all I'm going to do is I'm going to thread it back down around that same seed bead and go through the next seed bead and I'm just going to work it all the way around that bottom again until I get to where I want to be now this is where it's a little bit of a modified right angle weave a right angle weave tends to be a little bit prettier but just because you have to keep turning the thread in this one I'm just going to kind of leave it as such so now what I'm going to do this is one unit now I'm going to build on a second unit so to do that I'm going to pick up one seed bead and 1/2 whole bead one seed bead one four millimeter seed bead a two-hole let's slide that down off my needle seed bead four millimeter seed bead two hole bead seed bead four millimeter seed bead and you'll become here slight let's down and now as you'll see is I'm just going to pull it it'll come right back in there and you'll notice that I'm missing a seed bead so you have one two one two so I need to pick up one more seed bead to make sure that you kind of double up your seed beads on that little unit so now I'm going to come back through and I'm going to go through this four millimeter bead just like so and now I'm going to go through the seed bead and the two whole bead come up and now I'm just going to go straight back through that same two hole bead and this is where I am going to begin adding in my seed beads this becomes a little easier once you have a better structure there we go and go ahead and pick up one of your seed beads go through the next two whole bead another seed bead and flip that next to hope eat it and go through it one more seed bead through your next two will be one more C bead your next and last two whole bead so you see how we're sort of building those structures on so now I'm going to make it nice and easy on myself and turn around in this two hole bead and then go through this seed bead and this four millimeter bead and now I'm all set to build my next unit right here so I'll just show you one more time okay so now I have that strong I'm just going to go back through that four millimeter bead and pull tight and go through the next seed bead and the next two whole bead do my turnaround in that two hole bead and then pick up my seed bead go through the next two whole bead pick up a seed bead and through the next one and through my last one there and now what I'm going to do is I'm going to do something a little different I'm going to go through that Center path until I get to that third - hole bead and that's where I'm going to turn around okay so now going back through the two hole bead and now I'm going to come back through here and I'm going to go through the seed bead and the formula mini bead right next to it so now you're going to end up doing something just a little bit different and what you're going to do is you're going to pick up a seed bead a two hole bead and a seed bead and now slide that down flip that around so you can see there we go so now as you'll see this will become that unit right there so I added a seed bead a two hole bead and a seed bead and now I'm going to go through this four millimeter bead right here and this will help to link up that unit right there so now you just continue to build that unit and I'll finish this last one up real quick and see I brought my unit together one more time don't forget that last seed bead and through that four millimeter bead right there and one last time I'll just show you real quick the basic technique of this weave in particular is just to kind of keep following that thread path and just keep kind of moving in that same direction and then when you get to that to whole bead you just turn it around and go back the other way and then you'll get back right on track and go back when you're finish adding the center unit oops make sure you are going through the right way and that two hole bead and they should sort of naturally bend in for you okay so now what I'm going to do is I'm going to show you how to really quickly attach your clasp I'm just going to work my thread around and let's say I have come to the end of my bracelet here so now I'm going to attach the clasp and I'm basically going to be making two loops with seed beads one right here and the other right here so go ahead and pick up three seed beads and slide those down and now what you're going to do is you're going to take your clasp and I'm just going to go up through one of the loops and now I'm going to pick up three more seed beads and I'm going to go back down through this seed bead right here and the two whole bead next to it and you'll just see that just kind of come together and I'm going to go back and basically work my thread across I'm going to create a little bridge right there to get to my second loop and now I'm just going to repeat that process picking up three seed beads come on well better go through that loop pick up another three seed beads and go back down into that next four millimeter bead right there now what you're going to do is you're just going to turn the thread around and I would recommend retracing that path just for a little extra security and then you're going to tie off and weave in your threads and that is how you do the right angle weave modified version with a two hole bead and you can find all of these supplies and more videos at beadaholique.com you
Related Videos


How to Bead Weave a basic flower using the Kheops Par Puca Beads
In this video, you will see just one of the many ways you can bead weave with the Kheops Par Puca Triangle Beads. Using Toho 11/0 seed beads and C...
View full details

How to Attach Loom Pieces for Longer Projects
In this video you will see a basic technique to attach to pieces of loom work to make a longer project. This is perfect for making hat bands, wrap...
View full details

How to Make the Camille Bracelet
In this video you will learn how to make the Camille Bracelet, using Czech Glass 2-Hole Silky beads and Toho seed beads.
