
|
Nunn Design Antiqued Gold Plated Collage Bracelet Lrg 18mm Round -7.5Inch (1 Piece) SKU: AXC-9460 $14.99 |

|
Nunn Design 2-Part Epoxy Resin Kit, Jewelers Grade Clear, 8 Oz Kit SKU: TRC-14 $44.09 |

|
Nunn Design Glue Adhesive 2 oz. - For Patera Findings (1 pcs) SKU: XTL-1031 $17.49 |

|
Eurotool Oval And Circle Template Set - Assorted Sizes SKU: XTL-0163 $9.99 |

|
Fiskars 5 Precision Tip Scissors - Super Sharp SKU: XTL-5700 $7.45 |

|
ICE Resin, Angled Paint Brushes for ICED Enamels & Paper Sealant (6 Pack) SKU: XTL-880 $3.49 |
Related Videos

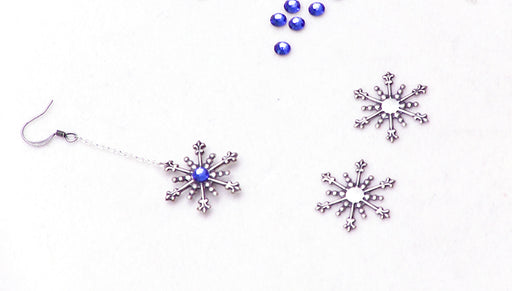
How to Make the Twirling Snowflake Earrings
In this video you will see how to construct the Twirling Snowflake Earrings using simple stampings and Austrian crystals.The brand name for the cry...
View full details
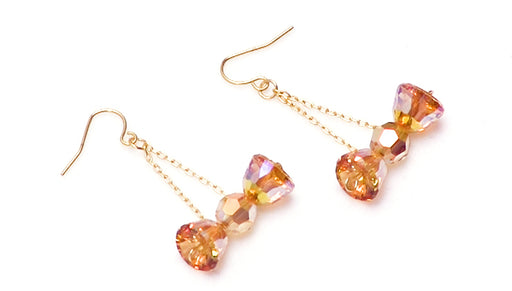
How to Make the Butterscotch Candy Halloween Earrings
In this video you will learn how to combine Austrian crystal beads and wire to create a pair of earrings that resemble dangling butterscotch candie...
View full details