|
CASTIN CRAFT Casting Epoxy Resin Opaque Black Pigment Dye 1 Oz SKU: TRC-86 $10.99 |

|
CASTIN CRAFT Casting Epoxy Resin Opaque White Pigment Dye 1 Oz SKU: TRC-87 $10.99 |

|
Open Back Bezel Pendant, Square 14.5x18mm, Antiqued Gold, by Nunn Design (1 Piece) SKU: PND-08263 $3.69 |

|
Sharp Flush Cutter Pliers - For Cutting Beading Wire (1 Piece) SKU: XTL-5600 $23.99 |
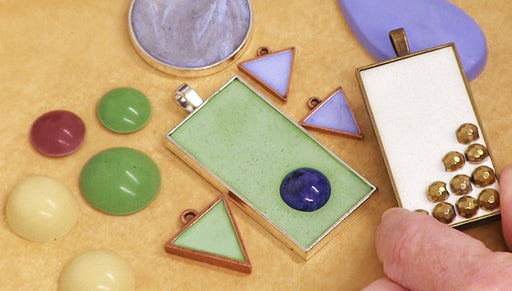
hi this is becky nunn with nunn design and i'm in the studio today with beadaholique to show you how you can colorize resin and color-block it like these samples that we're seeing here this is the piece that we're going to be making with the open frame hexagon piece and another smaller hexagon piece for this video you will need to have already watched the video showing how to apply the tape on the backside as we pour in that colorized resin you're going to need to have that barrier you're going to also want to watch the Bezdek video showing how to colorize the resin and in this case I colorized it with a black pigment and a white pigment you'll also need some flush cutters to cut off the loop and a couple of stir sticks and a toothpick the first step we're going to want to do is we're going to want to trim off this little loop on the top and that is what's going to fit right inside of the other open frame pendant so using your flush cutters you're going to want to just get right flushed to that base I always try to hold my piece or cut my piece so that when that piece comes off it doesn't go shooting across the room and maybe smack your coworker or something fun like that that's not so good so just go ahead and cut off that edge and don't worry too much about it if you don't get it exactly flush because we're going to be embedding that and covering it up with the resin once you have that loop cut off you're going to go ahead and place it inside wherever you would like it to be I kind of want mine to be maybe a little bit off-centered and kille turd a little bit like right there let's just try that and then you're gonna want to press it down and burnish it onto that piece of packing tape and that will create a nice even seal around the bay the whole piece and that's what will prevent your resin from spilling over into the other sections when I'm working with my resin I usually always like to put it on a business card because it's easy then to pick up and transfer around and not worry about touching the resin or spilling the resin over so go ahead and place it on a business card I think because I'm gonna be working black on black maybe I'll use this side of the card so it'll be easier for us to see so I'm going to put the black around the outside and the white and the inside so let's start with the white I've already mixed a two-part resin and then I added a small amount of pigment to create this nice white you're going to want to go ahead and pick a little tiny bit like this and I always under pour because you can always add but if you have too much it's harder to clean up plus you want to just pour a small amount at a time so that you don't worry about over filling or getting any on that edge because you're going to want to have that hexagon shape on the upper lip be nice and gold I mixed my resin a while back so this is starting to get a little bit thick so when you're doing yours don't worry if it's not quite this thick but you can see I just poured a couple drops a couple drops and as I wait you see how that just kind of bled out to the sides and it was slightly dumb and now it's gone flat then you're gonna go ahead and take your black and you're going to do that exact same thing but now on that outside edge this is actually let's see it's looking a little bit more charcoal than black so if you wanted it to be a jet black you would add a little bit more pigment so now I'm just going around and letting it drizzle right into the base and you're going to want to just take your time so just add in resin and like I said this is getting thick so it's going a little bit slower if you had just freshly poured your resin and mixed it it would be a lot more runny but by going slow I can really control where I'm placing the resin and also really making an effort not to get any on those side edges I'm going to stop and with my toothpick I'm gonna go in and move that resin around a little bit more manually and see how that cut edge was right there see I'm now covering it up so look at this when I released I had my fingernail I had my finger on that plastic I pressed down and another contact point so I didn't lift up the piece altogether I'll show you that again it's just a nice little trick so when you're working with the resin but by moving it to the different angle I can see these other side edges really easily so here I'm going to do it again see I'm going to press down with my toothpick and lift my finger rotate it and now I'm ready to probably add a little bit more resin so the side that we're seeing right now that's facing up this is actually going to be if you want it to be the back side so if you did by chance get any on the the metals right here that either the copper or the gold it's not going to show but if you wanted this to be the front side or as the piece flips over and you want the front side to present nicely but if you do spill it it's going to be just fine I have a tighter fit right here so that might be something that you want to take into consideration when you're laying your inside piece into the design is that it's going to be a little bit more tricky to maneuver if you have a really tight fit right here if you want to you can go ahead and continue to fill the piece because you can see it's kind of going a little bit concave and that's what resin does and as you pour more in it'll either level off or it'll start to dome you won't want to put too much in because then it'll start to move into the white so we're gonna stop there and this piece here is one that I'd already done and so it is already cured so you can see that the piece on this side has a little bit of a concave this area right here had a little bit more so even kind of went over the lines a little bit but that's fine because this is the side that we're really going to be focusing on so once the piece is done you're going to want to just remove the plastic tape by peeling it off like this and if you have any residue that you have on the backside you can either use your finger to kind of rub it off and it'll kind of ball up the plastic the little extra bit of adhesive will ball up or you can use like a fingernail polish remover or something like that to remove that extra goo and that is how you make a blocked colorized resin piece this is becky nunn with nunn design on location here at beaut AHA leak and this was a super fun project with Anne glad you joined me thank you you
Related Videos


Design Ideas for Filling Nunn Design Bottles
The Nunn Design bottles featured in this video make great focals and can hold a wide array of 'treasures' including everything from glitter to a ro...
View full details

How to Add Patina and Magic-Glos to a Vintaj Pendant
Learn how to create a high gloss finish on pendants and charms by first applying Vintaj Patina and then adding a top coat of Magic-Glos UV Resin.


How to Add Color Pigments to Concrete for Jewelry
Learn how to add color pigments to your concrete to make a wide array of jewelry designs. This is a very easy and forgiving technique.
