How to Apply Resin to Objects with Uneven Backs and Stamping Blanks

SKU VID-0465
Designer: Julie Bean
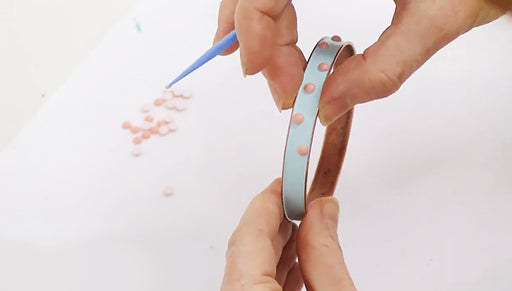
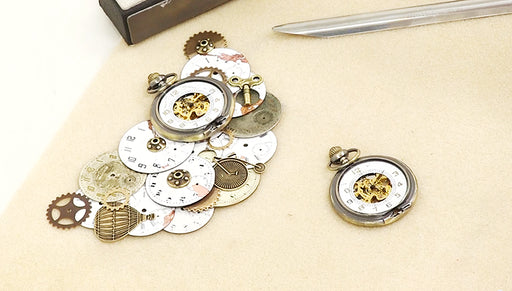
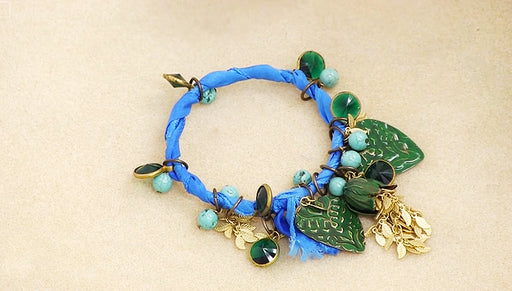
This video was created to fulfill some of the requests we have been getting asking how to apply resin to objects which have uneven backs (such as bezel buttons) and objects which do not have sides, such as stamping blanks.
Audio Transcript
Note: This audio transcript is auto-generated and may not be completely accurate.
Hi I'm Julie with Beadaholique.com and I want to show you have to apply resin into some unusual objects. So if you've familiar with working with resin and watching our videos you've probably seen bus fill things like bezel pendants and bezel earrings and the common thread is usually just a bezel and you'll see that a bezel here has these nice sides around it and a flat interior surface this is a bezel button and so you might be wondering how do I fill a bezel button because as you know if you work with resin you need to have a flat parallel to the table and needs to be on an even keel and a button is going to tilt, your resin is going to spill out and same thing with these little discs here. I've had people say how do you apply resin to an object that doesn't have a bezel ring, how do you do it if it's just flat and there's just a straight edge I'm going to show you how to apply resin to both of these objects which I've gotten some requests for so let's begin the first thing you're going to need is a box. I have a Beadaholique.com shipping box but any box will work go ahead tape it up and then don't put it this way because it's uneven. You wanted to go ahead and be on its side that's a nice fairly solid it tilt's a little bit but it's a fairly solid surface then if you're going to do a button you're going to take an object such as this pen punch the surface of the box you've created a little cavity that you can put your button into and suddenly you have a nice flat surface to pour the resin into now for these objects that have no bezel here's a great tip from the Beadaholique.com customer service department, actually this is Jason's tip and what he says to do is push the push pin into the cardboard box apply a little bit of Crafter's Pick glued to the top of it then rest your object on top and the reason you want to elevate it is because we're going to be relying on surface tension to keep the resin in place and keep it from spilling over the edge you can do this with it flat on the surface like that but I find it just works a little bit better when it's raised up so I prefer to do it that way now all of my images have been prepped. I want to briefly tell you what I did to prep the images. You can watch one of the other videos on beadaholique.com which fully goes over prepping images for use with resin, how to use resin and how to use other types of resin but for the purpose of this video I'm going to tell you. So what I did with a object like this was I just applied Crafter's Pick on top of the surface flipped it over set it down on some collage paper and let it dry I then trimmed the collage paper so that's right up against the edge of my stamping blank put a little a dab of glue on top of this push pin and set it down like so and then once that was done I went ahead and I coated my paper and I did that with my buttons and with this little flat stamping blanks as well and I used three coats of Nunn Design sealant and made sure I coated the edges as well. It's really important that you use three coats let me show you how to do this techniques. I mixed up a batch of Ice Resin equal parts and you'll see that I'm not going to use all of this resin in this particular video so we do have another project in the background to use the leftover resin for gonna pick up some resin on my popsicle stick which was my stir stick and I'm just going to carefully drip it in little by little into the center of the button. You'll see it spreads out to the edges you won't be able to see this time. I'm actually going to ahead and hunker down and look at it from this way so I'm eye level with them to see if i need to add more so that looks pretty even to me. I do want to create an ever so slight dome so add a little bit more go to the next one and do the same if you see that it is sliding too much to one side rotate it a little bit without touching the resin to make sure that it is completely level it can take a little finessing but you'll get it add a little bit more one tip if you have bezel shapes like these. These are Nunn Design buttons and you see they're not really the size of traditional of a hole punch or anything if you put these down these down on a copier like this bezel side down, make a copy you can then go ahead and cut out the imprint that it makes and that you can use as a template for cutting out your shapes now when you have an object that does not have an bezel edge again pick up your resin on your popsicle stick you are going to go very slowly dripping resin into the center of the object spill out to the edges to not rush this process because again you're relying on surface tension here to hold to resin in place. If you apply too much resin too quickly it's going to spill over once these are fully cured you can just pop the thumb tact off the back because they just it's just Crafter's Pick glue that was holding it in place If you're ever unsure if you need to add anymore to this one just pause for a moment see how it spills out take that view of that eye level I'm actually quite happy with that so I'm going to stop and then you go ahead and use all this left over resin on another project because you cannot save mixed resin so if you want a more detail explanation of how to mix resin, how to use resin how to prepare your images definitely check out Beadaholique.com and all of our videos in our mixed media section on that topic but I hope this video helped answer some your questions on how you might fill something like a button that doesn't have a flat back or something that doesn't actually have a bezel edge that's just a flat straight drop edge so I hope you enjoy this video and that it answered some of your questions. Go to www.beadaholique.com to purchase beading supplies and to get design ideas!

You recently viewed

Clear recently viewed