Beadaholique Live Class: Mixed Media Jewelry

SKU VID-1311
Designer: Design Team
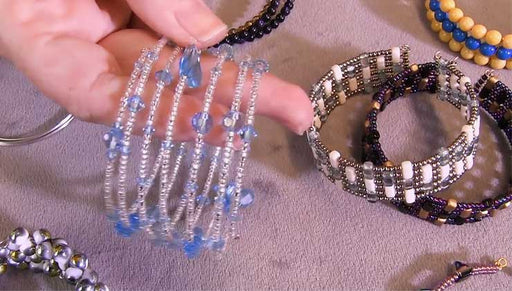
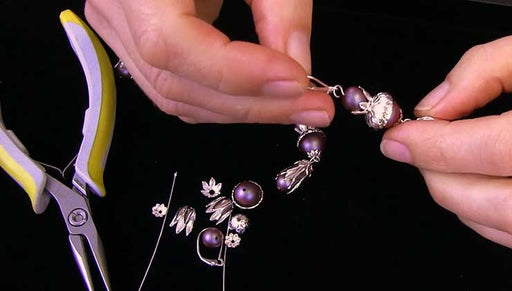
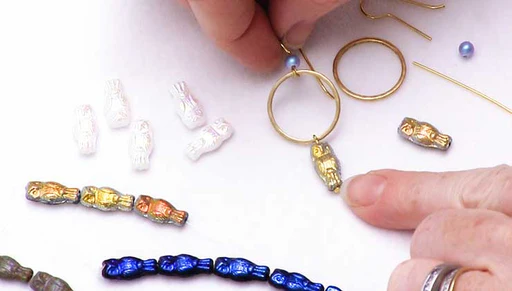
In this Beadaholique Live Event Event, join designers Kat Silvia and Alexandra Smith to learn all about mixed media jewelry. Kat and Alexandra will discuss and show examples of jewelry made with resin, concrete, epoxy clay, Mod Podge, Vintaj patinas, mica powders, and more. They will also do some hands on demonstrations of how these products work and answer a number of frequently asked questions.
Audio Transcript
Note: This audio transcript is auto-generated and may not be completely accurate.
hi everyone it is Kat and Alexandra and we are here for our Facebook live class all about mixed media so we have had a wonderful time sort of prepping a lot of items to show you and just to really get you started on mixed media if you're a beginner or if you're advanced this is a great technique to kind of learn I mean it's many techniques actually it's a kind of learn so we're just going to start and dive in but if you've joined us on our live Facebook class before you know that we have a giveaway for you so all you have to do is leave a comment in the comments below and we are going to give you an amazing prize package here and this is worth over $50 and this is sort of a little sampling of a lot of the stuff that we're going to talk about today so we have some diamond glaze we have some vintage patina you're going to get some art glitter as well and this beautiful fauna color and then we have some collage sheets for you to use as well and of course you couldn't let you go without getting some bezels some various things from the design here and then we also have some Sourav ski crystals and these are going to be great to use with all of your crystal clay and this is just a little selection of the crystals we have many more colors that you're going to get we're going to get you to have some of this crystal clay and this is the sparkle dust or mica powder and this is that beautiful pearl white color and you're going to also get a package of crystal clay in silver so this is worth over $50 of items so you can just leave a comment below and then at the end of our live giveaway we'll be giving it away the end of our life laughs we'll be giving it away alright I would love to get all that stuff right mostly new to me I can string and wire and weave all day but you give me glue and adhesive and I'm like how long does it take to dry is it going to stain my fingers is it toxic tell me about this stuff so here we are yeah so I want to dive in by showing you a technique kind of right away and what I'm going to be showing you here is using the silicone mold now I have a couple pieces here and I'm going to demonstrate how to use this and sort of as I demonstrate I'm going to kind of talk my way through it so first things first I am going to be a good girl and put on my gloves because you don't want to get the stuff on your hand and Alexander would you mind helping me sort of unpackaged this was the easy mold and this is a two-part silicon mold and what's great about this is that once you make a mold you can use it over and over again so it's really really kind of a neat product alright thank you alright so like I said it does come in two parts here and you're going to have the sort of white putty part and this is sort of component a and we have this purple putty and this is component B so what you're going to do is just take equal parts and you can see how big of a mold you want to make and you can see it just kind of comes out apart there may be a little too much let's put some back all right so all I want to do is kind of roll that into a ball there I think it's a little bit too much there there we go so I have one size of my wife go ahead and set that down and then I need two equal size of the Part B and this when I put them together this will create that chemical reaction you can see it's getting all of my gloves so you definitely want to use gloves because you don't want this all over your hands all right I'm just going to kind of compare I have a little too much purple there so I'm going to just pinch off a little bit and put it back in the box and just a little bit too much work okay alright so now I have two equal parts so go ahead and start squishing them together and your working time with this putty is going to be pretty tight so just go ahead and start working it in your hands aleksander would you mind just closing those up for me and you know the concern about getting equal parts of a and B is it it affects the drying time or inconsistency or both so a lot of what mixed media will do and this saying when we are going to talk about resin and crystal class is that it causes a chemical reaction so it's sort of like if you try to make a recipe and you use too much flour and not enough sugar you're not going to end up with the cookies that you want so this is just and you can kind of see I'm still working on it but there's a lot of striation in there and that's what you don't want so you want to keep working with it just a little bit more and I know I'm going through this a little bit quickly here we do have a full video showing you how to do this technique so definitely be sure to check that out on our instructional videos page but just to kind of get it going here you can start to see a lot of those disappear and you have one of those containers but I just had you close up we're not happy to flatten it yeah I'm going to use the back of this container and you can kind of see there's that nice little flat surface but I'm just going to use all right so I think that is good so I'm just going to roll it into a nice little ball there and I just have some waxed paper here so I'm just going to place that down and then I'm going to use the top here just to make sure that I don't get any fingerprints in there and just kind of smoosh it down and kind of peel it off there we go and now I'm going to take this button and press it down in to give a nice impression and you can kind of see the mold start to form up around it and I have these little toothpicks here to just help me kind of get that out really carefully the heat from your hands probably makes it stickier the sooner you're working with mm-hmm absolutely quickly yep it has that same kind of effect all right just kind of move that around there and then I'm going to take my open back bezel and Center it to the piece that I want and we go and just press it in and make sure it's nice and even all the way around now this bezel is nice and deep so I won't have any spillage to cerous but let me go I'm going to remove my gloves here for a second now that it's mixed it's less a concern right mostly it's that purple that really gets all over exact yeah so now so now you can touch it but what's great is you actually have a working time of about 30 minutes so you'll actually get a chance to see this dry and see the finished product now I do have an example here using the exact same button and bezel and this is a finished piece that our designer Rachel had done and this is what it sort of looks like when you're all set and done so if you put it like that and you fill up your resin and when you pop it out you're going to have that beautiful little impression there and the way she got that Sheen was to use them mica powder right yes and that's a great technique actually kind of get you can kind of see it creates a little window effect behind it but this is sort of a finished product welcomed us to remember - yeah she is the crystal clay Sparkle desk and just brushed it on with a paintbrush yeah it's so fun and as you can see this mold here this was done probably a couple weeks ago now but it's a mold that you can use again and again so this is one of those great little pieces we have a question so what is our questions so far hi Veronica I'm so glad you know you can use a lot of things in fact the bracelet that I was sporting earlier this is our Miss Bea bracelet and as you can see I actually used this in one of our molds here to create a sort of honeycomb effect and I have the necklace here to show you sort of how that sort of turns out so this is the necklace and I made this really kind of fun honeycomb and what's great is you can see on the bracelet that I have here it doesn't harm the bracelet at all the silicone mold does not stick to it so you can use household items you can use maybe something you got on a vacation a shell or the possibilities are endless and speaking of just sort of different little techniques to use I decided that I was having trouble trying to prop up one of my project to do a resin pour so what I did was I created a mold so that my resin piece would stay up right so that I could pour the resin in the back because one of the things you'll notice that we have a lot on our website is we tell you to kind of prop your work up and that's sort of a little technique you know because you want your resin to lay flat so this is one of those pieces where we had to just poke some holes through so that we could put earring backs in there or you can create a little well to put a ring in there because you want everything to stay upright and now that the function and purpose of pouring the resin in like this was to lay the the backing of earrings more flesh is it hollow down there yeah so if you look at the side version of this earring it is completely hollow on the back so I just kind of wanted to make the back a little bit more wearable for an earring and I noticed that when I just simply glued the earring back in there there was that big old well and it was actually kind of uncomfortable on my ear so there's a little technique of kind of adding a colored resin now I used the blue for the sky and I created just sew a little flat back so that when you wear it it's a little more comfortable or so so that is sort of just one of those things and I obviously made this mold before I added the pearl but just kind of showing you how it sets in there but you can use a lot of things with the silicone mold State ID by hanging your necklace back oh thank you for you have extra resin can you tell us about what you can do with that yeah so one of the things is that in order to get that chemical reaction that we often talk about we want to create at least one full cup of resin so you're going to create this whole cup filled with resin now your project might just be just filling that one little bezel and this is so much more than what you really need but you do need a good amount in order to get that chemical reaction so always have some molds standing by so here I have a couple cabochons that I made and this is just one of the molds here and I just added some glitter to one of my resin pieces and this one has a little bit of color to it so this is a great way to kind of get some extra resin and to use those pieces right here and these size these molds to fit bezels that we carry that you can get really creative with the type the decorative bezels that you put your resin into and make some really neat pieces that way yeah and definitely good for for custom pieces and bead embroidery around it so a lot you can really do with the extra resins but you don't want to just sit in your cup and go to waste because resin can be a little bit expensive if you haven't worked with it before but once you start working with it you'll start to keep buying it and keep buying it really good videos on how to oh yeah oh we have another question hi sherry yes so going back to I was sporting my gloves earlier I do also recommend getting a little mask to wear especially if you're working with resin when you're working with the silicone mold or some of the glues or adhesives you might not need this but it is always good to protect yourself and when your resin is drying you're going to want to leave it in a well-ventilated area because the fumes can be a little a little bit toxic but not dangerous please don't understand that they're dangerous it's just you might not want to eat where you're having your resin cool and cure but some yeah so just be careful and just take the right precautions you don't want to get any resin or anything on your hands so always having a nice big box of gloves nearby is a great thing I always look for sunny warm days to do this too because on rainy day just a little too humid so again our videos and the products to describe all of the the best ways to use them the safest ways to use them is there more that you want to describe about this mold or shall we move on to look move on to a table look I know let's move on to a different type of mold and this is something that you've actually worked with a little bit more than me a video we have on this is the silicone mold ez mold that uses a urethane fast cast resin and this cures in about ten minutes and so it's very quick and the application for this this was very experimental for us and so we came up with a few fun little molds using natural pieces found objects and things and that was that was neat but it says on the instructions that you don't need a mold release but a couple of recommendations in the comments of our YouTube video was that people thought maybe it would be a good idea so it's up to you whether you would want to do that so yeah that's a different entirely different kind of mold and resin project to do lots more to experiment with that yeah and what I love about the the blue the easy mold is that it's a paste so if you do have something that is a little bit more of an unusual shape and you want to get that 3d effect it works like a paste and then the urethane resin will come out white just like you have there and I think we haven't tried it yet but I think we're going to try to maybe add some paint to that and sort of see see what we can come up with and so some new videos on the way of course yes alright so continuing our little discussion about resin I just want to kind of move over here and talk about a few pieces but we do have another questions so let me kind of address that before I get into it hello Veronica Oh how'd it get a hole in it so for example this piece here actually had a hole in it so when the mold was cast we were able to keep the hole now if you're going to try to add a hole to something like this I I would read the instruction some yeah and I'm I'm thinking dremel tool yeah files different sorts of of fine drills would work and I've wanted to experiment with that but enjoy making it hasn't been as practical for us here so yeah because you can actually use we have a vintage metal file and you can actually use it you'll see there there's some sharp edges here and that's just because the way the resin was poured but to get that off you can just file it so a metal file works in terms of drilling a hole it really depends on the piece because if you're looking at something that's a little finer you're going to need a really delicate tool so that you don't crack this this is pretty hard stuff but you'd hate to kind of get your drill down in there honestly we had less look doing shallow molds of this type of resin this is more for larger pieces so I would recommend ya even on the Box they they do recommend this for more of three-dimensional large vieta's so these are that as small as you want to go with those mm-hmm but you know what I I will try to figure that out because that is a great question and you know especially because we're jewelry making here so we want to make sure that you can create a pendant that you can actually wear so I'll check into that because I you know we if you joined us on our memory wear class you notice that all of a sudden we had lots of memory wire videos and projects come out after the class because you guys inspired us so much so if you do have a question like that where we just don't have the answer but we shall find out yes and it also pretty relieved up that we could possibly use the type of bail that you adhere with glue so it didn't have a hole you could still glued the backing of a bezel that are a bail rather that would hold it onto a chain yeah that's actually that's a great idea could work yeah yeah so continuing on with the resin though I just want to kind of bring your attention over here and this is using some of the Caston craft colors and we do have transparent and concentrated pigments so you can see on this particular bracelet here I did a little bit of both so on this side is that opaque white and it's nice and flat and very shiny it almost has that kind of mammal look and then on the other side I wanted to do something that was a little bit more of a green button so I use that sort of transparent dye so that's just a kind of fun way to took two separate pours right because otherwise they got leaked out and so this is an idea for how how to manage these sorts of practical logistical issues yeah so you actually use it here with some tape yeah in a fret so this is very technical and the sexiest part oh yeah so I had to level it and keep it in there and then once that side of dried I had to do a completely separate pour and turn it around so that it dried and it was nice and level so that's also what I mean about you know you'll probably have extra resin as you work so definitely have those molds and etc ready and get what you need for the bases and things you'll need for frying and the reason I bring this up to is this is what I used in cutting circles out to dry these flat as well once I'd had that the mold poured and was ready for the resin I needed a flat surface mm-hmm so yes yeah so continuing actually on some of the tools so you've noticed that we have some sort of household items that we use as well and we do belt you know we have the popsicle sticks and these are just little they're actually just a little medicine cups but what's great is that the writing on the sides is really helpful when you are pouring your resin so these are great also they're very disposable so as you pour your resin you obviously can't clean it and reuse it so those are wonderful just asking though into terms of disposing of resin you need to let it dry completely before dumping it into the waste basket yeah if you let's say you've uh mixed up your resin you can just kind of leave it like that let it cure and let it dry before disposing of it it will all become solid yeah yeah cause otherwise you'll probably end up with resin on the inside of your garbage cans yes I need to take seriously I remember my first pour of resin I was not as careful as I needed to I thought of it more as a glue that was washable washable awful visible awful it is not so respect the resin I just use the mask use the glove yeah and just be tedious and careful though yeah and if you're just joining us I want to take a quick little break and remind you that if you tuned in live with us now we are doing a giveaway and just to kind of go over some of the things again and we haven't gotten a chance to talk about all this actually just yet but we're giving away from Diamond glaze patina we have some beautiful glitters some collage sheets and then some really fun bezels we got a ring here and we're going to actually just just have to talk about this this is one of our lip hell pins and this is by Nunn design some other bezels here I have some Swarovski 'shit on crystals and those will be really fun to use with your crystal clay and then we're also giving you some of the crystal clay sparkle dust and this is sort of that mica powder that we keep referring to so this is a $50 value you have to do is leave a comment say hi let us know where you're tuning in from let us know if you have a question that qualifies you to winter giveaway so we will be giving that away at the very end so like I was talking about we are going to talk about that lapel pin and it brings up another topic of if you don't want to use the resin we do have glass cabochon that are really kind of neat so this is a project that Rachel did and you want to talk a little bit more about the bouquet I mean the simplicity of it is what's so nice because it's quick and clean and cheap and all she did was cut out the image from her design sheet like this and she actually used the diamond glaze glue to adhere it in and then be done in glaze glue to adhere the cabochon straight onto the image which just to wipe off a theater person if there are any just wipe off the back of that glass so that is glass as opposed to resin but it gives that nice don't look without the time that it takes for resin to dry without the mess and it gives a really nice look so yeah these are also tempered glass already prepared pieces that be dolly coffers and are easy enough to just make simple magnets on it so I had fun doing a set of those two magnets are all part of craft month as well and I know just off topic here but my refrigerator is a very central part of my home and I like for fun magnets to appear so I made those well it's great and you can you know had your magnets to anything especially if you have created some of those resin pieces with those extra cabochon xand your mold just put a little dab of e6000 on the back and a magnet and you got yourself kind of a fun little set so yeah I know my fridge has lots of crafty things mama so grasping bezel to me right yes yeah quick stuff yeah I love to find ways to preserve stuff that I've maybe gotten from a vacation or just a photo from an event a wedding something like that so it's always great to kind of preserve stuff like that and I think the glass cabochon czar a wonderful way to things them so I also while you were talking you talked a little bit about the collages can you talk about your necklace that you have up there and well will be the less present piece we talked about and left epoxy resin was I cut out you can see here there's a little cut out of the image that I used from the Nunn design sheet of some cherry blossoms and then just with some crafters pick glue i adhered that in there with several spacers several copper spacers glued on and once those were all dried poured the resin and it captures a minute so yeah it's just a really nice clean finished professional way to capture objects and I actually also did that over here on this piece with some charm some stacked star terms and then gold spacers around the edge and that is on some velour paper which is this stuff and it's kind of like velvety topping on the paper that makes it a really rich deep finished backing that I glued in there just as I would any other type of paper and that worked out really well so and the piece on top here that is another resin piece and that is an open back and that's using the open frame hoops and again those are by becky nunn and I just wanted to kind of create a little bit of like a glass window pendant so it's transparent and I used some of the transparent green dye as opposed to the opaque so you can kind of see how that turned out very well I you know being an Irish girl redhead I love that fussen that will probably disappear to my home alright guys for resin that's it for resin I just want to really quickly that's not it for resin colors but I haven't had a lot more so we have ice resin and we also do have the Nunn design resin as well and these work exactly the same they're the two-part resin so it's just equal parts a and B to get that chemical reaction and then you can create all of these designs and we have lots of colors and very fun stuff to do with that last thing is I want to talk about the NED design sealant and because we are talking about the collage sheets and this is the sealant that you would use if they like that okay after gluing once the glue is completely dry then you just brush on a little of this sealant one to three coats of bath and it seals the image in before you put the resin on again we have videos on on these mm-hmm yeah we have videos on a lot of the stuff that we're talking about here and the stuff that we talk about that doesn't have a video we will be making videos because we definitely want to make sure that we answer all of your questions and with all the tips and tricks that we kind of find to help you out with that as well so but yeah so here is the Nunn design glue and we can also use the crafters pick for ittle collage well just apply it with a toothpick all right what's next whoops next let's dive in and talk a little bit about these vintage patina here so I'm going to kind of get some of the stuff out of our way and bring this forward again people might be wondering whether the torchon okay um a wanaka me I know I wasn't done talking about resins the torch we have here and this is just a barbecue lighter that you can get from any store and this is used to bring any of those bubbles out from behind that resin so that you don't have bubbles in your resin however I just created that honey honey honey is necklace so came on over here to these two resin X's unit top one is completely clear and it's because I took actually a cigarette lighter or or that would have worked better at a barbecue lighter but your fingers away on melts at the top of the red and just enough to bring the bubbles up and pop but done here caps describing that she kept the bubbles for the effect yeah of honey which i think is really cool that's sort of a what it could look like if you don't use that library alright um so alright so that kind of covers this and you know we're always using either packing tape or blue painters tape so we often refer to those in our projects as well so in case but this is just kind of household items and then I'm going to go over the magic pick a little bit later when we start talking about crystal clay but let's dive into our patinas freezing loop louvers oh hey so yeah sorry we have lots of stuff on our table so before I dive in I have a question hi Monica a heatgun you can you can use something very similar to a creme brulee torch but we recommend a lighter I don't think you really need anything that powerful and of course that kind of depends on how big your pieces I mean if you really need to torch it you can use one of those butane torches but I just recommend using just a barbecue lighter just kind of you just all you do and I'm not going to turn it on but I'll just kind of show you how it works and this is another resin piece so you just light it up and just kind of wave it over the top and you'll see magic happen because all those bubbles will come to the surface and pop and you might need to do that one or two times so you just kind of wave it over and you do this maybe three to four minutes after you poured your resin because once it starts to cure it might be harder to get those bubbles towards the top but you can just use just just a lighter is all you really need especially for a shallow piece like this so speaking of this this was done by our designer Rachel and she actually used a transfer sheet and the transfer sheets are a little bit different than the collage sheets because they are clear on the back so with those you just put it in a little bit of water and the backing will slide off and then you just carefully place it into your bezel but before she placed her transfer sheet she used some vintage patina and just took a paintbrush and just kind of added the color to the back and inside that bezel so I'll reach out to the middle of the bezel straight onto the metal yeah you don't need any type of prep or anything like that any sealant or anything to put that down in there and what's great as if intosh patina actually tries really quickly yes and so what she did was leave on a light coat but for some of these pieces like this one I did here which when we start to talk about concrete that's what the top portion is but this dragonfly what I did was a similar green color of emerald patina brushed all over the top of the Dragonfly and then quickly wiped off partially by paper towel and then a little bit more with which is the vintaj relief block and just rubbing along the sides of it brings the detail of the piece back out yeah the crevices stay colored yeah you can see this is our used piece of art so we've just brushed it over some of those metal pieces and you'll get that nice shine that'll kind of come through so there's a couple different sides to this there's a little bit of a buffing side you can see that we've used that portion there a little bit of a harsher side and as smoothing out so this is actually just a really great thing to use with a lot of vintage pieces and it was something that I can actually demonstrate here for you now this if you joined us in one of our very first facebook live classes this is the project that we made and on these antique brass feeds are vintage patina so you can see that it kind of gets down into the grooves there but let me sort of show you an example of getting it off of those grooves you can kind of see right there where it falls in there but there's still a little bit on top so I'm going to use that relief block and kind of show you what happens so showing that the metal a little bit as you go to move if you look like a manicurist ha ha ha in another life it actually really does shine the metal that's a nice yeah so you can kind of see and I hope you can see it on camera there but that really just sort of makes that design pop so that's a great little thing and you know again you can use that vintaj relief block with many different stampings you know very similar to the dragonflies that Alexandra had use so and this is just another example of using that vintage patina and you can see on these brass stampings that it kind of just comes out a little bit on each side so just really beautiful and then we also have one final piece here and this actually is on wood so this is using one of those paint pens and then just a little bit of that patina on the sides and back and just including a little stamping on top and you've got yourself a really cute bohemian adorable earring we have another question oh hi Karen sure so that's a question that we actually get very often and it's something that is a little bit difficult to do but definitely not impossible the main thing that you want to do when you're embedding something like that is to make sure that it's sealed properly and I actually didn't get a chance to talk about this and I'm going to talk about this when we go over concrete but this is a clear resin spray so this will actually help harden so to do a flower can be a little bit difficult because a flower is very very delicate but you can try to use the resin spray to harden it up a little bit so that when you do pour your resin on top of it it'll it will keep its shape as opposed to kind of flattening out in Alexandra's necklace here it's not organic matter but she was able to attach and in that resin so they're trapped in there they're not laid on top is the old bead spacer beads so that were talking about flowers I growing-up used to crest flowers on vacations and stuff and so I'm inspired to use pressed flowers that even as opposed to fresh to trap into the resin I know we have some good videos by Becky about yeah organic matter and resin also and she really lays it out well yeah and one of the things that she did that I thought was really really neat is she used organic matter and she created a silicone mold and then poured resin so you still get that beautiful kind of shape and that style to some of that the leaves and mechanisms and I actually have one of those pieces here as well so this is a piece that she had done and this is that organic matter and she used this and created one of those silicone mold there in the selection a video on the exact way I was like she actually did this exact piece in a video so if you're interested in that we will be linking it lots of videos I'm sure for you down below but that's probably the best way to get that organic matter in there I have seen it trapped in a globe and we are working on videos to try to explain exactly how that's done sometimes our videos on resin can be a little bit difficult to show just because of the time but I am going to work very hard to try to get a video to you guys so that you can understand exactly how that's done right so I if there's not any questions about patina I think we can kind of move on we might come as I said it we have a question on I assume you mean these earrings and I believe this is the verdict REE and we'll be able to point you in the right direction of the glitter I'm sorry of the patinas and what I also just thought of is you can actually mix the colors so we do have a white patina and if you wanted a little bit more of a let's say you wanted a light shade of blue you can do white and blue to create colors and we actually have a video on mixing colors as well so if you don't see the right colors that you have here you can kind of get a few and then it kind of mix them together so that can create the exact color that you're looking for so okay so like I said we were going to talk a little bit about artists concrete and this was something that we brought in maybe maybe a little bit over a year ago now and we've had a lot of fun with it it's provided some really great interesting techniques so we do have lots of videos showing you how to use the artist concrete and also to use the artist concrete the pigment so you can kind of see here it's just it's exactly like you would think and actually I'm going to go ahead and open this up just so you can see what it is we work with here all of anism you can just kind of see that it's just a nice little just it's just a powder and all you do is add water and mix it pretty much like you would mix concrete and then you can use it for several applications and jewelry so this is using that colored pigment and you can see how different the color is and you can actually kind of build the color but this design that Rachel did kind of gives it a really fun little pink peachy effects and going back to it these were the earrings that came on this box here so it kind of helped prop them up so this is what you know we kind of refer to when we're telling you to prop your pieces up so she don't that really nicely to create it yeah a domed effect and then you know kind of see the sides they're a little bit yes they almost look like candy buttons yeah yeah little little cabochon button without filling out the edge of the bezel that's nice yeah yeah you never want to spill over the edge of the puzzle sometimes it's a little hard to save so when I was filling this one I was careful not to put too much concrete and then not too much of these jus Deakins rocks glass shards but just capping them down with a toothpick to get them trapped in there for kind of a matte and shine contrast effect yeah and you know I like what you just said because you do kind of trap them in there so they're not those little glitter glitter rocks aren't going anywhere that's kind of a nice thing and I know you repeated that actually with this bracelet as well so you can kind of just see all that fun little applications and you know I love the concrete because it makes it very urban and very modern so and I just did a quick little ring here so this is what the concrete will look like if you just pour it in the bezel and that's all I was trying to achieve here just kind of getting that nice little look and it has that nice matte finish to it but I did use the resin spray and I have a couple pieces here that I'm going to show you so the coloring is very slightly different you can see that this one is just a little bit darker and this one is a little bit lighter who in which now this is the one that I used the resin spray on so I did a couple of coats of the resin spray and it just kind of seals it in so that it won't chip or anything like that so it's just hardens it up kind of dusty to the touch right yeah it can be a little bit dusty to the touch and you can also see here where it wasn't in a mold that it just air dried see this side was against the mold and this side is a little bit more math so that kind of gives you a little bit more of an indication so you can see how matte it is on the bottom of the mold that I use this just created such a neat blank canvas for or something that begs for a decoration like over here was this one a Rachel's pieces mm-hmm and she just added some flatbacks to it and with glue great really neat oh we have another question yes it is actually pretty fast drying it is faster than resin resin we recommend you want to cure for at least one to three days to get your full cure and to get it really really hard the artist concrete you'll get your folk here in 24 hours I recommend at least 24 hours before wearing it but you can also move it after I would say a couple of hours I would say like one hour you can kind of move it around it's not as delicate as the resin is going to be it also doesn't require quite as much meticulous balancing as the resin so when I prop this into that box that I showed you I kept it actually centered like so and just poured a cord the first one straight and just gave it a few minutes and tilted it and it didn't spill out and I was able to pour the second one and have them dry at the same time so that was handy yeah so that is sort of the information on concrete again we have videos and if you guys have more questions you know always leave them in the comments below if you're watching us after the fact leave them in the comments and we'll still try to do our best to answer them over the course of the weekend and next week as well speaking of questions we have another one yes we do have and I can't believe I forgot about it because I write here this is the vintage glaze and this is a metal sealer and patina extender so this is recommended if you want to if you're using possibly the vintage VOC line and then of the raw brass so if you want to keep that really beautiful raw brass and you don't want it to sort of naturally patina definitely use the metal glaze that will give it a nice little shine to it and you can actually do a couple coats of this and I recommend a couple of spin coats so this is a little bit lighter than the patina is going to be but this will help extend the color that you add or to rub brass as well good question and thank you because I forgot shall I pull forward official claim let me divert a crystal glass yes and I can you got stasis yep all right so crystal clay is another great medium and this is something that is probably used a lot as you can see we have a lot of promise in this a most often by us but that's not entirely true anyway up here we have several rings and this is one of the videos that I did here and this is a very simple technique of combining crystal clay adding it to a bezel ring and just adding some Swarovski crystal chatons to it and this is where you would want to use that wonderful tool the magic pick now this helps pick up your sheet on and sort of place them and get them into those nice little pattern heads a little sticky tip that you dab on to the pad right yeah and then it adheres to your sheet on and you stick it right into the clay and the clay grab it yeah it's kind of magical time but we do have a video on how to use this so I'm not going to demonstrate it right here but it's very fun and definitely a good thing to have in your arsenal if you are a mixed media guru so yeah so definitely some other just pieces here this one has a charm in it again these are just slightly larger sheet on this one is an example that's not a ring is that uses the chiffons and the stamping blanks yeah I'm just looking at how much detail work went into applying all of those little beatitude is so pretty yeah and what's great about crystal clay is you have a good working time but it's nice and stiff so that you can just sort of hold this up and get all those chiffons in in plenty of time to finish that piece and crystal clay has a drying time of about 24 hours as well before wearing that's what we sort of suggest to you now this is an interesting piece here and this is a marbled look again we have video but just to let you know this is actually using two colors of crystal clay so with crystal clay again it's a two-part thing where you take equal parts of your a and you will go ahead and open one up here one of the ones that we've kind of already been using this is white so it doesn't illustrate your point quite as well but as well here but you'll see that you'll get the sort of sticky part here and then you'll get your colored part here so you take equal parts of a and B and then you mix those together and then I took a separate blue color and mixed a and B and then I here carefully kind of marbled them together and placed them into my bezel here so you get that nice kind of kind of fun industrial artsy look which I love you know I'm noticing it comes with a little applicator of its own that's going to with a waxed tip yeah that'll be a black on the end so that may be helpful also and I noticed working with it which it's new to me as well even fresh out of the box it can be a little bit stiff but it's the warmth of your hand that softens it so it's just a minute or so it'll get nice and pliable yeah and that's sort of and when you start to mix them together that's when you really start to get that clay there might be more used to kind of working with so and continue now with the crystal clay I do want to show you that we have the crystal clay squisher and that is actually what it's called it is a clay squisher and Rachael did a great video showing you how to use this and as you can see there are six different patterns on this thing and it is just a rubber kind of silicone backing here and she used the swirls on this one and very simply she took some of the crystal clay sparkle dust painted it on to her little squisher there have the crisp look light in the bezel and then flip it over to kind of get that impression and then when you take it out you let it cure and it's got that beautiful Sheen already yeah because that you know and you can do this without the sparkle dust I just want to make mention of that but I think it kind of adds just a really fun little extra color to it probably acts as a little bit of a release also mm-hmm and what's great as you can see this is the one that she used so you just wash it and you can just reuse it again so and then just some other kind of neat little things that you can do with crystal clay this is an actual embedding anything in it so I decided that I wanted to add just a little Rivoli to this very simple finding but the problem is is that anytime I tried to add glue it would just seep through the bottom because this is open-back filigree so what I did was I actually took a little bit of crystal clay and I chose a gold color and I used crystal clay because I could squish it through but then clean up the back so that it was nice and simple so I have another yeah that's another way to use crystal clay and there's another example I have here where my cabochon was a little too shallow so it's at too far into my bezel for that particular bracelet finding so I used a little bit of crystal clay create a little ball and then squish this in there so that it's at a little bit higher so it looks nice and flush and the crystal clay acts like an adhesive so I didn't need to use any glue or anything in addition to that max I'm kind of you know a neat little technique to just sort of yes yeah yeah that's the coolest thing about the crystal clay is anything you embed you don't have to reglue it just anything yeah but it's a great it's a great introduction into mixed-media if the resin or the concrete might be a little scary for you definitely try using the crystal clay and make mention that you can mix colors mm-hmm yep okay and yeah you can actually if you were to continue to mix this so you didn't get that marbled effect you can mix it to get a lighter blue we do have a lot of colors of the crystal clay but if you're looking for a specific color if you want a purple that's maybe not just purple you want to add some light to it you can do that as well and the only thing that matters is that when you mix your initial color your a and B that those are the same ratio and then you can mix your colors together however you want so you can mix a little bit of white with your purple you can mix a lot of white with your purple I get like a lavender or something but you have to mix the purple separate from the white yes and then yeah you have to make the two colors separate and then you can put them together so it's all about that chemical reaction and that's kind of mixed-media mixed-media talk for just getting it right mm-hmm all right so now we're going to talk about some kind of unusual stuff and just sort of some fun photography more of the crappy stuff to bring it back to national craft month so over here I'm just going to kind of bring some of this in and I want to talk first about the stays on ink now this is just a solvent ink pad so it's something that you could get which is really easy and nice and simple and I have a rubber stamp here and then I have our paper bags and this I just thought was just a really fun just little neat kind of way this was sort of my little sample here you can see I kind of got a little carried away up top there but if you just take your rubber stamp press it in to your pad make sure it's nice and on there and let me try to do it upside down and just get a nice little stamp and there you go so I just kind of just fun and just easy to use and we also do have a stamp cleaner so you can reuse this with various different colors as well so nice and easy I wish you to tell me how you did this alright so this is the artist concrete and you're actually able to stamp onto the concrete and what's so nice I mean it reminded me it's all I guess yeah oh yeah you know it kind of does have that but fossilized look I'm all about the nature pieces yeah and what's really neat about this is so you can have your sorry you can have your concrete doing your stamping and then if you want on top of it to kind of seal it in you can use that resin spray again to sort of finish it off and seal it and make it kind of nice and shiny we have another question all right go for it let's check because I don't know I know I haven't tried using paper beads or trying to create them something tells me that you can my only thing would just be I wonder if you need to seal it because we do use the Nunn design sealant on our collage paper sheets so something tells me you might want to try to seal it first and then use the resin spray to give it that hard effect yes it actually says right I'm glad I read it pre seal porous objects such as paper and fabric with a sealant to prevent to prevent wet out before coating with resin spray so straight from the bottle itself definitely use the Nunn design sealant or any other kind of sealant to seal it in and then you can use the resin spray to really give it that hard effect that you are going for which I'm sure that if you're making the paper beads you want them to be nice and intact and don't want them to bleed or anything like that ma'am there you go I'm glad I could answer that for you by reading the bottle alright so moving on to some more fun stuff now Mod Podge had a heyday several years ago and we found a new fun way to work with it so this is the Mod Podge here and this actually uses the gold leaf that we have and these are just kind of metal leafing pieces and using this flake they come as flakes and we have gold silver copper a lot of fun stuff and Julie our designer did a video on this showing you how to just paint this on and really seal it and you know you doesn't come off it doesn't scratch off so it's just a really fun little thing so you can definitely get various different types of Mod Podge on our website as well if you're interested in using Mod Podge the Mod Podge is basically like a sealant and a glue all in one yeah it is a it's a water-based sealer glue and finish okay so you can use it on a lot of different things but if you're working with jewelry this is a great thing to kind of explore if you are looking for something that will give it that nice kind of glass the effect so I'm a professional paper mache yeah yeah glues cleanup holds it in and speaking of glue actually the diamond glaze is really amazing as well and this is another sort of adhesive pardon me going to move some stuff out of the way here alright so this is a little bit of that adhesive and this is a water-based adhesive so this is going to be a little bit more liquidy it has a nice sort of glue-like effect and this was done with that blue painters tape of creating just various different shapes on top there and what's great is when you add glitter to Diamond glaze it becomes a glitter paint and this is one of my favorite things to show people that it doesn't come off I'm scratching it and not coming off I'm wiping it and it's not coming off and that is so fun and I don't know if you've ever worked with glitter where it ends up all over your house but if you use it and kind of create this diamond glaze paint it won't come off and Rachael did he's really cute and I'm going to hold the other one up as well these use the diamond glaze in a bezel and these are the lapel pin and all she did was mix it together and kind of put it in the bezel very much like you would do with a resin but it stays in there and it just is so adorable and I just love this one's so cute for a little Valentine's Day or for a wedding so you know wedding season is coming upon us very quickly so if you're looking for a little craft to make for maybe your groomsmen or something that is something kind of thought these glitters are so fine that they really mix in nicely and you can control the thickness and the richness of the color too yes another question it dries clear we do have a couple different types of Mod Podge we do have like a finished sealer spray we do have this one and this is actually the gloss we do also have a mat you're going to get a little bit more of what am I trying to say like a like a frosted finish with the mat as we when you use the gloss you'll get more of a transparent finish but it doesn't dry white it's not like a like an Elmer's glue or anything like that right when I said paper mache that's a little bit milky so I think I was misleading there magis be sticky for her hmm you know you might be using a little bit too much because I noticed that when we were kind of creating the piece for this you really don't need a whole lot it's a it might be getting a little bit too gloopy and technical term gloopy um but that would probably be my troubleshooting for you is that you might be using a little bit too much because also with Mod Podge you can build the coats as well so let's say I did this one and it you know wasn't as much as I wanted it to I can let it dry and then do another coat of Mod Podge on it and I think that might help you out a little bit just to try to build the feeling right and letting it dry is probably key to never saying about building layers and the video I'm sure explains this but do you put them on pajeon and then the foil and then more Mod Podge yeah because it will act as sort of that it doesn't lose first in the me laughter yeah so but that was probably my best suggestion for that I do want to actually explore doing some more videos with the Mod Podge because it's such a versatile item and I feel that we we don't have enough for you guys so we'll work on that one as well one more question sure hmm I don't know if you can use diamond glaze on fabric we do actually have glitter paint that you can use on various things like leather and that is designed to be used for that type of application I don't think that you can use it on its ends specifically to use it on paper here so yeah yeah I wouldn't want to say yes because I haven't tried it we do have several like ultra suede so I can try it on that see if I can paint a little glitter on it I don't know if it would make it stiff or if it would crack but I will definitely explore that for you but right now I can't say that I recommend it alright so we'll continue and actually Alexander has some great projects and they're just sort of crafty projects I want to have her talk a little bit about them sure um you have some yeah well right here art is a Sun catcher that Rachel made and there are more behind us along with the dreamcatchers that I learned how to make since working here and so you know lots of different fun colors these are really designed for hanging in windows or in smaller versions as ornaments for tree so they just incorporate you know different materials swayed metals wood glass and yeah I had a great time learning how to weave the the inner portion with some wax linen or esslyn cord and incorporating the beads so I made videos on creating business and then embellishing what types of knots and cords to use yeah yeah so we have a video like Alexander was saying showing you how to do the loop but what I love about these pieces is mixed-media really is just mixing media you know she has some you know like she's saying just a silk cord and this is the ultra suede so it's just kind of really finding new fun ways to mix and match a lot of that stuff and different techniques and these are wonderful examples and I'm so glad you did videos on them because that would be my first question is where is that video yeah I really also like this technique of wrapping suede on to metal I kind of want to explore more with that yeah in jewelry I love it it's such a nice tight wrap that you were able to achieve now is there any glue underneath all no no it's just hide this simple knot Oh Moses and space really nicely and then for the Sun catchers these are actually just using what we refer to as snowflake frames so these are just wire frames and we do have of course a video on these guys as well and just you kind of stack up your beads and this is a fun activity for you know anyone that has extra beads lying around so if you just want to create just some fun stuff and just simple wire loops at the end that's all it is so just nice and fun and crafty and as we kind of gear up for spring and summer I'm always looking for new fun ways and me ideas for them so and one last reminder for our giveaway we just pull it over here one more time so we are giving away some of that Simon glaze from patina we have some glitter here beautiful color beautiful gold and we have a couple of collage sheets for you to kind of explore and have fun with some bezels and some chiffons for you to use with your crystal Sparkle of dust and your crystal clay so this is a $50 value so we're going to wrap this up in just a minute so get your last little comments in all you have to do is say a quick hi lips now where your tuning in from if you have a question if there's something fun you want to want to see us do you know if you guys ever have any questions not just you know in the comments below here but leave us a comment on Facebook you to or Instagram as well we're kind of everywhere so if you have an idea or something that you just really just want to ask about ask us we're here to answer your questions just a couple more pieces I didn't want to leave any stone unturned here I discovered when we were setting the table up this fun piece that's got just beads and rhinestones and charms inside and it opens with a little notch there and then some magnets that are set to adhere it also but you don't want to pop that open without being ready to catch all your beads because my elbow on the table before you set up so that was fun discovery for me and you can really you know change out what's in there for the seasons too yeah and then this one over here this is just a little box nut and this is just a fun little keychain and this is kind of fun to make in school colors so if you have kids going off to college in the fall you know you can just make something kind of fun there paracord and this yeah this is paracord be if you have a lot of videos showing you how to use paracord so it's just a fun fun thing to really explore and then just kind of a couple other things that you'll find in our mixed media section on our website is we have some fun little bookmarks and some fun little findings you can you know if you're an M reader add your favorite charms or Swarovski crystal nice gift to yeah you know I'm always looking for crafty gifts and I know my friends always expect them yeah and I had a little metal flower here and that's a little frosty pearl in the center and I just thought it was just a really cute little something blue let's say you're getting married or you have some bridesmaids we have several different colors of that little heart harsh that little rose so you can definitely have some fun with some hair adornments as well so that's just a little sample of some of the stuff that we have on the website there so we have our winner of our giveaway so we had a lot of comments so thank you so much and like I said if you guys have more comments please leave them below and without further ado the winner of our giveaway is Veronica dance congratulations Veronica all you have to do is send us a private message letting us know where we're going to send this beautiful gift so thank you so much for tuning in guys I just want to do one last quick little update of my silicone mold so it's been kind of hanging out with me for the last hour so so I have it on my table here we are and as you can see it's fully cured and my recommendation is to pour that resin before you pop your bezel out but I'm going to go ahead and pop that out and show you how easy it is there we go and my silicone mold is ready to go and I can use this again and again so I'll probably make something kind of fun with that so hopefully look on the website and you'll see badge Allah troubleshoot the first time you've done that it did leak through the bottom of oh yeah I did want to talk about that super briefly I know we're kind of wrapping up but I had to do this piece twice because the first time I did it I you can kind of see there it spilled out because I wasn't careful about making sure that that bezel was in there deep enough so on my second try here I sort of squished it up together next to that bezel so that I would make sure that bezel didn't leak on me and it didn't so that's what you'll see in the honey honey honey necklace all right thank you again so much for joining us we'll be news every month so be sure to check back with us them and have a wonderful weekend everyone thanks again for joining us bye

You recently viewed

Clear recently viewed