Audio Transcript
Note: This audio transcript is auto-generated and may not be completely accurate.
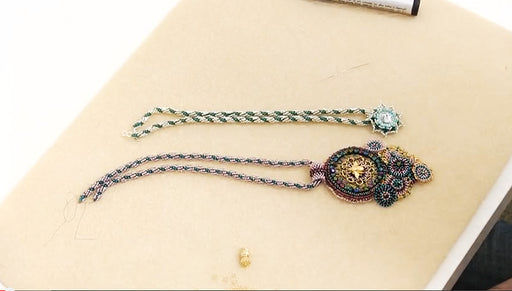
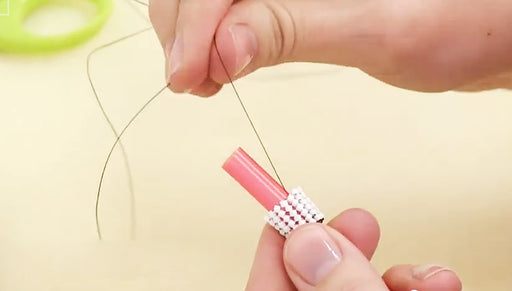
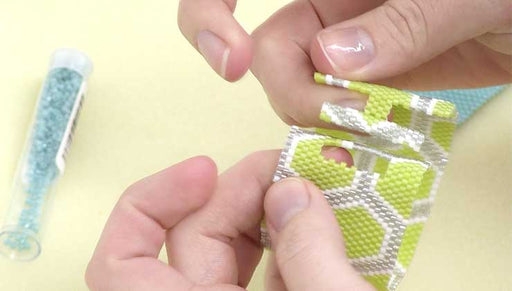
Hi, this is Julie with beadaholique.com and today I wanna show you how to attach little embellishments really to a big focal piece if you're working on projects such as this so the back story behind this is I'm working on a ad piece right now It has a combination of, I have a spiral rope for chain, I have a peyote stitched bail, I've got some bead embroidery here and then what I wanted to do was I wanted these little embellishments which are just a circular brick stitch and then just some decorative edge work as well. I want them to come down at the base and be like a cascade so they come to a point. Now my problem is how do I attach these I would have to just glue them but that's not going to work in this application so I thought I'd take a moment here and and show you in video form what I'm going to do so if you ever have an instance like this it might be helpful for you so first off I have already started but we're going to just ignore that fact for a moment. You're gonna wanna lay these out however you want them to be on your piece. Just play around with them make as many as you like I love how free form this is. Of course if you're doing this you're going to have your own pieces and they'll lay a little different but basically just play with them until you get a combo that you enjoy and I think I like it like that. So you're gonna wanna work from the base up and what I mean by the base I don't mean the bottom tip here. I don't mean the base of the pendant here I mean your actual beading mat up so whatever touches the beading mat first so I'm gonna start over here on the left hand side and I've got a thread and a needle so I've got .006 fireline thread right here and all I did was I threaded my needle. It's gonna be a little hard to see but I tied a knot to the base of this one round and then I just put my needle through one of the beads, came out the other end went through a bead on the top part, on the top medallion and back down through it and now I'm gonna work my way into the piece a little bit more. So that's all gonna make sense, it's a little confusing right now see I've got my tail sticking out from where I tied the knot and here I'm coming out of the bead right here. I want to attach this a little bit more go into one of the beads on the first bottom medallion and again it's going to be very free-form you're just gonna do whatever feels right, whatever works so now I wanna go back out another edge bead It's a little hard to see but I'm coming out of what is the base of the medallion I'm going to find the closest Bead on the other piece, which is the top piece and I work my needle into it and now I remember how I had this forget all these other strings, or those other pieces which are finished so I wanted that one to be on top. I wanted it to rest on this, pull these aside a little bit I wanted it to rest on this one I'm going to pick up these three now and I'm going to work my thread so that I get to the other medallion that I want to attach. Work my thread through the beads now I am just above where I want to attach this see my thread is coming out so I'm gonna put my thread through the little gap between these two beads my needle comes out the other side and flip this over going to enter now one of the beads on what is the bottom medallion pull that and now I'm gonna go and put my needle all the way through both pieces. Now I'm gonna go through a bead on the top one See where my thread is coming out so now I'm just gonna go all the way down through both pieces again gonna go through another bead on the bottom one you're basically just stitching these together. I'm gonna go through all of them, go through both layers flip it around to see where I'm at now I'm gonna go through this bead. There is no right or wrong bead to go through, whatever one happens to be where you need the connection point, where you need to stitch them together so now I'm in between. So I'm actually gonna just dip down again. It could be a little hard to see but I'm just gonna try to go through the bottom, through another bead put my needle through both layers, see where I come out through this blue bead now go through both layers again okay and that's feeling good and attached so now I want to the next one. So I wanna go back to my original piece I wanna see how I want this to lay. So I think I want now this other gold one to be on top and I want it to just go along pretty much the edge. So what I'm going to do is work my thread towards this direction. So I'm just gonna go through my beadwork I want this one to lay on top I'll place it on top and I also want to try to follow a curve here. You're going to want to refer back quite frequently. There we go get rid of this tail out here and go all the way through both now I want to find a nearby bead to where my thread is, go through it go back down through both layers go through a couple of beads on this side go through a bead on this top one. I can see it's right here starting to attach. I came up through this one I wanna go through another one, My thread is in between the two I'm gonna come down You'll end up on the other side. We're just gonna repeat this go through a couple more beads through the top and back down that one is now attached. You can see what we're doing here lay this back out. We've got that I'll want this one below it. I'm just gonna keep going and then what I'll do is I'll either tie off my thread here and then I could start a new thread doing the same thing to attach these or I can this work my thread back through my beadwork attach all of these the same way and then when you're done with this piece here and you have this nice like triangle shape, if you are doing something triangular like that you will attach these to the main piece the exact same way. You're going to stitch them together working through your beadwork and just remember with something like this it's best not to force it. If something wants to go on a certain direction, it's looking right go with it. It's best not to have a exact plan when you start and to be a little bit looser when you are doing these free-formed type designs so I hope this gave you an idea of how you might attach some free-form medallions if you are working on a piece such as this You can see the complete instructions for this project check out beadaholique.com in our free project section. Go to www.beadaholique.com to purchase beading supplies and to get design ideas!