FEATURED IN THIS VIDEO
Audio Transcript
Note: This audio transcript is auto-generated and may not be completely accurate.
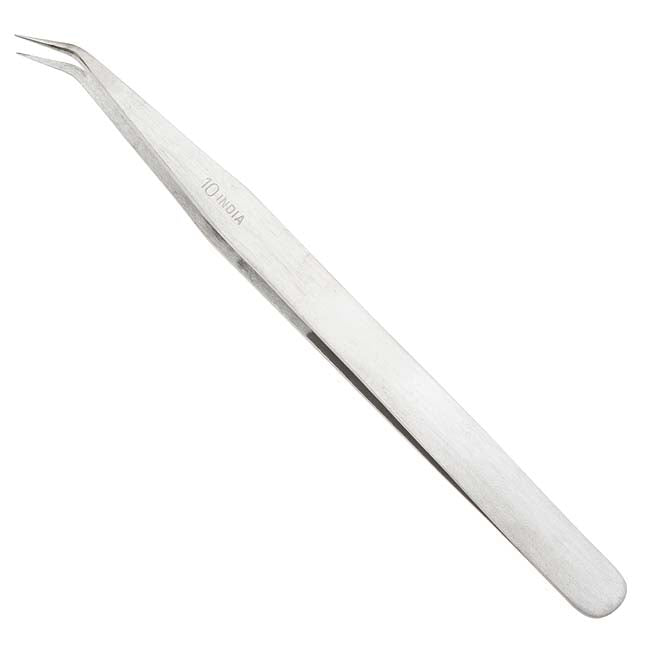
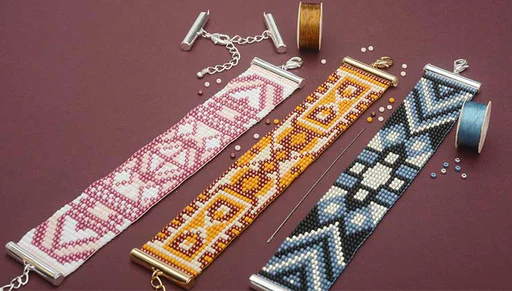
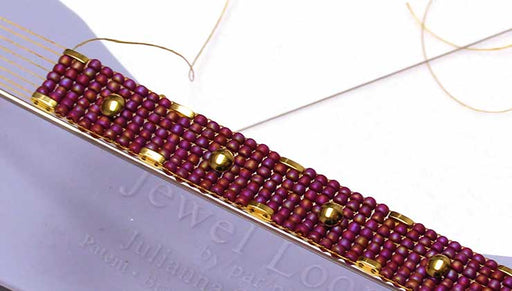
hi this is kat with beadaholique.com fends with the rabbit loom now I have an example right here and these are the little ends so normally when we do the rapid loom we're gonna use a button closure but these little crimp ends here are going to allow us for another sleek option and we're going to use a toggle clasp you can of course use a lobster clasp or any other magnetic clasp that you'd like but today I'm gonna use the toggle clasp with the two cord ends so this is what we're gonna be making here in this video and mostly I'm really gonna focus on just those end pieces because I'm going to assume that you have knowledge of how to use the rapid loom so I've already got mine set up so what we're gonna do is we're gonna start to set up our piece because it's going to be a little different than normal so I have today I'm using the 2 millimeter leather cord you can use the 1.5 it's just going to be a little bit slimmer so just keep that in mind I like to use the 2 it just really adds to those crimps really nicely and as you can see I have I'm gonna be using the silver crimps here today but we do also have these crimps in different styles now these ones are a little bit smaller and let me just kind of put them side-by-side there so you can see so these ones might be where you'd want to use that 1.5 so just as an option there and it is tierracast so they do come in that silver plate that antiqued look they also have a gold plate and a brass oxide so you get three different styles there to choose from alright so what we're going to be doing is we're going to be using the size six of our silk and I've chosen the six because this is going to be a wide bracelet and I'm using the 800 Toho seed beads as well as some six millimeter czech fire polish beads so the six is going to work really well that if you do want to use smaller beads you can probably go down to a smaller Griffin silk alright I have my toggle clasp but I've got a couple of oval jump rings there and taking you over here I have my loom and it is all set up and ready to go and then like I said over here I have some Toho seed beads I'm also going to be using deme rounds just to add a little extra sort of texture and color there and then these are my Czech fire polish beads so those are the beads I'm gonna be using you can use as many beads or colors and varieties as you like I have four different colors of the toe hose my Demi rounds and my Czech fire polish we're gonna need a twisted wire needle and this is going to be to attach to the other side of the silk the silk does come with one but we're gonna add a second one and then I'm gonna be using some GS hypo cement I also find a really helpful tool that I'm gonna be using is a bent nose tweezer here and that's going to help us at the very end and then I also have a couple pairs of chain nose pliers I have my flush cutters and I have my nylon jaw pliers alright so if you have everything ready to go let's go ahead and get started all right so I just took my Griffin silk off of the cord so we can go ahead and set that aside for a moment so we're gonna set up our loom working with the leather cord now go ahead and find the two ends there where it comes together and you're just gonna find your midpoint now eventually one of our little pieces is gonna fit over the end here but what I want you to focus on first is the sizing so here's my ruler and I'm actually going to show you on the piece that I've already made the distance on this so from end to end we're looking at about six inches or so now with that clasp it's adding on almost an inch and a half so I want you to be aware of that as you're sizing this so but from end to end it's going to be about six inches so alright so now with that said we're gonna start and put our loop at one end and go down to about six inches there now go ahead and take your cords and you're just gonna do a very simple little overhand knot with one and kind of pull that down and we want to get it as close to that little six mark as possible so we're just gonna kind of stretch that out and I want to do a little bit less there here we go and yep there's about six inches okay so now what you want to do is since it's gonna look like a larks head knot here at the top so you're gonna go around the opposite way let's see and pull that together so it's going to sort of have that little larks head knot style so we're gonna go ahead and pull that nice and tight and again let's just check our distance before to really give it a nice tug mine got a little loose there so I'm just gonna kind of loosen that up there we go and just tighten the top one there to kind of bring that a little closer together all right okay so you should have this working here now when you look at it you're gonna have your tails facing up what I want you to do is sort of flip that around so that your tails are gonna face down and the reason for that is that we want to have that nice little loop happening up at the top there let me move my ruler out of the way and what we're gonna do is we're gonna take one of our ends here and we're gonna place it over that knot there we go and kind of scooch it right up in there can I really really get it up in there there we go and remember we have our two tails which are these two cords right here facing down so we're going to come in with our nylon jaw pliers now if you don't have nylon jaw pliers you can absolutely use your regular chain nose pliers but this is just going to help it from not scratching there so we're gonna give it a couple of really good squeezes there because we want to trap that knot right in there and make sure it's nice and tight up there alright and that guy is not going anywhere you don't need to crimp it too hard so that's perfect alright now what we're gonna do is we're gonna come in and we're going to clip off those tails with our flush cutters there and we want to get them nice and close to the edge because we want that to kind of disappear a little bit now the knots big enough it won't entirely disappear there but we just want that nice little frame happening alright so this we're gonna actually use as the bottom part so I'm gonna go ahead and set my little scraps aside we'll use those in a minute actually and now for the top so we're gonna put this guy on the top here but before we crimp him closed we're gonna find the mid point of our Griffin silk here and go point-to-point with the edges of the silk knot with the needle there and once you found that midpoint go ahead and place that up and in the top of that little cord end now very important make sure it's nice and centered because we're about to crimp it so we want it to stay right where it's gonna be and again just before I cramp just kind of holding it with my fingers making sure I'm making sure there we go alright so now we're going to just crimp over the top same as we did before we want to make sure that leather stays in the back there though so I'm gonna kind of hold it this way there we go able to see that kind of close together all right and there we go all right so now we're ready to place this into our loom but the problem is that we don't have anything for our little holes to grip on to so we're gonna use our little scraps of leather and kind of bring it through the little holes here and we're just gonna use this just to make a nice little knot for it to grip onto just like so all right that's good enough and then we'll come to the other side and do the same thing trim that off at an angle there we go a little easier to thread through that way and again this part doesn't have to be pretty these are just knots to secure it into place just to give it something to kind of grip onto alright so again if you're familiar with your rapid loom we're gonna go to the top and we're just gonna open those little teeth there and kind of pull that through it's gonna hold our leather in there there we go now you can leave it like that you can make it tighter it's entirely up to you like I said it's just really to hold it in place it's not gonna affect the outcome of your piece all right and the same in the back here kind of sliding that in giving that nice little tension centering it and then just like normal we're ready to work now I will say one thing with this guy is that because our cords are kind of up here at the top you can come down here and just do one single wrap just to kind of get it down to the side and then do the same on the other side as well and now this is the side that doesn't have a twisted wire needle so I'm just gonna string that on real quick and just string it down a few inches or so all right so now I have both of my needles so just like we've done before with this we're just gonna pick up a few beads now I'm gonna go for five beads across that's gonna be a nice size here with using the a Toto hose there we go and doing our generic crisscross motion bringing that needle through going all the way through all five beads about the other side okay bringing it down and now this should look very familiar down and out and around alright now as you can see in my example here I did a couple of rows of beads I did some fire polish I you know alternated with some demi rounds and some of those rows there so you can continue to sort of do whichever pattern you like this is a completely random pattern of all five of those seed beads and then the Czech fire polish beads so just continue until you're all the way down here at the end and I'm gonna come back and show you exactly how to finish this off alright so as you can see I have done all of my wraps here and I've released this to let it relax just a little bit I just like 20 minutes or so just to kind of let that leather come together to see if you want to add that extra row there and that's something that we typically do with the rapid loom so I'm gonna go ahead and strengthen that back up again and now what I've done here is I've gone and I've done that wrap as though I'm going to do another row but I really don't have enough room to do so and I don't want my beads to get all crunched up in there okay so what we're gonna do though is I'm gonna kind of leave that little loop out to the side and I'm gonna take my needle and I'm gonna go through because what I'm gonna do is I'm going to tie a little knot on each side there so that's just my little loop there so now we're gonna go through that one more time and just kind of catch it again and this is where that little bent nose needle kind of works in your favor so we're just gonna kind of wrap it and that's gonna sort of tie a little knot there at the end and I'm just sort of scooching it together with my fingers now go ahead and rotate that knot so it's sort of on the inside there because then this side will be our back side so what we can do is we can then just sort of take our thread tie a little knot as though we're doing a pearl knotting and this is where that bent nose tweezer really comes into play so you want to get that nose right next to that little knot there and do one last little knot just to tie this off to make sure it's not going to come through and then just sort of scooch that down and that's on one side there all right so then you'll repeat that on the other side but I'm going to go ahead and start and take some my Gia's hypo cement here and I'm gonna add a little dab of glue to that knot and just really coat it and let that get nice and glued there cuz again this will be sort of the back side this will be the side that will face our wrists so I'm gonna let that dry I'm gonna do the other side and then I'll show you how to take it off the loom in just a moment alright so now I'm just gonna take it off my loom and just slide that little knot out there I'm gonna do that on both sides and just alright there we go and now I didn't have a pair of scissors in my opening but you can use a pair of scissors or your flush cutters to do this just come in and just trim right over where the top of those knots are here we go just trim that off and set those aside and you can also cut this off as well because this is just to hold it in the Loom alright so the last thing we're gonna do is we're just gonna use a couple pair of chain nose pliers to do some jump rings here now I have a toggle clasp and I'm using these oval jump rings here now the reason I like to use the oval jump rings is they slide a little bit easier when you're using a toggle clasp so when you're looking at the front side of the bracelet there let's go ahead and add a couple of those jump rings now we did talk about sizing earlier in the video and what I will say is you'll noticed how little of the silk I had left over what I want to give you the option to do is to sort of add the need to open my jump ring just a little more add jump rings here so that you have the opportunity to lengthen the style with the jump rings as opposed to adding more length to the actual bracelet because again this is going to give you that like seven half-inch bracelet but if you just want to add a little bit more length you can do so with those little jump rings here and this is just basic I'm just giving them a little twist to open hooking them on there we go and it doesn't matter which side you put your toggle clasp on they'll both get there but with the oval jump rings each needs to have its own a little side there we go and just close that up so there is your bracelet and then you can just close your toggle clasp just as you normally would and it's a nice little sleek finish to the rapid loom by using the little crimp ends there so it just provides a little bit of a different style so there you have it and that's how easy it is to do this you can get all of these supplies and see even more tutorial videos by heading over to beadaholique.com

You recently viewed

Clear recently viewed