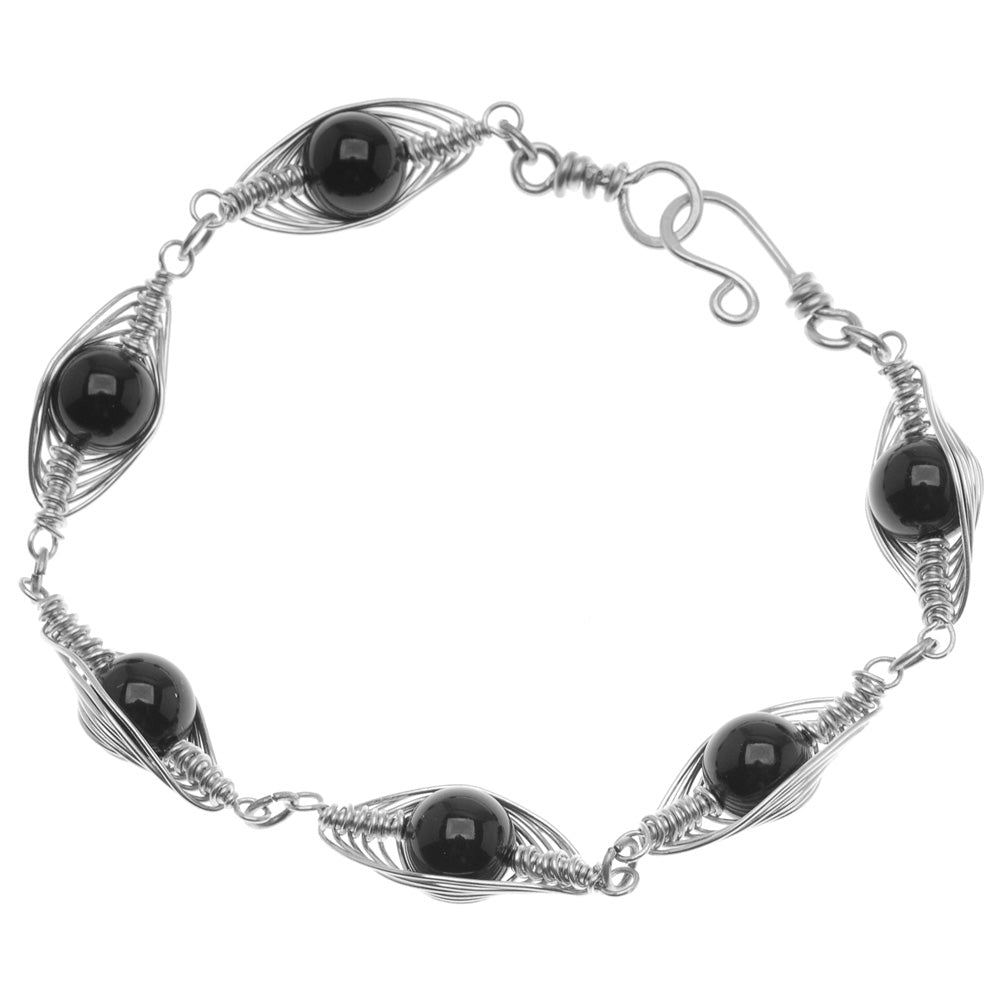
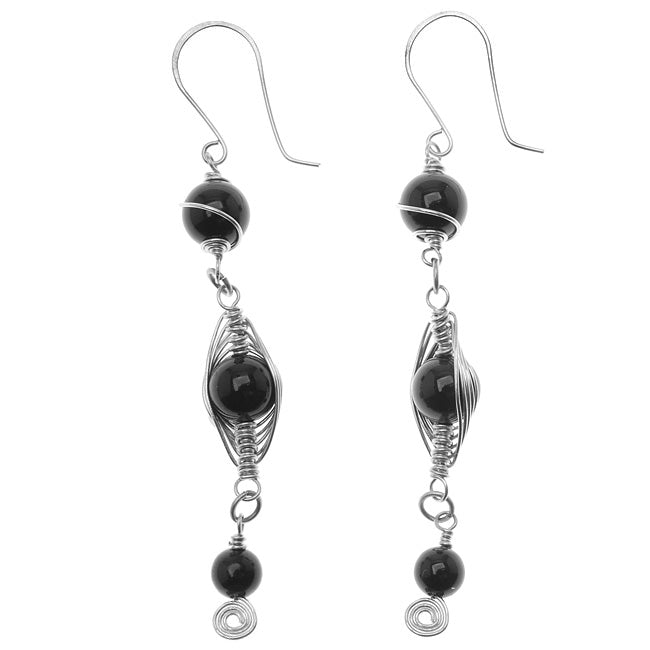
How to Create a Herringbone Wire Wrapped Bead

SKU VID-0059
Designer: Julie Bean
Learn how to herringbone wrap a bead. This wire wrapping technique creates a dramatic effect by overlapping wires as you weave and wrap them together around a center bead. With a loop at each end, these beads make perfect links and connectors.
Audio Transcript
Note: This audio transcript is auto-generated and may not be completely accurate.
Hi. This Julie for Beadaholique.com. Today I'm going to show you how to do a herringbone wrapped around a bead. This is what it's going to look like when finished. This is going to be one side and then as you can see the other side is actually is just as decorative and pretty. Just a quite a different look. So when you do string your necklace or earrings or whatever you're making you can decide which side you like best. It's a simple technique. It's actually a lot of fun to do. So what you're going to need is your needs is some beads. I have some pearls right here. Some black pearls in eight millimeter size. Twenty-four gauge craft wire. You can do it with twenty-six gauge if you're beads are a little bit smaller. That will work well. I have a pair of flat nose pliers. These are a very fine tip flat nose pliers. A pair of flush cutters and a pair of round nose pliers and then I've got everything on my beading mat. So what your going to want to do to begin is you want to cut yourself about twenty to twenty two inches of wire. You'll want to adjust the length of the wire according to the size of the bead you're using. If you're using a larger bead go ahead and cut yourself more wire. If you're doing a smaller bead you'll take a little less. I'm just going to eye ball it. Better to have a little bit more than a little bit less. Some people actually do this technique right off of the spool of wire. I find it's a little bit more difficult because it gets quite tangled and just like having a cut piece and that way the kinks kind of work themselves out. It's a little less work. So I've got my cut piece of wire. I'm going going to take my round pliers an approximately two inches from one tail. I'm going to make myself a loop. If you're familiar with making wrapped wire loops, this the same exact premise that we're going to do here. Now grab it with your flat nose pliers because I'm going to be doing quite a bit of looping. Count your loops. I've got one there two three four, five, six, seven eight nine I'm making sure my loops are nice and tight together and I'm going to do one more. Ten. You'll notice you wire gets a little bit stiffer and harder to work with as you go. So ten is just about right. Snip off the excess. Take my pliers push in that rough edge. Now I want to go to the other side and I wanna string on my bead. Let it fall all the way down so it's right up against my wrapping. This is what we've got so far. Now what I wanted to do is I want to create the identical series of wraps on this side. So I did ten wraps there I want to do ten wraps here. In order to know how much space you need. You could go ahead and just measure this this space right here or you could very carefully eyeball it. Whatever you're most comfortable with. So at that point what you're going to want to do is create a bend in your wire and create another wrapped loop. The same size as the one on the opposite side. and again I'm going to do my ten wrappings. So this is what we've got now. We've got identical sides. Holding your bead like so you're gonna want to have the wire coming out around this end. Not going backwards but coming forward. You're going to arch it over the top and we'll have it come back and wrap around going forward again. So we don't want to go behind the bead. You want it to go in front of the bead. This is probably the most important step of the whole process because it's gonna set the way all your wrappings look. So my non-dominant hand is going to press the wire against the bead as I loop it over the other end still holding it I'm going to wrap around and come back out the front. So now I'm going to turn this over and I'm going to do the exact same thing here and again I'm not gonna go behind, I'm going to go in front. So non-dominant hand is gonna press the wire to the bead and goes around the front and around the back and comes back out the front. The reason this is important because this is going to give you nice even wraps. I actually have an example right here before we go forward of one that I didn't get that looking so great and you can tell the difference. So just be careful with that first step. That first couple wraps. Okay now we're going to go right behind the wire we already wrapped. Flush up against it and behind then we're gonna come in front of this wire wrapping section that we have loop it around the back so we come back out front. Then we're going to go again on the other side behind that wrapping you did first but make sure that when you loop it around you loop front to back and around. We're just going to keep doing that same process. We're kind of crawling our way up around the initial wire wrapping we did. Back and forth. You're going to keep doing this until you are out of room to wrap. Like right about here I really can't go any further so I'm going to take my tail and I'm going to wrap once and twice around the top. You could try to get away with one time and it might actually look a little bit neater if you just do it once but it's kind of good to do it twice just for good measure. Make sure that's secure. Go ahead and trim off your excess. Press down any rough edges and there you go. You have a Herringbone wrap and here's the back. Go to Beadaholique.com for all of your beading supply needs!

You recently viewed

Clear recently viewed