|
Miyuki Delica Seed Beads, 11/0 Size, Opaque Chalk White DB200 (6.6 Grams) SKU: DB-200 $5.39 |

|
Miyuki Delica Seed Beads, 11/0 Size, #1906 Opaque Rosewater Pink (2.5" Tube) SKU: DB-1906 $6.79 |

|
Miyuki Delica Seed Beads, 11/0 Size, Matte Opaque Sea Opal AB DB1595 (7.2 Grams) SKU: DB-1595 $5.85 |

|
FireLine Braided Beading Thread, 4lb Test and 0.005 Thick, Crystal Clear (15 Yards) SKU: XCR-1280 $6.95 |

|
Finished Cable Chain Necklace, Oval Links with Lobster Clasp 2x1.8mm, 16 Inches, Silver Plated SKU: AXC-98926 $3.80 |

|
Silver Plated Open Jump Rings 4mm 22 Gauge (50 pcs) SKU: FJR-5454 $2.49 |

|
The Beadsmith Jeweller's Micro Pliers Chain Nose Flat Nose SKU: XTL-5511 $8.45 |

|
The Beadsmith Jewelry Fine Round Nose Micro Pliers SKU: XTL-5514 $8.49 |

|
Sharp Flush Cutter Pliers - For Cutting Beading Wire (1 Piece) SKU: XTL-5600 $23.99 |

|
The Beadsmith English Beading Needles Size 12 (4 pcs) SKU: XTL-3006 $3.99 |

|
The Beadsmith Tools, Thread Snips 4.25 Inches Long (1 Piece) SKU: XTL-5614 $2.85 |
hi this is rachel with beadaholique I want to show you how to brick stitch cute animal shapes so you may have seen this style of adorable bead woven animal on Pinterest it's very popular and I just want to show you how easy it is to make these pieces these pieces use brick stitch which is actually really versatile and lets you make all sorts of fun shapes but since I'm a cat person I made a whole bunch of kitty faces and I also wanted to throw a bone to the dog lovers with this yellow lab pattern so these pieces can be simple or complicated depending on how many colors you want to use so for this black Kitty I just used three colors of Meucci delicas and it was just a simple face just black for the fur and pink for the ears and nose and mouth and a nice fluorescent yellow for the eyes but you can also get more complex with these pieces and build up a nice texture that almost makes your pattern look more lifelike in 3d so this piece uses many more colors and as you can see the colors just come together to make the piece more lifelike so there are lots of options for personalizing these patterns and you can actually make them look just like your pet so that is one bonus of this pattern is you can switch up the colors for the fur in the eyes and really just do a portrait of your pet and all of these patterns are available for free at beadaholique.com so you can find them and start personalizing so in this video I'm going to show you how to make a simple white kitty and for this project you're going to need some yuki delicas in size 11 oh and I'm using white and a nice pretty pink for the ears and mouth and nose and a nice turquoise for the eyes you will also need some fireline I'm using crystal fire line in the four pound weight and to make this a necklace you're gonna need a finished chain necklace I'll show you what to do with this when the time comes and you'll need a couple of jump rings and I'm using some very fine gauge jump rings these are 22 gauge and that's important because these are going to go through your sighs eleven o delicas now for tools you're going to need a size twelve beading needle some thread snips you're gonna need two pairs of pliers I'm using two pairs of flat nose but you can use flat and round and you'll need some flush cutters and here I have my pattern printed out for my white kitty face and I'll be following this pattern as I bead so let's begin I've gone ahead and cut about four feet of my fire line and threaded my needle and I'm going to begin by making a base row of ladder stitch so if you're familiar with brick stitch you begin with a row of ladder stitch and I'm actually going to be working from one side of the Kitty's face to the other so I'll be following the pattern like this and this will be my base row and I'll be building the piece up because you want the orientation of the beads to be with the hole facing up and down to begin your ladder stitch so we have another video showing you exactly how to do ladder stitch but to review I'm gonna start by picking up two beads and I'll slide them almost all the way to the end leave a little bit of a tail so I'm going to kind of bend my thread so that the beads are sitting next to each other and I'm going to sew back up through that first bead so now the two beads are sitting next to each other and I'm going to sew down through the second bead again and that's the beginning of my ladder stitch row so I'm going to proceed with the third beat and sew in the same direction as my thread so I'm going to go sewing down through the bead that I just added and make this new one sit right next to it and now I'm going to sew up through that third bead so now the rows getting a little bit longer and I'm gonna keep doing this until my ladder stitch base Row is eight beads in length all right so now my ladder stitch base row is done I have my eight beads in a row and following the second row of my pattern I'm going to begin the next row on a decrease and I'm going to start adding a couple of little pink beads for the ear so I'm gonna pick up a white bead and a pink bead and again we have another video showing you exactly how to do brick stitch increases in decreases but to review I picked up my two beats to start the row and I'm going to sew under not the first but the second thread bridge so I'm just slipping my needle under that bridge between the second and third bead in the base row and I'll pull my thread through and I'm going to sew back up through the second bead which happens to be that pink bead and now to anchor this beginning of the row I'm going to sew back down through the first bead which is that white bead and again up through the pink bead and doing this will just make those beads snap into place very satisfying all right so that's the beginning of my row on a decrease so now following the pattern I have another pink bead to keep going on the ear so I'm just gonna pick up that one bead and so under the next thread bridge and back up through the bead so just finish your row according to the pattern and I'll show you how to end the row when we get there alright so I just reached the end of my second row I have one more bead to go and since I'm ending this row on an increase it's a slightly different technique than what we've been doing going under the thread bridges so I'm going to pick up my last white bead in this row and since there isn't any more thread bridges to go under I am going to sew down into the last bead in the base row and that's literally the only time you sew into a bead when you're doing brick stitch all right so now I'm coming out of the last bead in the base row so I'm going to sew up through the second-to-last bead and up through the third to last bead in the second row so if you can follow my needle path here second beat it on the bottom third bead in on the top and this is just some handy maneuvering so that I can exit with my thread coming out that last bead by the end all right so now I'm coming out to third to last bead I'm gonna sew down into the second-to-last bead and up again through the very last bead and that's how to end your row on an increase so now I'm going to proceed with the third row of the piece and I'm actually going to begin this row on an increase which is different from what we did on the second row I began on a decrease there I'll just show you how to begin on an increase so in the third row it looks like I have two white beads to start alright so now I picked up my two beads and I'm gonna sew under the first thread bridge and I'm gonna sew up again through that second bead and it's as easy as that I just began my third row on an increase so I'm gonna proceed with the pattern just keeping on following the colors and I'm gonna follow the increases and decreases as necessary with the pattern and I will see you back here showing you how to finish off your kitty cat piece okay so I'm almost done with my little kitty face as you can see the face came together just like the pattern and I'm just adding the last couple of beads in the piece and I just want to let you know that we have graph pattern available at beadaholique.com so you can actually graph out your own little fun shape design and decide exactly where your beads go and what colors to use and that's a good way to start making a portrait of your beloved pet just a couple little beads left and I'm going to end my last row on an increase so I'll just show that one more time take up my last bead and sew down into the previous bead up through the second-to-last in the row below and out through the third to last in the top row and then down and back up and there it is my little white kitty so at this point I'm just going to tie in my thread tails just weave them in I like to go down just a couple of rows and make a little loop so down through one bead up through the adjacent bead and then back down through the original bead it's a nice secure way to end your thread and I'll go in through one more bead and I'm just gonna trim that off with my thread snips and this will be the back of the piece you don't really see the little thread tips but I like to just make sure the front is nice and clean so I put my thread tails on the back and I'm just gonna do the same thing with my other thread tail very quickly and there really is no wrong way to weave in your thread tails you can just make as many passes as you like to feel secure and then cut it off forever you're happy alright I'm gonna call that good right there alright so there's my little bead woven kitty cat face and I'm going to make this cat into a necklace I'll show you how to do that I have here a finished chain necklace and this piece is really easy because it has the clasp already attached so all I'm gonna do is find the center of this chain and take my flush cutters and I'm just gonna cut that middle link and that opens up this finished chain for me to add the kitty charm in the middle so I'm gonna do that by taking a jump ring and I'll take my pliers and I'm just gonna open this jump ring and slide it through the delica on the very tip of the cat's ear and this is why it's important to use I would say a 22-gauge jump ring because anything thicker you're gonna have trouble fitting it through your delica but this one fits very nicely so now I'll take one side of my finished chain necklace and slide that jump ring through the last link and I'll close up my jump ring and now I'm gonna do the same thing on the other side so I'll take another jump ring open it and slide it through the kitty cats other ear it's almost like he has pierced ears and now I will take the open link on the other side of my necklace and slip that onto the jump ring and close it up all right so now you have a little finished kitty necklace you can also make an earring out of this piece all you would do is maybe do like an inch of chain on either side and add a jump ring kind of where my thumb is and then you can add an earring hook off of that and it's a very easy and cute earring design so that is how to make an adorable kitty cat brick stitch piece and you can apply this technique to all different pets and animals and make a whole menagerie of cute animal jewelry you can find all these supplies at beadaholique.com thanks so much for watching you
Related Videos


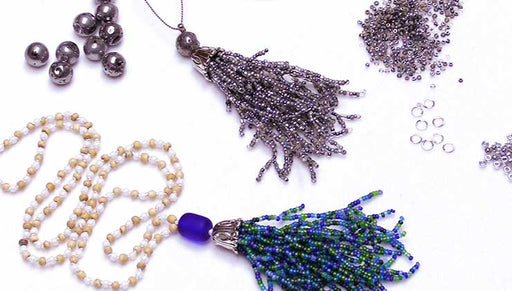
How to Make a Tassel of Beaded Coral
In this video you will see how you can use seed beads in a coral fashion to create a beautiful beaded tassel.


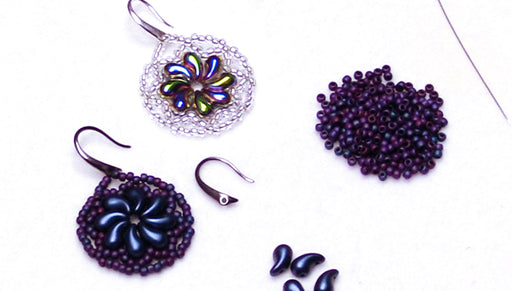
How to Make the Lacy Floral Swirl Earrings featuring Czech Glass ZoliDuo 2-Hole Curved Drop Beads
In this video you will see how to make a simple bead woven earring with a swirling pattern of Czech glass ZoliDuo 2-hole curved drop beads. Choose...
View full details

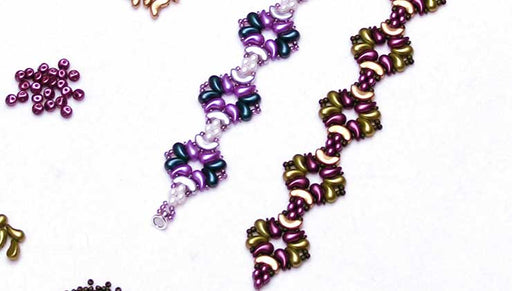
How to Make the Orleans Bracelet featuring the Czech Glass ZoliDuo 2-Hole Curved Drop Beads
In this video you'll see how to construct this bracelet from start to finish. This design features ZoliDuo Beads, Arcos Par Puca Beads and Es-O Be...
View full detailsCustomer Reviews
You recently viewed
Clear recently viewedThese are great, and the video instruction is very easy to follow.
These pendants/earrings will make great gifts. So much fun that
you can customize! :)
Thank you!!
This is the cutest pattern and easy to do. I’m anxious to try creating my own personal pets in the family. Video is clear and explains it well. Very impressed! Have fun!! So many possibilities!
