
|
Czech Glass SuperDuo, 2-Hole Beads 2x5mm, 8 Gram Tube, Dark Neon Emerald SKU: BCT-566 $4.25 |

|
SuperDuo 2-Hole Czech Glass Beads, Dark Neon Purple, 2x5mm, 8g Tube SKU: BCT-564 $4.55 |

|
Toho Round Seed Beads 11/0 #PF557 'Galvanized Starlight' 8g SKU: JSK-0277 $3.95 |

|
Czech Glass Druk Round Beads 4mm Opaque White (100 pcs) SKU: BCP-7405 $2.99 |

|
Slide Tube Clasps, Two Rings Strands, 22K Gold Plated (4 Pieces) SKU: FCL-5501 $5.79 |

|
FireLine Braided Beading Thread, 4lb Test and 0.005 Thick, Crystal Clear (15 Yards) SKU: XCR-1280 $6.95 |

|
Fiskars 5 Precision Tip Scissors - Super Sharp SKU: XTL-5700 $7.45 |

|
The Beadsmith English Beading Needles Size 12 (4 pcs) SKU: XTL-3006 $3.99 |
Related Videos

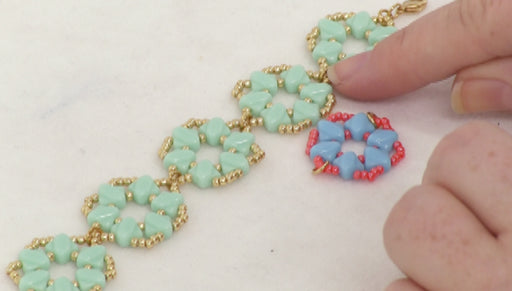
How to Bead Weave a basic flower using the Kheops Par Puca Beads
In this video, you will see just one of the many ways you can bead weave with the Kheops Par Puca Triangle Beads. Using Toho 11/0 seed beads and C...
View full details
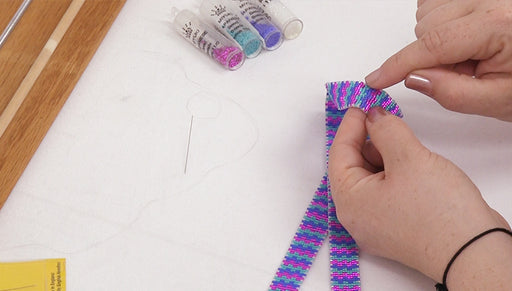
How to Attach Loom Pieces for Longer Projects
In this video you will see a basic technique to attach to pieces of loom work to make a longer project. This is perfect for making hat bands, wrap...
View full details
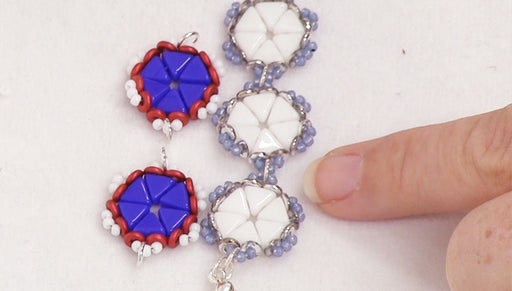
How to Make the Camille Bracelet
In this video you will learn how to make the Camille Bracelet, using Czech Glass 2-Hole Silky beads and Toho seed beads.