How to Stich Bead Embroidery to Create Recklessly Faux Leather

SKU VID-1069
Designer: Julie Bean
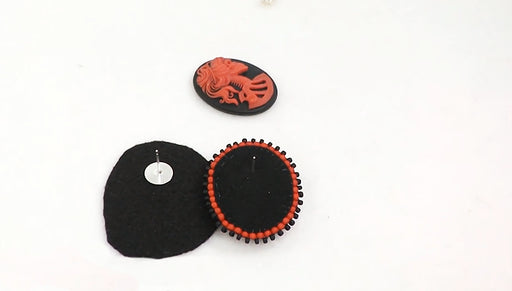
In this video learn how to directly stitch bead embroidery to faux leather. This is a great way of mixing unexpected elements together and expanding the possibilities of what you can do with bead embroidery.
Audio Transcript
Note: This audio transcript is auto-generated and may not be completely accurate.
Hi, this is Julie with beadaholique.com so i made each of these pieces separately this is a bead embroidery around a cabochon button top and then this here is a little cuff i made using create wrecklessly faux leather cap rivets and snaps and we do have a whole series of videos showing you how to actually get to this stage and get to this stage but for this video i want to show you how you can combine these two pieces and be able to stitch this focal on to this bracelet so i've gone ahead and i've put a little dot where I want my Center to be and I used that dot as a reference point as I was making the bracelet and attaching the cap rivets so now what I need to do is I just need to Center this on to my cuff and by having done all the hardware first it stabilizes the leather so I don't have to worry about the leather scooting around faux leather I should say so we've got a thread and you know I'm just using 9mo size D which is what I use for my bead embroidery I have about 20 22 inches here and I'm going to place that piece of bead embroidery right there where I want it and look at it pretty carefully and make sure it's all lined up and now I'm going to hold it in place and grab everything and now I'm gonna go from the back and I do not have a knot on my string let me go from the back and I'm just piercing the needle actually through the faux leather it has a fabric like backing to and it's really soft and easy to pierce through I'm gonna do that and I'm gonna leave a tail of a good six seven inches so I'm coming out and now I'm just between my rows of bead embroidery I go over a little bit and go back down through and come out the other side now I want my stitching to be as discreet as possible on this backside because I'm gonna be able to hide my stitching in the bead embroidery topside so I'm just gonna make a little stitch right here and come back up just that nice little tiny stitch and now to get to another point of contact what I'm going to do is I'm going to work my needle through my beads now you'll notice with my particular piece this top edge is actually off of the faux leather so I want to just be aware of that so I'm not stitching into air so right here where I can still be on the leather stitch down make it a nice little petite tiny stitch and come back up and because I'm using a black thread and I have black foundation I'm not going to see my stitches now I'm going to work my needle through my beads again and the trickiest part of this whole process is just holding your piece in place where you want it so you'll want to check that as you go go through another bead because I do want to make sure wherever I place a stitch that I am actually stitching through the faux leather as well so now I'm going to go ahead back down through make a little nice petite stitch come back up work through my beads you can see how this is looking on the back so you don't see a lot and you can really do as many or as few stitches that you feel necessary to attach your beadwork okay so keep an eye on it make sure it's looking straight you do have the ability to still adjust it a little bit before you get too far into your stitching okay now I do want to make sure that on this one I go through both pieces so I've got the red and the blue so I'm going to make sure I do a stitch right here see I seem to have snatched something right there so if that happens there's a lot of threads happening under there just pulled my needle out and found a better spot yeah nice a little discreet stitch come back up so we've got four stitches right here which is pretty darn good so I'm just going to work my way over to the other side at this point if I go down here let me see if I'm going to be in the faux leather and I am so I'm working my way back to the starting point and here's a good spot because I'm on the two leathers so right here I don't really want from my own personal tastes I don't want to come up through that row it's that top row of those little 1502 hoe so I'm just going to move my needle over ever so slightly now where did I start okay I think I'm right back to where I started there we go so here's what the backside looks like so very discreet and this is now secure that's not gonna go anywhere so at this point we're gonna tie a knot so make sure it's a good secure knot we don't want it too bulky because it's gonna be against your skin and I also don't want tails here on the backside so now we're just gonna take our needle we're gonna go back up to the top side and we're gonna weave our tail into our beadwork if you want to you can tie a knot here Oh weave your tail in somewhere and then trim it yes sir remember you left that original tale of six seven inches and this is why because you're going to go ahead and you're going to thread your needle back on to that original tail and you're also going to go again up through your beadwork and you're going to just do the same thing and there we go we have now attached the focal piece of our beadwork to our faux leather cuff and is pretty discreet if you had a piece for the top side that was the same color as the back in here you wouldn't see all this but you're actually not seeing all that much and you're definitely not seeing it on the front which is really a bonus now so this is what it would look like on and then you can see it here wrapped as well and so that is how you attach a piece of bead embroidery to a piece of faux leather you can find other videos featuring how to do embroidery how do you work with create wrecklessly products and hardware's and other inspiration ideas at beadaholique.com you

You recently viewed

Clear recently viewed