How to Set Multiple Austrian Crystals in Prong Gita Jewelry Settings

SKU VID-1680
Designer: Kat Silvia
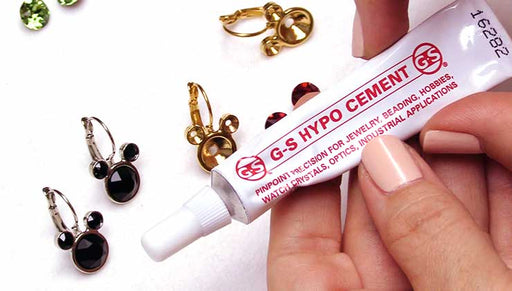
In this video you will see how to set multiple Austrian crystals in Prong Setting by Gita Jewelry. You will see some helpful tips using a popsicle stick to make using these prong settings simple so you can make sparkling quick and easy jewelry.

The brand name for the crystals shown in this video is no longer available. High quality Austrian crystals are now available under the PRESTIGE™ Crystal Components line.

Audio Transcript
Note: This audio transcript is auto-generated and may not be completely accurate.
Hi, this is Kat with beadaholique.com gated jewelry settings now many of the settings do have multi prongs but what I really want to focus on here in this video is the actual multi stone pieces that are going to be all part of one setting so the tricky part with these guys is that sometimes those little prongs kind of butt up against each other so let me draw your attention all the way up here I have another example and these are really beautiful I love the little floral style here but these prongs because they're so close and clustered together they're they're a little hard to separate so I thought it was worth doing a video just to kind of help you guys out with some of the tips and tricks that I learned while making these earrings so if you kind of look here you'll notice from the side version and I'm hoping you guys can see this is that you have some of those little prongs that sort of butt up against each other like I was saying so when you're looking at it from that angle you kind of have to separate them and it's especially difficult with the center one which is why if you're doing one of these floral designs I recommend you starting with that one so that you can kind of get those guys out of the way so that they're not butting up with the ones as you work around after that so start with the center one for these little flower guys but the little prongs they kind of sit like this and I'm gonna demonstrate with my hands they kind of sit where they're just separated a little bit enough so what you want to do is we're gonna be working with our popsicle stick so we're gonna kind of bring our popsicle stick in and sort of Bend from this angle cuz they're gonna be really close together so they won't be totally flush because they do have that natural little curve but you just kind of gotta get your popsicle stick in there and push it to the side so that's how we're gonna do it so I just kind of wanted to demonstrate in a larger version there because it might be a little difficult to see but I'm gonna walk you through exactly what I'm gonna do so I have picked out three of my little stones here that I'm gonna go into this little setting so this particular setting takes stone size 29:39 and a twelve millimeter Rivoli now when you're working with these guys especially this one in particular I recommend starting with the smallest stone first it'll be the easiest to kind of handle because once you get around to the bigger stone it's a little bit easier to push those prongs in so we're gonna start with the small one there and I'm actually gonna turn this into a necklace but let's go ahead and start with setting our stones so the reason we recommend a popsicle stick is that it's not going to hurt that crystal if you slip on it is it what we don't want to use pliers or anything metal potentially that will scratch it so we do have the stone setters but that's not gonna necessarily work for this one those punches that we have because you're gonna kind of catch the other prongs so the popsicle stick really is the ideal tool and it's great because you can get popsicle sticks anywhere and of course we even sell them here at beadaholique.com alright so let's start by setting my little guy in there and I'm just gonna kind of wiggle him in there this is also why I recommend doing the smallest one first alright so I have him set right in there so all I'm gonna do is and don't worry about fingerprints you can get those off later I'm gonna start on the outside because it's the easiest prong to kind of get down so I'm just gonna do a little rolling motion over that prong and it's just gonna Bend really easily over at the top there so I just kind of rolled it over and Bend that prong in so now what I want to do is I want to work across from the prong I just bent in so you can see that this one kind of comes in here so I can't really get my popsicle stick in the way I was before so this is where we're gonna use that little end tip to kind of bring it up and over the top now I'm gonna set it down just for stabilization so now I can just kind of bring it up and over the top and do that same kind of rolling motion just to bend that one in just like that alright so we're gonna do the same thing so again on the outside I can kind of come in with the edge so the popsicle stick has lots of different edges that you can use that it's gonna be really helpful for this and Bend that down I'm gonna leave it down cuz it's just I have the leverage of the table so hang on I know my hands and the way I hold on just a second mm-hmm alright so all I did is I just kind of came in here and just rolled it up and over the top just put that little side prong there all right and last but not least just gonna get this the last little one here and go ahead and feel free to use the table it really does help stabilize it and you can see that I'm kind of putting my finger in that big Cup there it just makes it a little bit easier alright so I have one stone set so I'm going to move on to the second one here and again this is going to be my stone size 39 and that sets in there really nicely so again let's start on the outside here and if it's easier for you guys to pick it up pick it up if not just go ahead and leave it on the table and again working across so we want to kind of criss cross these you don't want to work your way around sometimes your stone will slip out that way alright and that one isn't quite as secure as I wanted it so we're gonna go back to the table method there we go alright and again I know my hands in the way I just gotta stabilize it so again just kind of bringing it up and over and doing that kind of technique alright so now we have that same kind of issue here where this is the prong for my twelve millimeter so this is the one I have to use two prong that so we're just gonna do a nice little rollover technique and get the stone set and you can just kind of wiggle it around make sure that stone doesn't sound too loose at all it's here no nothing so those are nice and set in there alright and last but not least we're gonna set in our twelve millimeter Rivoli and that beautiful fuchsia color and I love this because you can kind of choose complementary colors and just really really go for it with when you're working with three different crystals alright so bent that one in and now I'm gonna move across here and let's see so this one I have all the prongs bent down so I'm just gonna kind of come in and gently push that one up and over just kind of getting it out of the way there we go alright and moving across bending this side in gotta use that table it's your best tool alright and I'm just kind of rotating around doing that same technique again I know my hands are in the way guys hold on just a second and all I'm doing right now is I'm just gonna go back over some of those prongs just to make sure they're really really set there because I want to make sure that when you look at the piece that you actually see all those little prongs you'll be able to tell which ones kind of maybe are sticking out a little bit and we don't want to catch that on any other jewelry or hair or sweaters or anything like that so you want to make sure that they're all nice and flush so you can just kind of keep rolling over just to make sure all right so we're gonna set our popsicle stick aside and I'm gonna show you how to turn this into a really simple necklace so one of the things I love doing around here is I love taking a finished chain necklace that is just ready to go and then I just find the midpoint here and all I need to do is find that little link come in with my flush cutters and just sort of cut that chain in half so now I have two ends of my chain so all I need to do now is I'm gonna use a couple little jump rings and this is a great little tip in order to get that little flush style go ahead and use oval jump rings they're gonna be really really nice and you're gonna see how it kind of looks here so you don't have that big circle you just get that really nice little line that's gonna happen there and we're just gonna that onto the one end of our chain and one end of our crystal setting there so there's one and we're just gonna repeat that on the other side and all I'm doing is I'm just gently twisting this with a couple pairs of chain nose pliers and we are gonna be all set here in just a second so I just wanted to do this video so you guys could see just a couple little tips just really utilize that popsicle stick use all sides of it to really make setting these crystals really nice and easy because these make wonderful fun easy projects and you can just see that we have all kinds of different styles and varieties and sizes and when you're shopping at beadaholique.com don't worry about what stone size we have all of that stuff in the descriptions so if you're curious like hey I'm not quite sure what size crystal that is we want to make sure that you guys get the right size crystal for the right settings so be sure to check those description boxes alright thanks for watching if you guys are new to our YouTube channel here be sure to hit that subscribe button and of course you can get everything you see here over at beadaholique.com

You recently viewed

Clear recently viewed