How to Punch Holes in Acetate Using the BeadSmith Two-Hole Metal Punch Tool

SKU VID-1675
Designer: Alexandra Smith
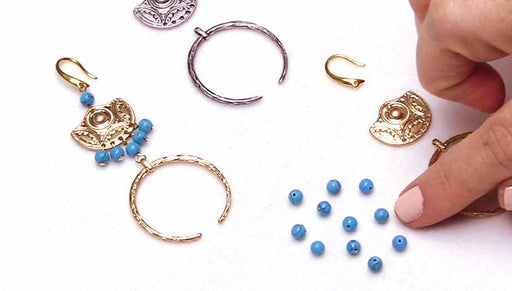
In this video, you will see how to use the BeadSmith Two-Hole Metal Punch Tool to punch holes in acetate resin. You will also see how to widen existing holes, as well as examples of jewelry designs created using this tool.
Audio Transcript
Note: This audio transcript is auto-generated and may not be completely accurate.
hi this is Alexandra at beadaholique to so you how to punch holes in acetate using the beadsmith to whole metal punch tool so this tool is traditionally used for making holes in metal blanks such as I have in this earring here so I punched two holes in this square and what we're going to do in this video is punch holes in this acetate resin pendant this little coin pendant now I want to show you a project that I did using this technique which came with one pre-existing hole and I went ahead and triangulated using my ruler at half-inch increments to make two more holes to facilitate a y-shaped design for that necklace and so here I want to demonstrate to you first how to widen a pre-existing hole for instance in this design this is a 17 gauge jump ring which was just a little snug for fitting through the hole that came with the piece so wouldn't it went ahead and widened those and I did that using the two millimeter size on this tool so that's what I'm gonna do here is I'll go ahead and insert the resin acetate I should say which is a type of resin into the tool and I'm lining up the hole right underneath the screw portion that comes down on it and so it's my finger I'm going to tighten that up and get a soft vise grip just enough to know that I'm centered about a sixteenth of an inch in from the edge and from there without using much force at all I'm just going to screw the tool down in like so and if you can see inside there this larger screw portion is just starting to protrude into the center and what I want to be careful of is not to let that dig into my acetate so I can feel the resistance has lessened and I'm going to go ahead and unscrew I've made my punch over the pre-existing one so now we have a slightly larger hole and so what I'll do on the opposite side say we wanted to make this into a connector I'm gonna bring in my Sharpie pen and you can take your ruler if you want or you can just I it make a little dot right where you think you want your hole to beat and then for fun let's take this and use the smaller side that 1.5 millimeters side so that you can see the difference in this size so again I'm going to insert that coin into the tool get my soft grip make sure it's centered where I want it reposition and send the screw through I'm watching to make sure I don't go a surface and see how it's loose now I think that's where it's come through all the way so I'm gonna release that really doesn't take much much strength at all and now I have my 1.5 millimeter hole size so I hope that video was helpful you can find all of these tools beads and supplies at beadaholique.com please also subscribe to our YouTube channel for all the latest updates thanks for watching

You recently viewed

Clear recently viewed