Casting Epoxy Resin Mixing Cup Set With Brushes and Sticks SKU: TRC-01 $13.99 |
|
Nunn Design Glue Adhesive 2 oz. - For Patera Findings (1 pcs) SKU: XTL-1031 $17.49 |
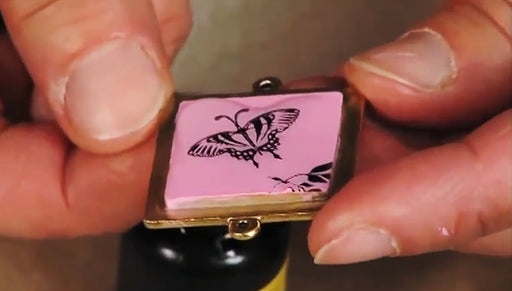
Good afternoon. In this www.Beadaholique.com video I'm going to be showing you how to prepare images into a bezel setting which we'll then put a resin on later. For this project you're gonna need some images. I chose a collage sheet that we sell here at www.Beadaholique.com. I chose it because one I love the images but also all the different images are specifically sized to fit into terracast bezel settings which takes some of the guess work and extra labor out of the project. You can really use whatever image you like. You can use old photographs. You can use an images from postcards, magazines, anything that you like. So you're gonna need a sort of image. You're also gonna need a bezel setting. You're gonna need a glue. I chose Nunn Design for ease of use. You're also going to need a sealant which is gonna protect your images once you put the resin on top. You're going to need a pair of scissors or if you have an appropriately size hole punch, you can hole punch your image. You're going to need a paintbrush and you're gonna need a pair of tweezers. So to begin choose your image. I chose this little gal right here. You're just going to cut her out. As you can see I've already cut some images out. With this particular collage sheet I got quite a few images. Just cut along the lines. If you're not using a collage sheet that's presized for your bezel setting it's pretty easy you can just go ahead flip your bezel upside down trace along the edges and then cut just a little bit to the interior where you traced and that should fit your bezel just fine. I always say cut a little bit larger than what you think you're gonna need because you can always trim it down as you go. So if this was too large you know you can just have a look at the other side just trim it down but this one actually fits just perfectly. So what I'm going to do now, I'm going to take my glue. I just have little bit of paper I'm working on right here for my work surface. Squeeze a little bit of glue out. I take my paint brush. I'm going to hold my image fairly steady on my paper. I'm just going to paint on the glue I don't want to move my image because if I do it's going to run into those glue tracks. I don't want that to happen. But I want to cover every bit of my image particularly the edges and the corners and then take my tweezer. Lift it up. Then place it into my setting. Now what I'm going to do is go along the edges. Just smooth it out. Get any air bubbles out of there. Also make sure the glue is evenly spread. Just going to go in there with my finger make sure it's tightly down. And that is the first step and I'm going to let that dry. Now that my image has fully dried, give it about twenty minutes to thirty minutes. It's better to err on the side of caution because if you put your sealant on and your glue is still wet and if any seeped through the edges it would end up with a white cloud that would be sealed in there. So I'm taking my paint brush. It's actually same brush I used before. I just rinse it out with some water. And now I'm going to take my sealant and poor a little bit of it out. If you don't want to pour it on paper and you can always use a tupperware lid or a yogurt lid. Sometimes that works really well as a little paint tray. I don't want flood this image with sealant but i do wanna make sure that I cover every bit of it and in particular I want to make sure I get into the corners because the corners are notorious for giving you troubles with resin. Once you put the resin on, if you don't seal those corners it's going to seep under and into your paper and it's gonna have a little bit like a dark shadow to it. If you do get a number of streaks as you paint your sealant on do like a cross hatched type of motion. Find what works best for you. A softer paint brush usually works a little bit better than a courser paintbrush. And now I'm just going to set that to dry before I put my resin on. If you want you can go back and you can put the second coat of sealant if you feel like you might have some areas that you missed or if you feel like you might have some that the resin is going to under there. There's no harm in putting on a second coat. And after that dries which I'd let it dry forget our an hour We'll go ahead and put our resin on. Go to Beadaholique.com for all of your beading supplies needs!
Related Videos
How To Use Easy Cast Clear Casting Epoxy Resin To Make Pendants
Beadaholique's Julie demonstrates how to use Easycast Clear Casting Epoxy to make pendants. Measure equal amounts of resin and hardener then mix. A...
View full detailsHow to Use Rubber Stamps to Make Jewelry
Jewelry Designer Mary Lynn Maloney uses stamping, paints and uv resin over Patera tags to create another great jewelry project.