How to Make the Tanzania Bracelet

SKU VID-1531
Designer: Kat Silvia
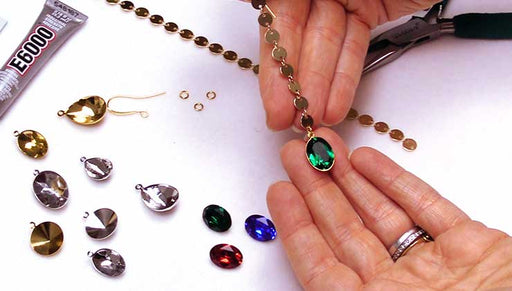
In this video you will learn how to make the Tanzania Bracelet from start to finish. This design uses Zola Elements charms and connectors as well as Zola Elements chain to for a simple delicate bracelet. Finish it off with a magnetic clasp for easy wear.
Audio Transcript
Note: This audio transcript is auto-generated and may not be completely accurate.
Hi, this is Kat with beadaholique.com sola and we are so excited to bring them into you from beadaholique art by showcasing this chain here which is really one of the focus of our bracelet here it's a beautiful little turquoise color chain with these lovely little drops and they're all nice and connected with little jump rings there they are soldered close so we're gonna be cutting those but just to kind of showcase that chain it's just really really beautiful and we sell this by the foot so you'll get a nice beautiful foot of chain now I just pulled out a couple of little pieces here just so you can kind of see what the individual components look like and these actually make really fun little connectors so if you have any chain leftover and you don't want to use it as a chain you can use these as little connectors to make let's say a long earring or just various other things as well so really great little tip there if you have leftover chain alright so this is the bracelet they were gonna be making here today it features a very beautiful focal there with a lovely little elephant on it and then we're going to be using two connector pieces to that chain a nice little magnetic clasp in the back so I have a little slight color variation that I'm going to be doing here today so you can see that these are all zola elements that I'm going to be working with here today so I have this one here that has beautiful little white opal at the base there and a nice little sort of topaz in the back with turquoise and black so it's a little color variation but it's the same little component there so a couple of different choices there depending on which color you like but we're going to start by constructing the main little focal piece of our bracelet here alright so for tools I have two pairs of chain nose pliers one as a bent nose but you can also of course just use two chain nose pliers we're gonna be opening some jump rings and then later on we'll be using our flush cutters alright so let's start and I have some four millimeter 20 gauge jump rings here and what I'm gonna do is I'm just gonna take one and I'm gonna gently twist it to get it open there and I'm gonna add it onto my little elephant charm here and I'm actually gonna close that up make sure I have a nice flush close there nice and even all right and then what I'm gonna do is I'm gonna open up another jump ring give it a nice little gentle twist there and I'm gonna hook it onto the jump ring of my little elephant there and I'm gonna come over here and I'm gonna add it to the loop that is closest to that opal side there at that little tree oh if you will if you're using the other color it'll be that olive alright so now I have that section so what we're gonna do is we're gonna take another jump ring and we're just gonna again just give it a nice little gentle twist I'm gonna attach it to the opal side there and then I want to make sure that it's facing the right way so I'm gonna turn it around just because I'm right-handed here so if you're looking at the piece like this you want to make sure that you catch that jump ring right in the center there on that side alright and the reason I do this first is that way you don't have all that chain kind of in the way there so you can make sure and see that your necklace or I'm sorry that your bracelet will lay properly so if you can kind of see that we have that middle jump ring going around there and then our two on the side and we have our three little trio opal or olivine in the center there alright so this is our main little focal component here so what we're gonna do next is we're gonna take some chain now this is going to make about a six and a half inch bracelet but like I said you'll get four I'm sorry you'll get one foot of the chain we're gonna cut off four to make a six and a half inch bracelet but you can always cut off five and you know see how it works for you alright so I'm going to go ahead and cut off four here I'm just gonna take my flush cutters and trim that jump ring I'm not trimming the loops they're just trimming that jump ring that's in there so that'll be one side and I'm gonna go ahead and repeat that to get my second side here coming in just trimming that off alright little scraps of art jump ring there alright so now what we're gonna do is we're going to just attach it with some jump rings and again these are four millimeter 20 gauge jump rings you want something that's nice and small but it's gonna be sturdy that's why we went with the 20 gauge so I just hook it on to the outside of one of my components there and then attach it to the loop of one of my chains close that up and now we're just gonna simply repeat on the other side and every time you open and close a jump ring just give it a nice little gentle twist just enough to slip it on to your component and then when you close it up just take your time and get a nice flush even you want it to look as though it's almost a closed jump ring you don't want to see any open parts to it all right so now we're gonna add a little magnetic clasp so again very similar we're just gonna open up that jump ring and I'm gonna attach it to one side of my little clasp there attach it to my chain and come in and give that a nice little gentle twist close and now we're just gonna repeat on the other side and this is just a really fun quick and easy way to make this beautiful delicate bracelet it's just a really fun piece to wear really really lovely and these old elements just really make it the piece shine alright nice good closure there alright and then we are all finished so I'm gonna go ahead and slip this on my wrist just so you can kind of see how it lays so it's very nice it has a nice little dangle there that just heads down the wrist and you have this beautiful color on the back and a nice little magnetic clasp too for easy closure and easy where you can just see that I just kind of laid it on my wrist and those two magnetic ends they found each other alright so you can make this an either colorway and I think both are equally as beautiful thanks to the beautiful Zola Elements chain there let me flip that around there we go alright so that is how to make the Tanzania bracelet and you can get all of these supplies and even more videos and to find out even more about Zola elements head over to beadaholique.com you

You recently viewed

Clear recently viewed