How to Make the Ophelia Bracelet with CzechMates 2-Hole Square and Crescent Beads

SKU VID-1038
Designer: Julie Bean
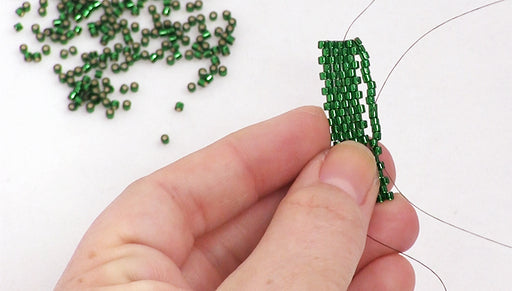
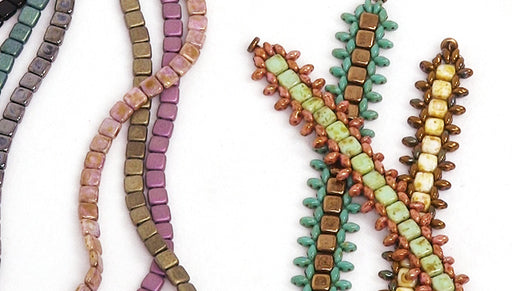
Learn how to bead weave CzechMates 2-Hole Square and Crescent beads together to make a pretty delicate bracelet. The process of making the bracelet is shown from start to finish in the video.
Audio Transcript
Note: This audio transcript is auto-generated and may not be completely accurate.
Hi, this is Julie with beadaholique.com and this bracelet uses checkmates 2 whole square beads checkmates 2 whole Crescent beads some little 3 millimeter fire polished beads in hematite and it's capped off with a little magnetic clasp and then for the stringing material I'm using fireline point zero zero six in smoke and this is 60 inches already placed on my needle with a stopper bead placed 15 inches from the tail and then besides the needle the only other tool you need is a pair of scissors for this bracelet I'm going to show you in the video is going to measure six and a half inches long each one of these little square beads adds a quarter of an inch so if you want to make it seven half inches just add two square beads to each side so to begin we're going to place a square bead onto our needle and just through one of the holes and slide it down to your stopper bead then go ahead and go through the next hole it's part of this two hole bead and pull and now we're going to pick up a second square bead and just loop around so we're going back through that same hole we exited just the opposite direction I'm gonna pull that down so that they're laying right next to each other we're going to make a little chain of these guys we're going to do nine of them so I'm exiting the second hole of the first square bead that I strung on and now I want to go back up through that first hole which is nearest of the second bead now I need to jump over because I want to be exiting right here to be able to a string on my next square beads so I want to go down the second hole and now I'm right where I want to be to pick up another square bead and when you pull that sometimes needs a little bit of help for it to lay where you want it to lay and at the end we're actually gonna do a whole reinforcing thread sequence here that's going to make this lay a little straighter well again we need to work our way so we're exiting where we want to exit could be easier for you to see if I keep it on the cloth right here so pick up another square bead I've got four and we just need nine okay so we've got one two three four five six seven eight and nine so we're going to make sure that we complete this one by making sure it's fully attached and we want to be exiting the hole that is nearest to the end just as if we were going to pick up another one but now instead of another square bead we're going to start to pick up the crescents and the little three millimeter beads so what you want to do is you want to kind of eyeball how you're going to want these and that's going to help you to know where you pick them up because you can't just pick up these little beads by any hole in any different direction cuz they might not lay right otherwise I'm sorry that might be a little bit confusing you'll get the hang of it as you do this so take a look at how you're going to want them oriented and lay them out on your table you got to imagine that these guys are going to be on their side like that with the little three millimeter between them so we're going to go ahead and we're going to pick up this guy here and pull him down now we want to jump up to the his next hole and we want to pick up the three millimeter and we also want to pick up the other Crescent bead now to properly anchor this one you're going to go ahead and slide it down a lot of this bracelet is are really keeping track of your tension now we're going to go through his second hole through the square bead and through the hole of the Crescent bead as well and pull now we're going to go ahead and jump back up and go all the way through the top holes again and at this point you're going to pick up that next Crescent bead and pull it down jump up to its second hole again making sure your attention is good you're pulling these down as you go and then another three millimeter bead and now keep in mind that you're now on the top holes so you want to pick this Crescent beat up via its top hole and pull it down and jump down to its second hole and now go through the top hole of the first Crescent bead you strung on as well as the three millimeter and also the top hole of that other Crescent bead right over there and pull and then also go through Crescent bead next to it to help make it a little bit more secure now we're gonna go through the top holes again of these Crescent beads as well as that three millimeter bead and now we're ready to pick up another Crescent bead so now keep in mind these are your last two for the side of your bracelet so you're gonna pick it up via what is the bottom hole slide it down now jump up to its second hole pull it now pick up that little three millimeter and the next crescent jump down to its second hole and go through all these beads on the row before I seem to never be I did it sometimes it seems like it's really impossible to get through that end Crescent B but I was able to do it there we go now we're ready to add our centerpiece which is a little square bead and four little Czech glass beads so take your four little Czech glass beads so you have them handy as well as a square bead this point you're just going to pick up one three millimeter bead your square bead and another three millimeter bead and you're gonna go back down through your Crescent views so he's just making a nice loop so that stays centered now retrace your thread path and go back through the three millimeter bead as well as a square bead and when you exit the square bead we're gonna jump over to its next hole so we can start working on the second half of this bracelet now for here you need to add the two little side beads but you also don't start need to start adding the crescents again to make this fanned appearance so for each little fan you'll need the two crescents as well as a three millimeter okay now we're ready to do the second half of our bracelet so we're gonna pick up that three millimeter bead now note that you're going to be coming from the outside in here so when you pick up this Crescent bead you want to pretend this laying like this so you're going to pick it up from the outside now I'm going to take another three millimeter another Crescent and another three millimeter and slide those guys down and go back through your square Reed now we're gonna retrace our steps and we're gonna go through the three millimeter again as well as the Crescent the three millimeter and the Crescent and pull snug now we're going to jump over to the second hole of that Crescent bead at this point we're coming from the outside here again of this Crescent piece I'm going to flip them over and then I pick up another three millimeter and my other Crescent bead and go through this Crescent piece here so it's real tempting at this point to just try to jump over right here but then we'd have this thread bridge showing right there so we don't want to do that so we have to retrace our steps a little bit to get where we want to get to so now we're going to jump back up here lay it down on the table so you can see what we're doing so it's now the top hole of that same Crescent bead that we were just exiting now we're going to go back and then we're gonna exit this Crescent bead right here but we're not going to exit this one that's right above it and we are going to now jump over I should say jump down to that second hole in that Crescent bead that we're presently on so our thread bridges are only on the outside of the Crescent beads so that they're hidden so again we're coming from so this is the orientation that we want our beads to be in but because we're coming from the outside we're gonna flip this guy over pick him up in this way there we go so those are the Crescent beads we want and go through this second hole over that Crescent bead that's already attached so now we have that nice fanned appearance begin we're in the same situation where if we just jump down we'd have an outside thread bridge which we don't want so we're going to retrace our steps a little bit and do the same thing and now we want to go through this three millimeter and just the one Crescent bead now lay this down okay so we're exiting where we want to exit to pick up the first square bead on this side of our bracelet I'm gonna pick up a square bead and go through the Crescent bead on the other side but again we're in that same situation where you don't have thread bridge so one last time of retracing our steps I'm gonna go through the press indeed and we're gonna go through the square bead but we're not gonna go through this Crescent bead right here so now we just jump over to the second hole in our square bead and we're going to pick up another square bead and the hard work of this bracelet is now complete and you're just going to make another little chain segment essentially of these square beads same process that you did on the other side it's nice about this bracelet is if you want to make multiples of it you get plenty of beads to do so so you can make many of these bracelets and once you do one it does get a lot easier it's just wrapping your head around how to orient those Crescent beads and then also how do you hide any potential thread paths that would show we're going to add our final square bead to this design and then we're going to add the clasp so square bead almost attached okay so we're exiting the whole final square be detached so now we're ready to go ahead and add our clasp so it's a magnetic clasp with a little loop on the end you're going to separate it out and you're gonna pull two of your low three millimeter beads so we're gonna pick up a three millimeter go through the little hole and it is magnetic so it will stick to your needle and then another three millimeter and just loop around and go back through your square bead and that's how the clasp is going to be attached and now go back through your square beads and you're gonna go back through the whole line of them it's just reinforcing the attachment method here it's also going to give us a spot where we can hide our not amongst the Crescent beads so we don't see them on the edge of the square beads okay go through the hole closest to the Crescent beads don't exit a crescent bead though pull snug and then make a knot so we're just gonna pass under it go through the little loop we created and pull tight we're gonna do that again this time we're gonna go through it twice so nice little knot hidden in there now at this point you can go up through the Crescent bead go through the second hole of the Crescent bead and that's another nice little place to tie a knot just once your tale to be woven in there a little bit and then you can trim off your excess thread and then you'll go to the other side and you'll take your stopper bead off and you'll do the exact same attachment method with another two three millimeter beads and the magnetic clasp we are all done so I want to show you the finished piece and this is what its gonna look like on and there's the clasp so if you're planning out your project I do want to give you actual numbers here of the supplies you're going to be using for a six and a half inch bracelet you're going to be using 19 of the square beads seven and a half inch bracelet will be 23 of the square beads the Crescent and the three millimeters will stay the same no matter how many you're going to use for the three millimeters you're going to be using fourteen of them and for the crescents you're going to be using twelve and just one little clasp it's like I mentioned earlier you can make a lot of these bracelets with just the amount of beads you will receive for this project and there's a fun project to do it is a little bit of a mind bender making sure you get those Crescent beads oriented properly and don't have any exposed thread bridges but the result is really pretty and doesn't take too long to do you can find other tutorials using square beads Crescent beads and a whole host of other two whole beads at beadaholique.com you

You recently viewed

Clear recently viewed