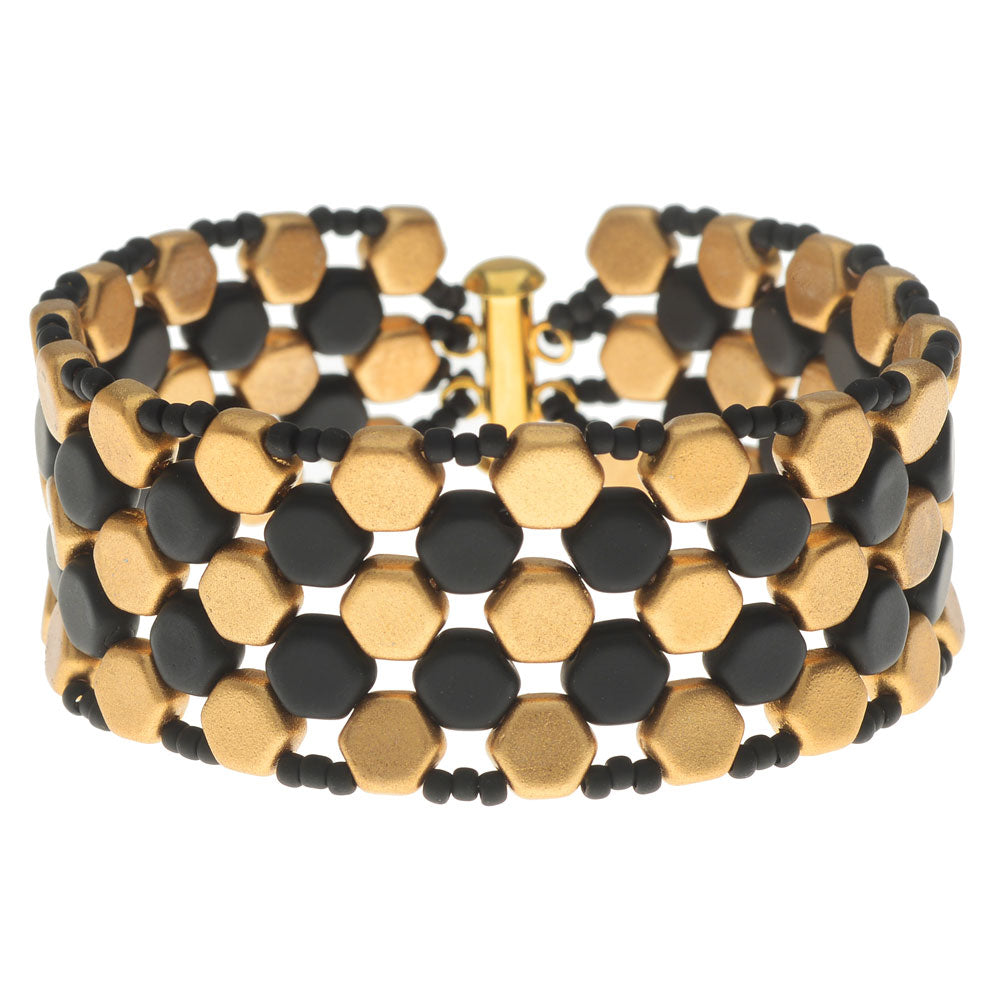
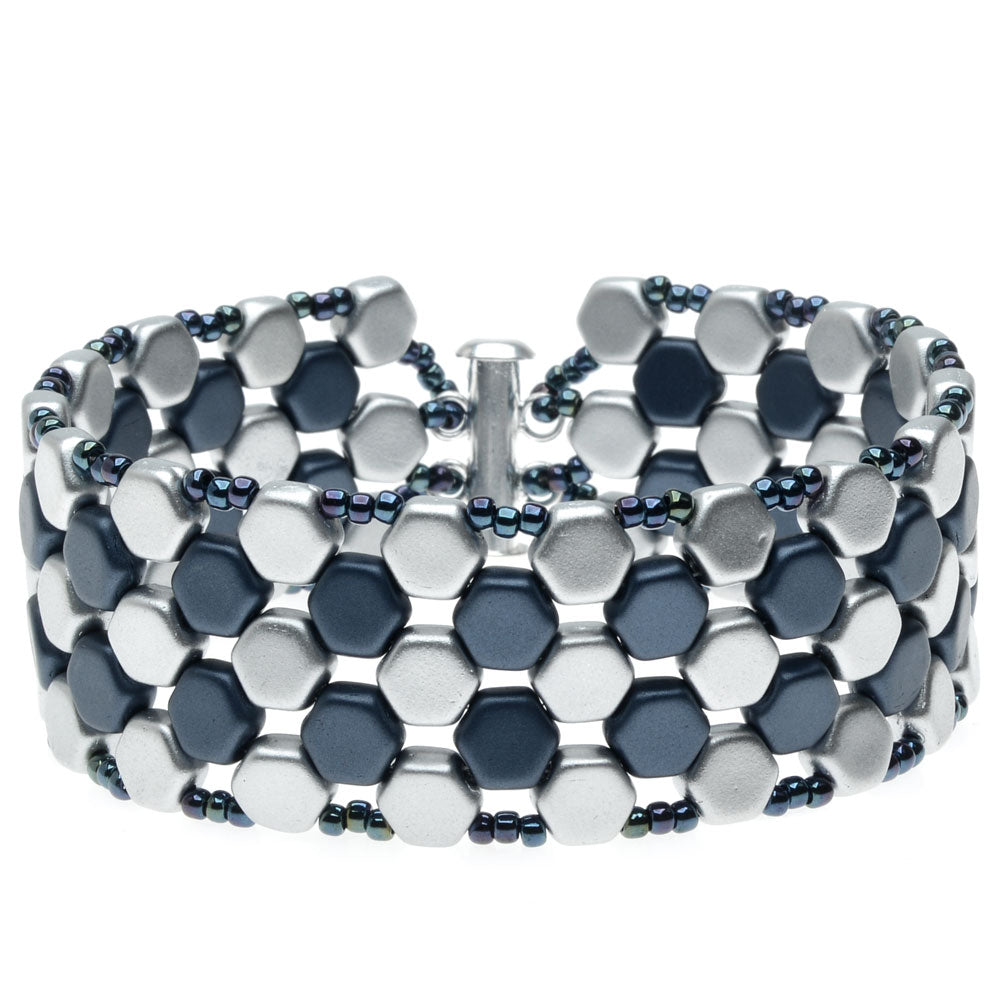
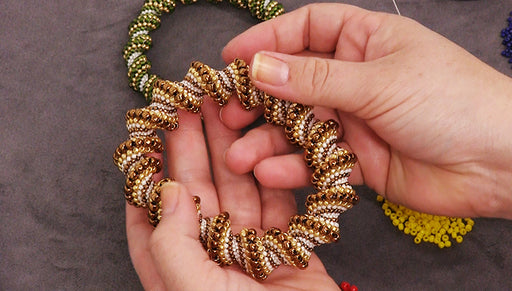
Audio Transcript
Note: This audio transcript is auto-generated and may not be completely accurate.
Hi, this is Kat with beadaholique.com i comb beads and I just made this nice little two needle method woven bracelet and I just kind of brought out all the colors here to show you that you can just pick your favorite color combination and pick your favorite Toho 11o seed beads to complement your colors so today I chose a metallic and I'm going to be using the blue and the silver and to make this bracelet you're going to need two strands of each color I also have a tube clasp here with two rings I'm going to be using the crystal with the fireline the size B I have a thread zap and then I also just have a pair of flush cutters so go ahead and I have my size twelve beading needles and like I said this is a two needle method and I have them strung and I have about six feet of my crystal fireline ready to go here so as soon as you have that ready go ahead and get out your eleven Oh Toho seed beads it should be enough and I'm going to go ahead and snip off from the strand my honeycomb beads now as you can see in my bracelet here there are two colors so you can decide which one you want more of and which one you want sort of less of as seen here you'll have three rows of gold and three rows of the blue just kind of get my table ready here there we go okay that's at my clasp aside so I'm going to take my two needles here and I'm going to start by using one silver honeycomb bead now these are to hold so I'm just going to show you how the holes run they run up and down just like so you can see that there is a little notch there and the little notch there so go ahead and just put on one silver bead and slide it all the way down until it is in the middle thread just like so now you'll want to keep your needles on the correct side so that they don't criss cross over so now I'm going to take the right needle and pick up one blue honeycomb and slide it on to the one side and I'm just going to slide that all the way down and you'll see how it'll fit right on top there I'm going to take my other needle and slide on one honeycomb bead slide that all the way down so you can see how they're going to sort of fit together and now again take one needle through this side of the silver bead take your other needle through the other side of the silver bead and go ahead and slide that down okay so you're just going to keep going you're going to add two blue two silver and what you're doing with this first strand is you're creating that center row so this is going to be the full length of the bracelet so continue your weaving until you let add your last silver bead till you get to the end so I'm going to do that and then I'm going to be right back to show you the next step alright so I finished my first row and my first pass with the needles and I have 18 of my silver beads in the row here and this will give you with this design this will give you a six and a half inch bracelet if you do want a longer bracelet this is where you're going to want to add more beads but you'll have enough in both strands that you can be comfortable adding any length that you need to so now that I've come to this point I'm going to I'm going to be adding the clasp so go ahead and take your tube clasp and just separate it and now with one of my needles I'm going to pick up three Toho seed beads and just slide those all the way down and again these are 1111 OC beads I'm going to take my tube clasp take my needle come up through the back loop and I'm going to pick up three more seed beads slide those down and now I'm going to pick up one silver honeycomb and I'm going to go through this second or I'm sorry this first blue bead that I have on that side so go ahead and pull that all the way down and that will hold the loop of the clasp on the side so now I'm just going to repeat on the other side so again pick up three Toho seed beads slide them down and again I'm going to come up through the back of that first loop there and don't worry this will all get sort of tightened up pick up an additional three seed beads slide those down pick up another silver honeycomb slide that down and now I'm going to go through this side through this second hole on that first row of blue honeycomb beads so now I'm just going to tighten up my work there so you can see all right there we go and now what I'm going to do is I'm going to continue to add a row of silver honeycomb beads all the way down equally on each side and you can work doing one this side and then one that side or you can just do all one at the same time so I prefer that method it's a little bit quicker and you see how it just tightens up nice nicely therefore you pick up a honeycomb bead go down through and just to keep my attention even I'm going to start on the other side so you can see how this develops and when you're picking up your honeycomb beads it doesn't matter which hole you go through because they'll flip around for you all right so just keep on weaving and I'll meet you down here at the other side okay so now that I have my two needles coming out of my ends here I do want to make another quick note to you about the sizing of the bracelet cause I don't want anybody to be surprised so again this is for a six and a half inch bracelet and it's eighteen of the silver beads going or eighteen of that sort of center row and what you do have left is you have enough to do two more rows of the silver so of your main color if you wanted to make it even longer than that you will need to purchase an additional length I just want to make that sort of clear but you'll also see like how many of the blue beads I do have left over so if you did want to modify the pattern at all you can do that as well so now that I have my two needles coming out here what we're going to do is we're going to attach the clasp on this end so I'm going to take my right hand needle and I'm going to pick up three of the Toho seed beads and slide those down and you're going to want to make sure that your class is going the right way so that it connects with that other side so now I'm going to go on this side I'm going to go up and through the top and down I'm going to pick up three more seed beads and now I'm going to take my needle and I'm going to go through that Center one right there and down through the blue one that's right next to it so my needle is coming out of the side just like so so go ahead and pull that through and I'm actually going to take my needle and go up through that blue one up through that silver one so my needle is coming out the top there pull through and now take my needle and go through that silver bead right there so that is one side so now I'm ready to complete and go down the other side but we got to finish our other end here so I'm going to take the left-hand needle now picking up three seed beads again going up through the top and through I'm going to pick up three more seed beads and I'm going to go down through and all the way through that blue and just make sure that your clasp is going the right way and your thread doesn't get caught anywhere okay there we go and taking that needle and going up through that blue up through that silver making sure to not get any of the seed beads that are left there pull that tight and turn that thread around and go through that next silver seed bead just like so okay so now this is what we have and when I have both of my threads coming out of these silver seed beads so now for the final pass what we're going to do is we're going to pick up three seed beads and go through the next silver bead and this is where you're really going to want to pull tight and tighten up your work make sure that it's nice and snug and you just keep repeating all the way down one side and then all the way down the other side and again you can go all the way down and then you know where you can kind of go back and forth and take my left hand you and show you how it starts to look okay so you see how it's going to develop so I'm going to continue to do this and I'll be right back to show you how to finish it off okay so now that you've come to the end of your reading I have both of my tails coming out of here and I'm just going to show you how to sort of finish it off and tie a tie in your ends so go ahead and take your right hand needle and you're just going to go back down through that first bead and coming out of that first blue bead and now just take your needle and go around the back make sure you're catching that thread bridge and you're going to pull take your needle through the loop and just go ahead and make a nice neat little knot and just go through the next two and just repeat that coming up through the punc make it a little loop putting your needle through doing a knot and then just take your needle and just go through that last silver bead there and now I'm going to take my thread zap and I'm just going to zap off that end so that's one side done and I'll just show you again real quick on the side and you just sort of mirror it so you come in through that first silver bead and down through that blue bead and sorry I'm right-handed so I'm just going to turn it around a little bit come down through catch that thread bridge make a loop pull through go down through two more beads make another loop and 3oh pull up tight just going to go down through that silver bead just to hide that little knot there and again just take your threads up and zap off that end make sure when you're done with your threads app that you put your safety back on so there you go that is how to make the Miss B bracelet again I just want to reiterate that if you want a longer bracelet you'll need to buy probably an extra strand of that main color way that you're going to do you can find all of these supplies and more videos at beadaholique.com you

You recently viewed

Clear recently viewed