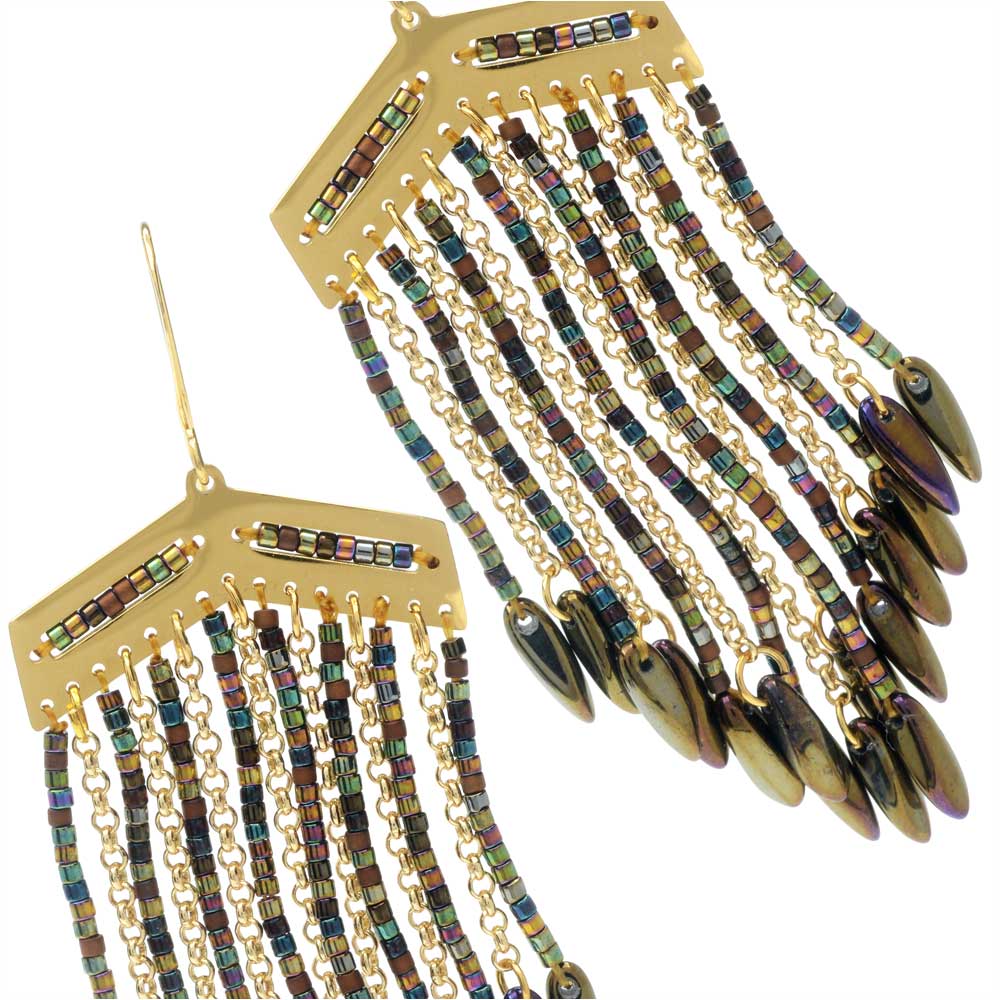
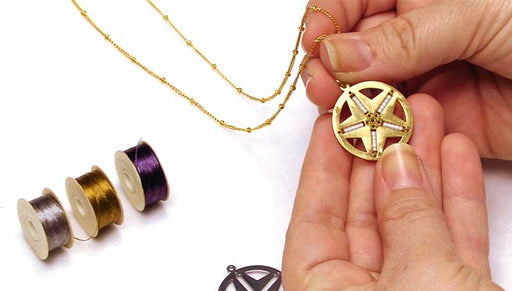
How to Make a Fringe Earring with Centerline Chandelier Pendants

SKU VID-1650
Designer: Alexandra Smith
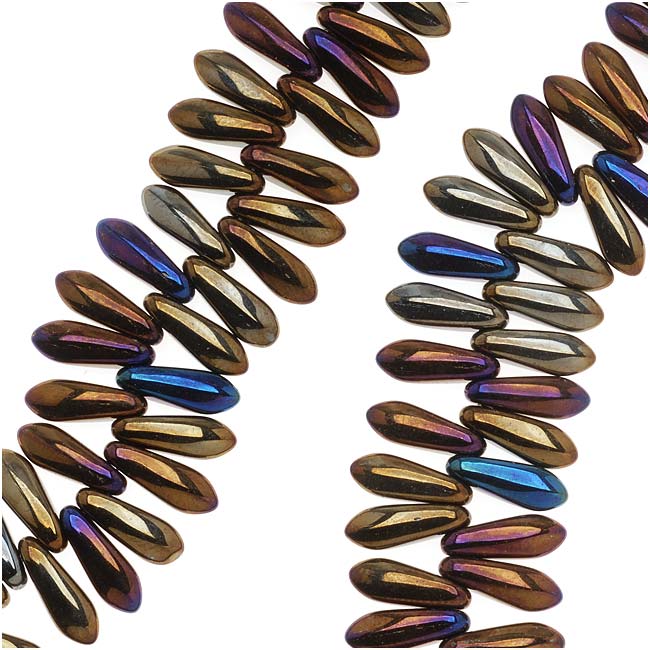
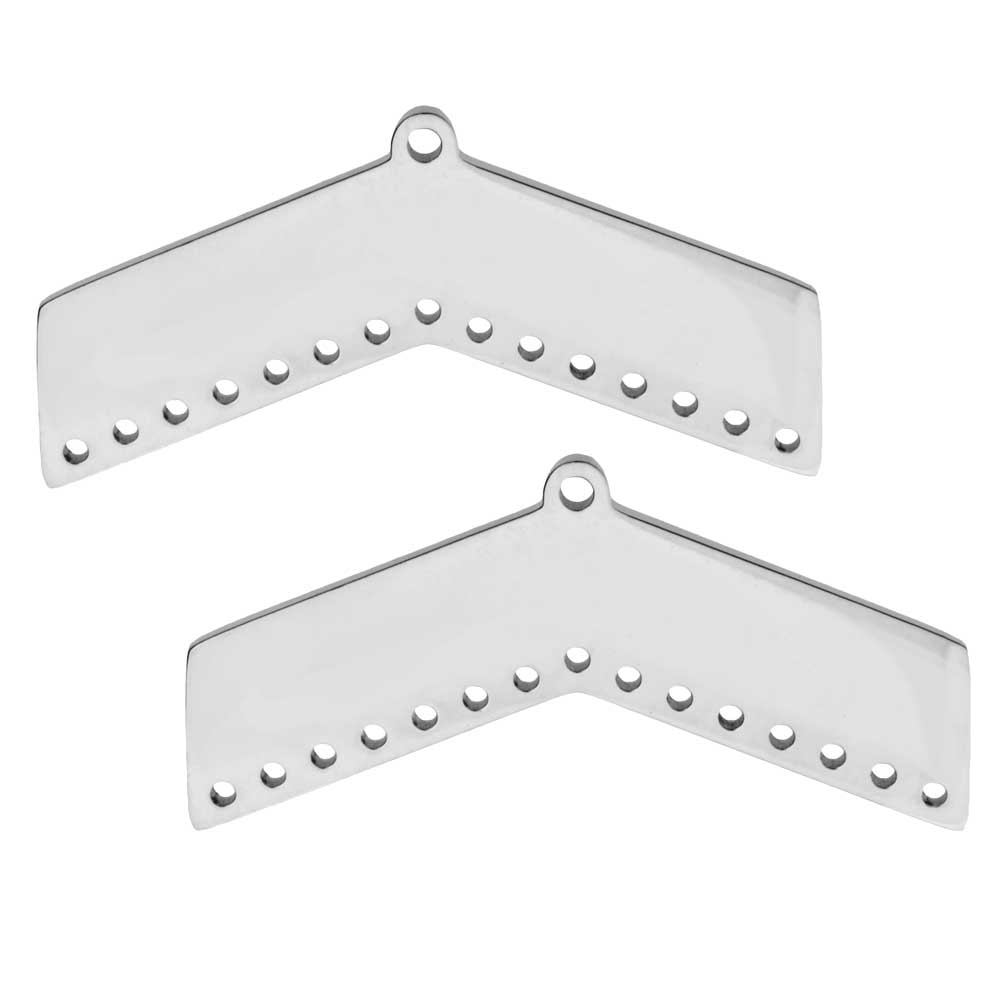
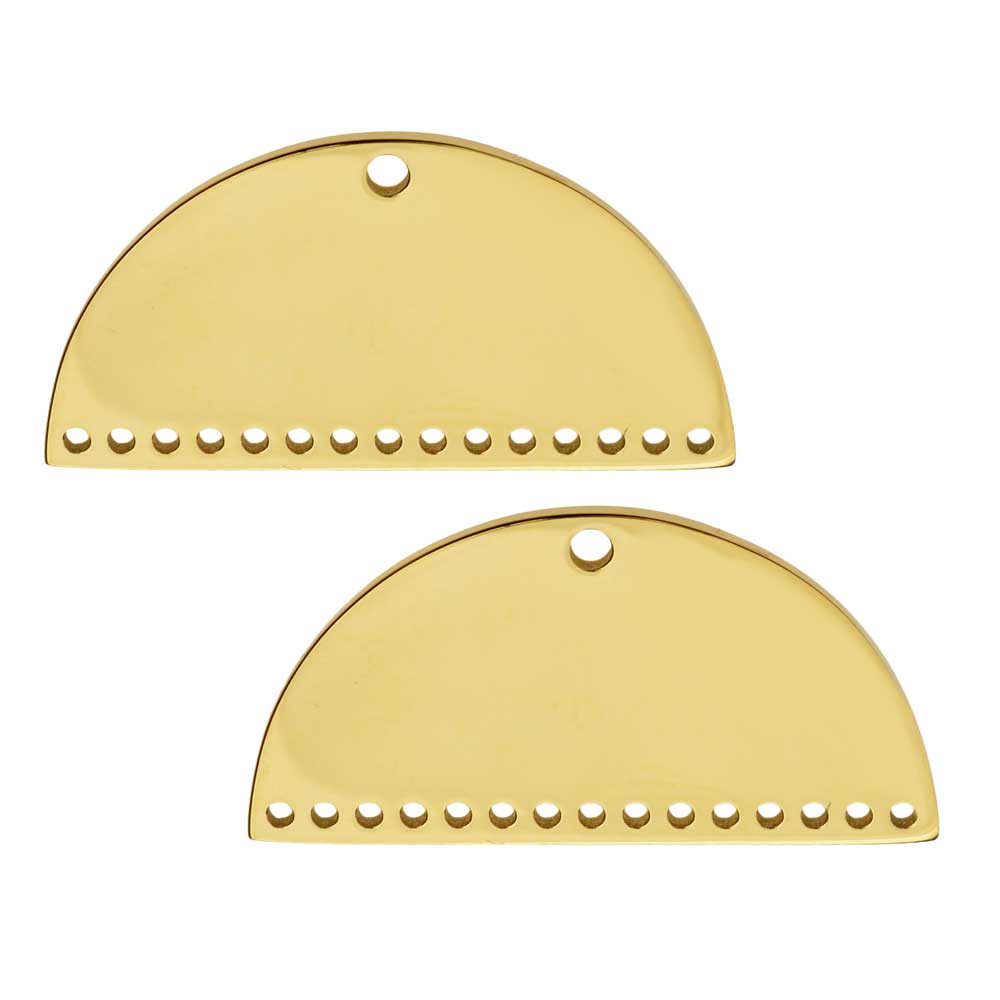
In this video, you will see from start to finish how to create this design using a Centerline chandelier pendant, Miyuki Delica 11/0 seed beads, Czech glass dagger beads, and slim rolo chain. First, you will see how to add beads to the grooves in the Centerline pendant. Next, you will learn how to string and attach the beaded strands. Then you will see how to attach the chain lengths with dagger beads using jump rings, and lastly, how to attach the earring hook.
Audio Transcript
Note: This audio transcript is auto-generated and may not be completely accurate.
hi this is Alexandra at feat AHA League here to show you how to make a fringe earring with centerline chandelier pendants so here's an earring that I made which I'm calling the cloak and dagger earring in a sort of curtain formation with these beautiful Czech glass dagger beads at the bottom and you'll see that the pendant has this signature centerline groove at the top that will be weaving beads into will also be creating the beaded fringe and then adding the chain in between so you can see that these centerline pendants come in a variety of styles here's the silver version of what we're making today we've also got some half moons that are marketed as bracelet links but we think they would make great earrings also and a couple of other chevron styles of this pendant so what I have that I'm working with are again these Czech glass dagger beads in a 3 by 10 millimeter brown iris a heavy metals mix beautiful rich my yuki 11o seed bead mix I've got 4 millimeter jump rings some 2 millimeter Rolo chain and my ear wire and for tools I'll be using a big eye needle some naima thread in this gold color that will disappear nicely onto the metal I've got my scissors cutters chain nose pliers round nose pliers and some GS hypo cement so let's begin I've cut two feet of the NEEMO thread and I'm going to thread it on to my big eye needle and we'll start by filling in those grooves at the top of our pendant I'm going to thread my cord mine I'm Oh half way down so that my needle is evenly placed in between and I'm going to start by coming up this little hole on the side of one of these grooves and come up and leave myself about a four inch tail that I'm holding aside and I'm going to take on eight delicacy beads that's the number that fit best inside these grooves six and eight the nice thing about the big eye needle is it gives you an opportunity because it's longer to double check your count so I know I have eight beads on there I'm gonna string them down and again my Nemo is double threaded through the beads for security and to fill out the holes of the beads so they don't flip flop around too much and now I'm stringing through the opposite side through that little hole and at this point I'm gonna flip my pendant over so that I can sort of with my finger tuck those beads up into the groove and I'm going to double back through all eight of those seed beads almost got that last one there you don't want to skip a bead there we go alright so let me thread my needle through now getting caught there we go and now I'm going to tie myself a simple overhand knot using my tails and my needle side what my needles a little bit cotton there we go alright I'm coming around once and twice before I cut my name out I want to take my G's hypo cement and dab a little bit of glue on that knot we use out a little bit there get my bead of glue on and close up my glue real quick so it doesn't spit itself out there we go and if you'd like you can let this sit for a few minutes to get tacky I'm gonna go ahead and clip because we need to move on so let me clip both sides off there with my scissors and we'll do the other side now to unthread my needle I need to bring my Nam out to the center and pull like so you'll find with this project you end up with a big pile of thread tails there's a lot of threading involved so let me get my next length about two feet I'll bring my ruler in here to clip and thread I'm gonna pull my needle halfway through so I have an even amount of Nemo on either side and I'm gonna repeat the process here I want to make sure my knots end up on the same side of the pendant so for that let me think this through I think I'm gonna want to flip this over and come through this direction let's read through my little end hole there I'm gonna hold out about a four inch tail for myself and take my eight beads on spread those down and come through the opposite side into that hole on the other end of the channel pull my beads through so they lay in that groove I'm gonna flip my pendants over tuck my finger underneath so that I can fit my needle back through the beads there we go coming back through and I get my loop off of there gets caught on the edge of the Chevron alright make sure my threads are pulled all the way through and again I'm gonna tie my knot make sure I got my attention right there there we go now for ease of use we have the option here of clipping off our needle first let's see if that makes it a little easier so the needle doesn't get stuck I'm gonna do my overhand knot once and twice and that's landed my knot on the same side as my previous one so you'll notice that I had flipped the pendants so that I would match the knots up on the same side of the pendant I'm gonna again take a little daughter glue and dab that on don't want to get it on the middle if I can help it close my glue up and clip my thread there you go my tails out of the way now we're ready to move on to the fringe I'm gonna leave it my pendant this side up to let the glue dry a bit while we do this so let me bring my naima thread back in and I'm going to cut now about 16 inches that's the amount that will be good for each strand of beads that we're going to hang on it's 15 and 16 thread my needle again and this time just bring my tail of an inch or two inch or two down and so for the measurements for the fringe what I figured out for this this increase for this taper is to start with seven sorry eighteen beads so I'm going to take those on to my needle got ten it should be 18 again with my big eye needle I'm going to take advantage of this lengthen double check my count just going by fives 5 10 15 18 ok I'm going to bring those beads down like so about halfway down my thread and take on one of my dagger beads and then what I'm going to do is double back through my seed beads so I'm going to grip them between my fingers like so to cheat the process a bit and try to get as quickly through there as I can alright doubling back so this is what we've got we've got our dagger beads with our threads coming back up through our seed beads and now I'm ready to come through the outermost whole of my pendant for the fringe there are 15 holes total and we'll be alternating beads chain beads chain and so forth so as I bring that on you'll see that I have my tail end on one side and my needle end on the other flop that around a little bit to get get leverage here when I sorry I want to get my knot tied securely on there so let me place that properly and I'm going to go ahead and take my needle end through and again tie an overhand knot once check my tension I don't want it too tight and I don't want it too loose so this is the point at which we want to get the right amount of play in our thread so I've come around once and I'm going to come around one more time for my double overhand knot get that to land right at the top now what I'm going to do is I'm thread my needle and gather up both of my tails both sigh of my thread and then rhe thread my needle with both of them in there just like so and I'm going to again double back through all of my beads headed back toward the dagger and this is weaving in the thread to make sure that knot stays secure pulling the thread all the way down making sure that any loop that I have up there is pulled through and taken care of and now I'm gonna clip my two threads just above the dagger where they come out of the seed beads and that's my first length of Fringe so now I'm ready to take off this extra thread from my needle and start my next next thread of Fringe so again I'm gonna cut another length is 16 inches and the increase is gonna be 6 beads longer than previous so I had 18 to start and now I'm going to string on 24 yeah this was a trial and error process for me to figure out how how much of a taper I wanted on the bottom of there alright so taking on 24 beads that should be 24 now I want to make sure that my thread is only single coming through these beads before I add on my dagger and it's once I add on my dagger bead that I'm ready to double back through so let me adjust my tail pulling through my needle a little bit and now I'm ready to double back through my seed beads I'm gonna grip them between my fingers and guide needle back through all of them at once just like so now again I'm ready to thread up through my centerline pendant I'm going to skip one hole and come through the third one in gotta find where my tail is and pull that out and again for ease of use I'm going to take out my needle so I can more easily tie my threads together in an overhand knot coming around once and twice and now I'm going to gather up both sides of my thread and restring them onto my needle then I'm going to get myself positioned to come back through all of my beads starting at the top and threading down toward the dagger bead working my way down threading that needle through all the way to the bottom there we go I can take my needle off now make sure my threads are pulled all the way through and clip my thread so I'm gonna repeat repeat this process all the way up to the middle and let's review the count it's going to be 18 beads for the first fringe piece 24 beads for the second fringe piece 30 beads for the next one which is 6 more and again 6 more to make 36 or the innermost on this side then we'll be working in the reverse and we'll do 36 30 24 and 18 working across the length of the center piece so I'll continue and meet up with you once I'm adding on my last fringe piece of 18 beads on the far side now I've completed adding my fringe my beaded fringe and I want to reiterate the numbers of beads that I used to get this tapering effect we have 18 beads 24 beads 30 beads 36 beads and we're working back 36 beads 30 24 and 18 and now we're ready to insert some of this 2 millimeter slim Rolo chain and for that I've begun by pre cutting myself a length of 17 links and I find with tiny work like this with incremental measurement changes that it works best to count the links and beads rather than measuring although I will hold it up to a ruler for you once we're done so now to attach these I'm going to take one of my 4 millimeter jump rings and one of my dagger beads slide that on and also slide on the end link of my chain I'm gonna close that up and take another jump ring slide on the other end link of my chain and now place it where I want up in this second hole in on the center link piece there we go alright I'm gonna close that up and that's our first length of chain now I've pre-cut my second piece and this is 23 links so again there's going to be a six link incremental difference just as there was a six bead incremental difference and that's an easy way to remember the graduation of these pieces so again I'm gonna take my jump ring slide on my dagger bead and link of my chain close it up grab the other jump ring the other end link and slide it on to my fourth hole in on my centerpiece take those two sides and close them up and I'm going to work inward the same way and get back with you when I've added my last length of chain and again we'll go over the numbers of links in the incremental graduation of the piece so I've completed adding all the lengths of chain and I want to really reiterate the numbers of links on each one so here we have it 17 links 23 29 and 35 again that's an increase of six links per strand and then once we move back it's gonna be 29 23 and 17 moving down the other edge of the piece so now that we have those all on all we need to do is put our your earring hook on let me open this to the side and slide my centerline pendant and I'm going to pay attention to which side I have my my glued knots from the groove up there and I'm going to make sure those are in the back close up my earring hook and now we have to cloak-and-dagger earrings those are just so beautiful and rich so again you can create designs using these various types of tops that we have and these are all available at beadaholique.com and also please subscribe to our YouTube channel for all the latest updates thanks for watching

You recently viewed

Clear recently viewed