How to Make a European Style Large Hole Bead

SKU VID-0414
Designer: Julie Bean
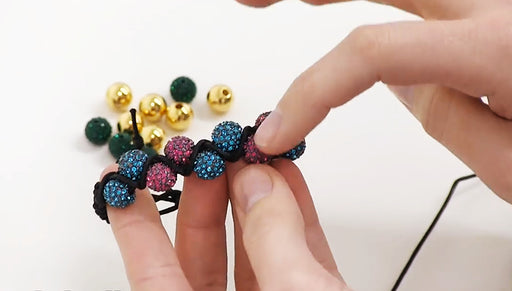
In this video, see how to use Crystal Clay and grommets to make a large hole Pandora style bead. You can then decorate your bead with Austrian crystal chatons, Sparkle Dust mica powder, and other embedded objects.

The brand name for the crystals shown in this video is no longer available. High quality Austrian crystals are now available under the PRESTIGE™ Crystal Components line.

Audio Transcript
Note: This audio transcript is auto-generated and may not be completely accurate.
Hi! This is Julie with Beadaholique.com and I want to show you have to make some large hole pandora style beads out of pretty simple ingredients and the base of them is going to be grommets. Got them right here to actually do this surrounded it's gonna be crystal clay which is a self hardening two part epoxy clay I added some crystal chatons. I actually added mica powder as well to give them a little bit of shimmer what you're going to need is some chatons if this is the pattern you choose to follow and I'm actually going to mix it up a little. Here I used all the same size I have sample here for the video. I used two different sizes you'll need it two grommets per bead you make you're going to need some crystal clay I thought I'd do it in pink you need some mica powder which is this crystal clay sparkle dust what it looks like loose eye shadow mineral eye shadow what it looks like in terms of tools you'll need a magic pick what is going to help you picked up your chatons I got a little pad here which helps the magic pick stay sticky you need a paint brush for the mica powder you're not going to need a scissor. I'm going to use it with the straw in just a second. You will need a straw You need one that is about the size of the grommet just a little bit smaller is ideal so keep that in mind. You'll find straws at fast food restaurants, places like that. Just start collecting them you'll find one that is the size of the grommet and you need a plastic bag or piece of wax paper for this project as well So to begin I've got my straw and I actually used it to create these two I actually punched the center out so to keep using my straw I'm going to make a snip and cut off that end so now I have the hollow portion again take the crystal clay I've got part B which is the hardener part A which is the color and I need equal parts of both take a pinch off of B and A rolling them into two little balls and comparing the size of the balls to see I have equal sizes I'm happy with that. Wrap up the extra clay With Crystal Clay, the actual curing process doesn't start until you mix the two together so you have some work time to you start mixing it you have about two hours of work time but I find that it starts to dry out after about twenty or thirty minutes, so you do want to do all of your work in the beginning. To mix it up, squish it together like so you can wear gloves when you do this, if you don't wear gloves wash your hands right away I prefer not to wear gloves in the video because it's hard to see what I'm doing you see I've got some modeling going on and just gonna mix for a couple minutes until all the striations s are gone it's fully mixed roll it into a ball this is going to cure on its own so there is no need to fire or bake it take my plastic bag, you can use wax paper as well take my ball and flatten it a little bit I want it to still be round but I want it to be flat take my straw and on the end which is hollow I'm going to center punch all the way through pull up though the clay within the straw discard that and now we have a hole to place the grommets I'm going to very carefully put the grommet in the middle and my straw is a little bit larger than I would like so to compensate pinch the clay together a little bit that's secure on that end carefully pick it up. It is quite sticky so bear that in mind. Be gentle with it put the grommet on the other side again press it inwards squeezing the sides together that's narrowing that hole I want to look at it from all angles and I wanna form it into a nice uniform round shape like I did on the examples when you have the shape take the end of a dowel or paint brush form it a little bit more. This allows you to not have to hold onto it and get my fingerprints on it after we've done that we can now add our chatons clean this up ever so slightly the clay is starting creep over the grommet and I don't want that. I want a more determined look now the fun part I have my magical pick I'm using it on the pad. It has some tape on there and it help's it stay really nice and sticky pick up a chaton and place it by having a structure like this that your got your bead on. You can add a little bit more pressure to get that chaton in there I know from experience I'm actually going to pick up these heavier ones place it in there it might be fun to do more random look with this one so I'm just going to put these where ever you want these are nice and sparkly look at my bead see if I need to add anymore the more sparkle the better with this one let yourself play, don't feel it you have to do it any certain way I think that looks good now I'm going to make sure my shape still intact add one more crystal why not now I'm going to add mica powder you want to add the mica powder while it's still wet. I need the paint brush pull this off put it on the end of my magical pick with the mica powder, I'm going to grab a little bit on the tip of it holding my bead over the tub just paint it on it's going to give it a shimmer so some of the pink is going to still show it's going to give it a more silver look we have enough on there and you can go and be little bit firmer with my paint brush to get the access off we have just created a large hole pandora style bead using crystal clay and mica powder and chatons and grommets here's an example of a couple other ones. You can see it's nice that the pink does show through this was done with white and this with black I hope you have fun with this technique. Feel free to experiment and let your creativity flow. Go to www.beadaholique.com to purchase beading supplies and to get design ideas!

You recently viewed

Clear recently viewed