|
The Beadsmith Bead Loom Kit For Beginners - Weave Necklaces Bracelets And More! SKU: XTL-6110 $13.99 |

|
Japanese Nylon Beading K.O. Thread for Delica Beads - White 50 Meters SKU: XCR-9701 $6.49 |

|
Fiskars 5 Precision Tip Scissors - Super Sharp SKU: XTL-5700 $7.45 |

|
The Beadsmith Ultra Suede For Beading Foundation And Cabochon Work 8.5x8.5 Inches - Grey SKU: XCR-4200 $8.99 |

|
The Beadsmith English Beading Needles Size 12 (4 pcs) SKU: XTL-3006 $3.99 |

|
Beadalon Large Beading Mats - Prevent Bead Rolling 13 X 18 Inch (Set of 2) SKU: XTL-9935 $6.75 |

|
E6000 Industrial Strength Glue Adhesive (1 Oz) SKU: XTL-1051 $6.99 |
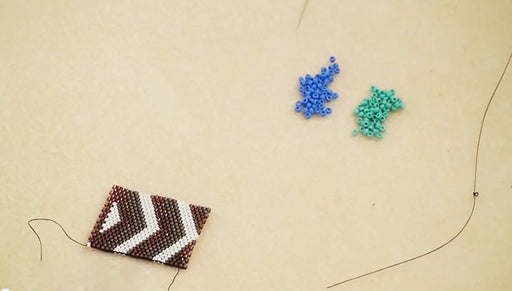
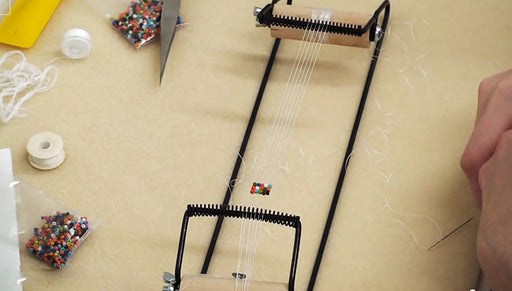
Hi this Megan with Beadaholique.com I today I'm going to show you some different ways of finishing off loom bead weaving. So when you pull your piece off of the loom you have your work threads running along that would be nice and long and loose You need to find some way to finish those off. It is possible especially with a narrower apiece to just tie your threads bring them to the back and weave them in if you have a wider piece you start to have an awful lot of threads to weave in into the top few rows of beads and especially if your beads are smaller it might not work I personally like to to put bead loom weaving on a backing So I'm just gonna show you with a couple different ways that I've experimented with and found one of them is to sewing your weaving onto a fabric or leather and the other one is to glue you're weaving into a bezel but either way the first thing that you need to do tie off the threads Take your threads into little pairs of two and I've already done this on the other ones here going to show you on the last one. Take your two threads Do an overhand knot loop it around and then before you pull it tight take a needle put the needle in the knot close to the bead weaving If you ever done pearl knotting, this is very similar to what you do with the tweezers in pearl knotting as you pull keep the knot close to the beads and then just slide the needle off. So once you're threads are nice and knotted then you can trim them down you don't want to cut them too short just give them about an inch maybe a little bit less so it can get nice and securely tucked underneath there So as you can see and this choker here I've taken this piece of bead loom weaving and sewed it onto a piece of ribbon and turn that into a choker. I'm going to show you quickly just how you sew that down. You can use ribbon. You can use ultra suede. You can use any kind of canvas or fabric So it's really up to you what kind of look you're going for just cut your backing to the same size and shape If you wanna do something like this where it extends past the ends. Make sure you planned ahead before you cut I'm going to take to some nylon beading thread and beading needle I'm gonna tie a knot on the end I'm going to do a regular sewing knot if you don't know how to do a regular sewing knot by rolling off your finger all you need to do is make a knot and go through several times. That's a surgeon's knot and pull tight If your knots not large enough to keep it from going through the fabric then just make another one right on top of that From the corner here inside a little bit you go out to the edge and you want to be just below the corner right where your first row of beads going to sit take your beaded piece put the knots to the backside and line that up on your backing fabric backing material and then you can see your threads coming out right next to that hole there go all the way through the first row and then just take that little stitch at the edge of your backing material loop it from the bottom up so that it grabs that until now go through a bead and then go from the bottom up through your backing material and make sure that you have your needle coming to the inside of the threads that are running through there so it can hold down pull that tight so that the thread sits between the beads and then you're going to go to the next bead over and you're going to continue this way so from the bottom up through and make sure it's on the other side of the threads that run there and through the bead and keep going until you get to the end and once you get to one of the sides you're going to make sure that your threads are underneath it tucked nicely in and you're just going to do a whip stitch which is just around in a spiral catching both pieces in each stitch what you want to do is go from the bottom up for your backing material and then catch the thread bridge that's between the two beads on the end and back around from the bottom up between the next two beads and catch that thread at the end You're just going to continue down the length of the piece make sure that your thread's still tucked in as you work so they don't stick out and that's going to give you a nice secure foundation you can see the back is very neat. It just gonna have tiny little stitches showing when you get down to the bottom you're gonna secure this end the same way you at this end turn the corner and go all the way down and if you need this add more thread as you go You can tie off the beads and weave in your ends the same as you do in bead weaving That's how your going to sew this onto a backing like in this kind of use and one of the other ways I want to show you is how to glue it into a bezel which is really quick and easy first thing you're going to do is take E6000 on a toothpick or a scrap piece of wire some kind of applicator if you have the E6000 fine tip you can just do it straight from the bottle the tube just spread a thin layer on the back side of your piece. If you have a front side and a back side that you prefer make sure you do this on the back then I'm going to take you loose threads fold them to the back You're going to get glue on your fingers make sure you don't get it on the front it on the front and try to make sure that you get your threads always around so that the knots don't show from the front you don't want this to be too glupey. Don't use too much glue because it won't lay flat and you can also use your applicator to get those down into the glue once you have those glued down you don't need to let them dry all the way because you're going to be adding more glue to the bezel and just glue it down now the tricky part about this is that you want to get glue into all the corners and the edges of the bezels pretty quickly before it starts to dry so be thorough but be quick you want to give yourself pretty generous layer. You don't want so much that the glue seeps right through the beads but that wanna make sure that the glue is gonna get up into all the beads all the way into the corner all the way to the edges take your piece and make sure that the knots are tucked in using the back of the wire you used for the applicator for that and then you're gonna just let that dry nice and thoroughly making sure that all the beads on the edges in the corners are tucked in push down So that's another way that you can finish your loom weaving you can experiment and come up with all different kinds of ways to do your own finish on it. You could string the work threads into beaded tassels or just tie them together. If you wanna make a loop you can kind of play around but there's a couple of ideas for what I like to do when finishing my work. Go to Beadaholique.com for all of your beading supply needs!
Related Videos


How to Bead Weave a Star with Brick Stitch
In this video, learn how to combine circular and flat brick stitch to weave a five pointed star shape.


How to Flat Odd-Count Peyote Stitch
Learn how to flat odd-count peyote stitch in this bead weaving tutorial. This stitch is a bit more work then even count peyote, but it allows you t...
View full details

How to Use a Bead Loom
This video demonstrates how to string and weave on a bead loom. Quickly and easily create woven seed bead creations!
