Audio Transcript
Note: This audio transcript is auto-generated and may not be completely accurate.
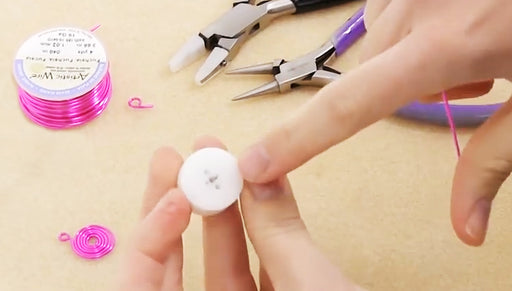
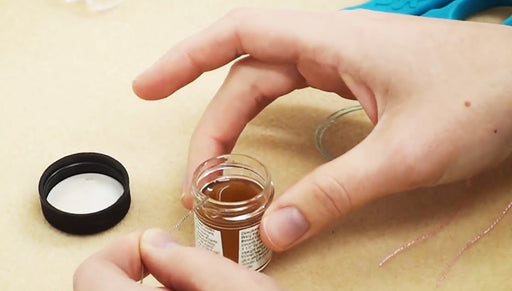
Hi this is Megan with Beadaholique.com and I want to show you how to do viking knit using the Lazee Daizee viking knit wire tool kit it comes in this plastic container, look like that open it up you've got your instructions don't throw this away because this is also a handy reference. So I'm show you how to do it but this has some good information such as what hole on the draw plate you wanna use for what gauge wire you used and how how long that will make it all that good information. So keep this. This is very handy to keep inside the kit you'll have the actual Lazee Daizee tool, so this is the tool, this little daisy shaped piece comes off this the draw plate. It helps you smooth it out at the end. It's going to hide a number of mistakes, we love this piece we have a little clothe here for smoothing it down before you put into the draw plate it comes with a really long push pin. some clippers which are in there for cutting the wire and then a little wire coiling mandrel you don't need this to do the viking knit. This is just for if you want to do a coiled end cap, which it tells you on the instruction manual how to do so you can do viking knit which looks like this with a few different gauges of wire you can use twenty-four, twenty six, twenty eight, they're all going to work, this was done with a twenty four gauge craft wire I'm going to use twenty four gauge in this video to show you. So I'm just gonna show you how do you use the tool to do the viking knit and how to add nice pieces of wire. You don't want to work too much at a time there's another video showing how to do the ends, how to add to the cord endnd cap on to finish it off to start you only want to work with two to three feet of wire at a time actually probably twenty four to thirty inches, you don't wanna overdo it so go ahead and cut a piece of wire about twenty four to thirty inches long take the wire and there's a hole in the Lazee Daizee near the top and it goes at a diagonal through the piece here so put it in the upper hole and have about an inch of your wire coming out of the bottom hole and hold that still now you're going to take the other end of your wire you're going to put it through one hole in the daisy part and you're just gonna put it to the one right to the right just to the right of where it's coming out of and then when you bring your wire down you wanna make sure that it's not underneath the original part to the left there anytime you're pulling your wire through make sure it does not kink give that a little tug. Don't pull too hard now every time you make a loop use your thumb to hold the loop in place this first row you want your loops to come down to about the indentation here use the middle finger of your left hand to hold the tail in place use the thumb to hold your other loop in place now you're going to bring the tail of your wire down through the top of the next loop in the daisy the next petal as it were and come over the rest of the wire pull down, you want as you practice, you'll find the tension that you need to make it nice and even and right down through the next petal hole and pull you want this bottom line here for this first row to be about the indentation, you need a little bit extra room so that you can clip those off hold the loop go down through the next and pull you don't have to go around every hole, you don't have to be six loops in a row you can do fewer it will result in a thinner piece but I'm going to just show you six that will result in a piece about like that it's easiest to start with doing one each one in each one to keep it straight and continue when you get back to the beginning take your tail end of your wire and you're going to go underneath both pieces of wire in the first loop that you made and again you're going to pull your tail over your existing piece of wire give a little pull hold that loop with your thumb go underneath both pieces of wire in the next loop from right to left over the rest of the wire and give a pull and now you want to try to keep your loops all the same size and you can twist the head here a little bit the idea is to have a loop sitting on each flat edge of the hexagon here and that's gonna make it easier to bring your wire underneath the loops every time you wanna hold that still with your thumb go under the next loop under and if your first few rows are really messy it's okay, you can always trim them off this does get neater with practice much neater than mine, I have not practiced enough for mine to be perfect yet either when you get back to your first row you're gonna go into that loop and you can see the tail is still on its way down there, go ahead and grab the tail too, it's just gonna make it a little bit more sturdy the pin is to help get underneath the wire you can kind of lift it away a little and then it's easier to put my wire through so go underneath both pieces of wire in the loop and underneath the tail just to keep it in place and then you're going to continue around for the third row only want the wires you want. Don't get your wire stuck all these other places here you just want the two unless your grabbing the tail the idea is to have all your loops the same size that will give you a really nice uniform finished piece anytime that it's kind of difficult, go ahead and go in there with the pin tool lift it up a little and don't forget when you start a new row it is gonna move down so you don't need to try to make it work straight across. You're just going to take a step down every time so you can see this one is lower than this one lies that is the way that needs to be once you get past the first few rows, you're gonna get to the point where your tail went in the hole and you won't need to capture that any more there you're just going to continue to work until you're just about done with your wire I'll show you how you'll add a new piece in and as you get to the point where you're tail comes out here, you do not need to weave that piece in that will actually trap your piece on the tool don't grab this piece, grab the the first one before it goes in, not the very end when it's coming out and once you've gotten around a row without weaving the tail in it's actually gonna be helpful if you gently don't squeeze too much on your work. Just squeeze at the top where the little daisy shape is pull your work off we're just gonna trim that tail once you keep going you won't be able to get up into your work to trim it just trim that off and then keep it to the outside and slide that right back on then you want to make sure that you've lined up a row with the flat side of your tool you don't need to leave yourself a very long time now but when you've got about a couple of inches left go through the loop and then bring your wire straight down and then you're going to very gently, squeezing just the tip and not the actual knit part lift up until your last loop is over the top hole in the diagonal hole you're going to get a new length. You only want to work with about twenty forty, thirty inches at a time bring your new wire through the center of that loop and down through the hole you're going to fold back and hold it to about an inch just like you did at the beginning bring your wire down a little bit gently then you're going to complete the rest of the row just like you would normally and once you've moved to the point where the head is not attached anymore it can be a little bit more difficult to keep your rows straight in place on the flat sides, so be sure that you keep them nice and lined up so that you have a loop sitting on top of the flat part, it much easier to put the wire through underneath when you get to this tail coming out of the tail don't catch that just skip over it Once you've finished the rest of the row and you come back to the loop in which you have a join gently pull your work off the tool bring your ends together place it back on you're gonna pick up the two sides loop the two pieces of wire on the sides bring your piece right through there just like normal and then continue around finish the row and don't worry about what the joints look like you can't see the tail through the draw plate. You're really not going to see that very much of that when you come back around to the loop that has the tails you're going to grab the sides of the loop and the tails you want to grab the tails for three rounds you got them in a first round this is number two, your gonna grab them two more times around If your rows start to migrate you can also use the pin tool the try to lift them over a little bit. Just be gentle using wire especially a dead soft wire like a like artistic craft wires be gentle if your have or too rough it's pretty soft, you might just break your wire you can also pretty easily scratch the color finish off if your using a color finish just gentle I'm gonna grab the tails with my loop for the third time and then pull your work up and trim the tails not you're working wire, just the tails, just right at the bottom of the loop slide your work back on as you work this on, it's going to work up, you're not going to be able to attach the head back on anymore if you do a longer piece like this, if you're gonna do a necklace piece it's gonna get quite far off of the tool so just make sure that you're working where it's comfortable for you to hold onto the tool where you have access to those holes when you add new wire and don't worry about this piece being attached just continue on until the end of your wire length and just keep adding pieces until it's as long as you want it to be and don't forget when your figuring out your finished length that you are going to be adding some type of end cap to the ends and that is going to add length depending on what type of end cap your using and also when you're figuring out the length you'll need to use the chart given on your Lazee Daizee instructions because there's the whole chart I'll show you when I', done with this in a minute, there's a whole chart that shows you what the finished length gonna be depending on how small you draw through the draw plate because it's going to get longer when you draw it through the draw plate you can either just do a whole lot extra and experiment and see how it goes or you can try to actually figure out how much you'll need go ahead and when you get to the links that you are happy with just going to bring the wire down and you don't need to do any kind of securing on that next you're going to push the little head part of the daisy down so that you can get access to those loops at the top make a cut so that way you can pull it off and you are gonna lose some parts just take off anything that's loose and don't yank on the tail just trim it I would trim it just tiny bit above and again this tail also just a tiny bit above where it's coming out of the loop on your instruction sheet here there is a viking knit wire draw chart this is based on using twenty five feet of wire pick your gauge and how many loops you made which is if you used all six or if you used four or five and then it's going to tell you raw how long will it be, so I used twenty four gauge wire with six loops, so it's raw it's telling me that twenty-five feet will give me seven and one eighth inch length if you draw it though the three eighth inch the hole on the draw plate it's gonna give me seven and three quarter inch length and so on. where it says n/a that means that you piece is to thick to draw through that hole don't try to do it, it'll scratch up the draw plate so this is gonna be how you figure out how long you want how long your piece is gonna be based on twenty five feet of wire so that'll give you a good idea so when you've got your piece off of the tool take conditioning fabric and just roll your piece in the fabric it helps to line up the rows and get ready for the draw plate now you need to put some wire to hold onto when your you draw this cut yourself three pieces and they should be three or four inches long take the top which is where you have all the rounded loops place the piece in you might want a little bit longer. Cut yourself maybe five or six inch pieces of wire you're going to go straight across they're basically six loops, so gonna go through two and two bring it through straight across and out the other side then take your wires and twist them up you wanna use a thinner gauge wire for this, if you we're using scraps that's fine but you don't wanna make it too thick because you want to give a nice twisted handle, what this is going to do is allow you to pull evenly on all the loops at once. So you're going to take the draw plate, figure out what size you have here and then you're going to go to the next smallest hole and pull your work through it a few times, try to do this in one fluid motion, it you have a long piece, that can be trickier if he stop you might kinks and dents, once it's fitting easily through that hole you're gonna go down one in size several times on that one then go down a size you can use pliers pull it through the first time you can see it's thinning it and it's also smoothing it down and it looks nice and even. You want to make sure you're not drawing it through anything that it's smaller than it recommends. This says the smallest that it recommends is a quarter inch so that's going to be an quarter of an inch, that's going to your finished piece when you wanna cut this, you don't need to worry about finishing the ends all you're going to do is cut very slightly longer then what you want and then pull off the loose pieces it will not unravel so anything that's hanging loose there and that's your end and then you can attach a cord end caps to that. So check out the other video on how to do that. Go to www.beadaholique.com to purchase beading supplies and to get design ideas!