
|
22K Gold Plated Metal Tiara Headband Frame - Fun Craft Beading Project 5.5 Inches (1 pcs) SKU: FCO-9016 $6.75 |

|
Silver Plated Tiara Headband Frame - Fun Craft Beading Project 5.5 Inches (1 pcs) SKU: FCO-9015 $3.79 |

|
Wire Elements, Tarnish Resistant Gold Color Copper Wire, 28 Gauge 40 Yards (36.5 Meters) SKU: WNT-2833 $10.99 |

|
Toho Round Seed Beads 11/0 201 'Gold Lustered Amethyst' 8 Gram Tube SKU: JSK-0078 $2.99 |

|
Sharp Flush Cutter Pliers - For Cutting Beading Wire (1 Piece) SKU: XTL-5600 $23.99 |

|
Beadalon Large Beading Mats - Prevent Bead Rolling 13 X 18 Inch (Set of 2) SKU: XTL-9935 $6.75 |
Related Videos

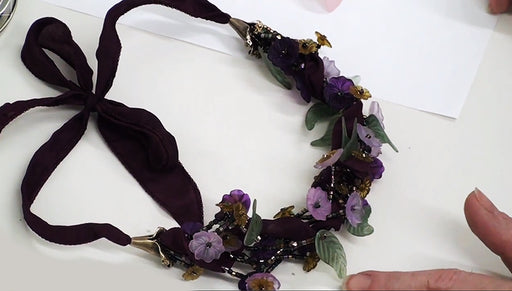
How to Color Lucite Flowers and Leaves with Gilders Paste
In this video, see how to quickly and easily color lucite flowers and lucite leaves using Gilders Paste. You can create a wide range of colors and ...
View full details
How to Turn Stamping Blanks Into Links and Connectors
In this video see how to take a stamping blank and turn it into a link or connector to be use in your jewelry projects. You will be punching holes ...
View full details

How to Use Bail Making Pliers and Make a Bail
In this video see how easy it is to make a bail out of a connector or filigree piece using Wubbers Bail Making Pliers. Available in small, medium, ...
View full details