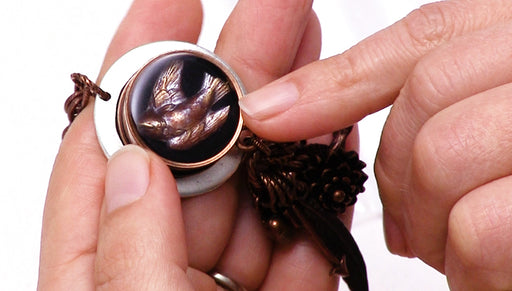
How to Create a Texturized Crystal Clay Stamping using a Ribbon End by Becky Nunn

SKU VID-1199
Designer: Becky Nunn
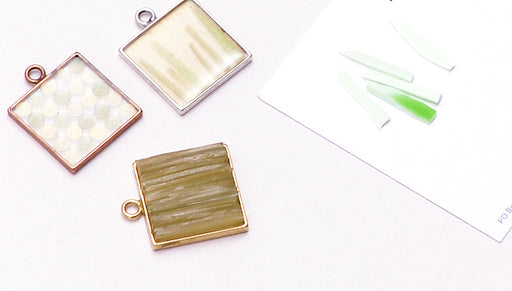
In this video you will learn how to use Crystal Clay to make a texturized stamping and attach it to a ribbon end for a unique focal for your jewelry. You can use this technique with various kinds of surfaces that have a texture you want to impress into your clay.
Audio Transcript
Note: This audio transcript is auto-generated and may not be completely accurate.
hi this is becky nunn with nunn design and I'm a guest designer at beadaholique in this video how you can make a texturized crystal clay stamping using a ribbon end what you'll need for this video are some of the Nunn design ribbon ends a little piece of rhinestone chain some crystal clay I already pinched off two equal sized balls and mixed it fully you will need some mica powders some texturizing pads a q-tip and a couple of tools for the first step what we're gonna do is we're gonna take one of the ribbon ends and we're gonna create a little bit more of a channel for the clay to fit into I'm going to do that by taking a pair of and you don't know spires and just placing it inside of that ribbon end and creating a wider entryway I'm just doing that by inserting my plier in and slightly rotating it so that there's a wider gap there this will make it easier for us to insert that crystal clay once that we have that opened up pinch off a ball size let's see I'm just kind of doing this off a feel of like how much clay do I want to be on that design maybe a little bit more so this was already pre-mixed and now I'm just making a nice round ball using the palms of my hand hand and I'm not having any creases in the crystal clay so now I have a nice smooth ball now I'm going to Pat it down slightly and this is where I'm creating this Niq shape I love the more organic look today's to these pieces so if you have a regular look I just think that's bonus so I mean just using the fingertip my fingertips to slightly Pat this down and create a shape that I like then once I have a shape that looks like it'll work nicely I'm gonna flatten down a little bit more just one of the ends this is the end that's going to insert into the ribbon end let's see how flat that is when I make it a little bit flatter so you can see I was wanting to slide it down into that opening there you go and this might feel really awkward when you first do it just if it doesn't work just go ahead and pull it out and Pat it down again till you get it just the right way that you like it if you got any clay on the sides you can use your wet wipe to clean that up all right so that's gives you an idea and then I'm using my fingers to kind of just sculpt that to create that shape that I like I'm going to lay this down for a second and use a wet wipe to wipe the clay off of my fingers and pick it back up and wipe it off of the metal if I got to any on the sides of the metal right here you have 90 to 120 minutes to work with the clay before it really starts to set up and hardens so you want to make sure that you got the clay off of any piece before it starts to really get hard alright now that you have your clay that's set inside of there I'm just gonna leave this one side open while we do this next these next couple steps and I'll close it once it's hard then I have a texturizing pad that I'm using and depending on where you like the design and where it looks like it might be a good design to go like right there or possibly even let's see let's see maybe something like let's try this right here so that's where my design is gonna go about right there so I'm thinking about how that design how this part right here is going to work because I'm going to need to take this over to the side of my table to make that impression so that the this part is off of the table and then I can press down so once I have an idea of the area of the pad that I want to use I'm going to use some mica powder and I'm going to smear it on to the texturing pad texturizing pad this has a dual purpose one it's gonna create this look like we're seeing here where it has the color already in to the clay and two it'll help so it doesn't it doesn't stick to the texturizing pad when I make the impression so now that I have my texturizing pad and I have my clay and I have kind of the shape that I like I'm going to take that to the side edge of my table and then I'm going to press my clay right into the texturizing pad and squish down so that's why I had to have that on the side edge I'm also using my fingers to kind of sculpt that shape that interesting shape one last time then pick up your pad and let's see how we did and I'm slowly releasing it now we have our design into the texturizing pad just so that it won't stick on to the table I'm going to move it to a little sheet like that and then to create this piece right up here with rhinestone you take a little bit of your rhinestone chain and you can lay it out on this piece and depending on how do you want it to be really far spaced out like this or do you want it to have retracted and have it close together you know it just depends on what your aesthetics are let's try pulling it out like that so I know that my end is going to be right about there so with a pair of flush cutters I'm going to just cut away this little excess right where that retracting area was now I'm ready to place it into my clay put that in so you can use a toothpick just spread that out and slowly I'm wanting it to be kind of centered in my piece so I'm just spreading it out and then slowly pressing down on those the Centers of each of those and then going through and embedding the full chain down into the clay I just think that looks so cool alright so then we have this piece right here and we're gonna let that set the clay in two hours time that will already be hard enough for us to bend this down here are some pieces that I already finished that I actually even did them double-sided so I had a texturizing pad on the base and on the backside and made a little sandwich to press and create texture on both sides but once these are hard they're rock hard and to bend these sides down just bring it over to the side of the table and squish that closed and then bring to the other side and just press it up against that edge and squish it closed and then you have a really cool little pendant in this sample here I actually even put hits of two-part Nunn design resin over the top of it to give it a really shiny glossy look but that is just a super fun way to create these little pendants using epoxy clay the crystal clay mica powders and a ribbon end this is becky nunn with nunn design i hope you enjoyed learning how to do this technique you

You recently viewed

Clear recently viewed