Audio Transcript
Note: This audio transcript is auto-generated and may not be completely accurate.
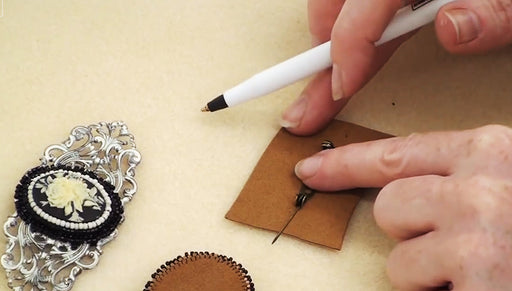
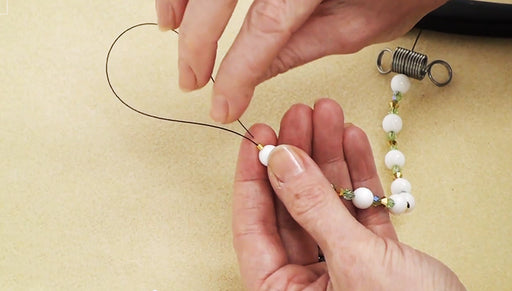
Hi, this is Julie with Beadaholique.com and today I want to show you How to Cover a Cuff Bracelet in Ultra Suede and do a Decorative Beaded Edge around the outside to give it finished polished look These cuff bracelets are great, they're very sturdy, you can bend them a little bit what I want you to do before you start this project is try it on your wrist and bend it to the shape and size that you want you will be able to bend it still after we do this but it is better to just start off by bending it take this lovely suede and cover the bracelet first see if there's a right and wrong with the suede, on this one you can tell that there is I'm going to choose the lighter color side to be on the outside it's a little fuzzier now if you're not going to do any type of stitching on the top side like a decorative bead embroidery stitch or something like this where I am going to stitch on a decorative focal point and this is what you're gonna do if you just want to cover the bracelet like this with suede paper at the very end I'm going to go back and show you how you can do something like this where you do some stitching ahead of time on the top side so to begin you're just going to guessitmate how much we're going to need so take the edge of your cuff start it here carefully walk it down to the other side and then cut yourself about a half inch beyond where you feel you need it I wanna make sure I have about a half inches on either side of the edges here of this cuff bracelet and so I'm going to rough cut it down and here's a little tip, you can go ahead and fold this in half once you make your first cut so that you can have a nice even cut or at least somewhat even, we're going to trim them up so I don't worry too much about how perfect this looks here we go and I'm going to glue this to the inside at first, so I've got some crafters pick glue you can just open up the cap and squeeze some on your finger your going to want quite a bit. You can use a piece of wire or a toothpick as a applicator I like to use my fingers. If you've seen me do other videos you'll realize that's a little quicker for me get some glue and I'm going to put it directly onto the brass coat the entire underside I don't want so much that it's gonna squish out the edges when I attach my suede I want it to go all the way to the edge and I want it to be enough on there to adhere my suede that looks good to me okay, make sure that I have the right side facing me. One side is a little darker on this particular one and I'm just going to put that in there to the well and just press into place this is why you want to cut extra because you don't have to worry that you're cutting it too close you want to be able to generously just put the glue on the back side and then put the suede on top so I'm going to clean my finger off and I'm gonna let this dry and then I'm going to trim it after you've left this dry for about twenty minutes go ahead and trim it to do that just take your scissors cut about a sixteenth of an inch from the edge of the brass and I actually have found that sometimes easier to go from a different angle depending if you're right or left handed feel free to move your piece around whatever works best for you but try to keep the width that you're creating along the edge equal, so all the way around your entire bangle you want to keep that same amount of space it doesn't have to be exactly sixteenth of an inch an eighth of an inch whatever you like but be consistent if you end up with a little notch like that just trim it off go ahead and inspect the piece, make sure that there's no notches or rough edges now do the topside For the topside cut another piece which I can tell is already going to be plenty big If you don't want to use up so much suede you can go ahead and be a little bit more precise. I just like to air on the side of caution, makes it a little bit easier for me so to do this one do the same thing, take some glue, use my finger again you can use a toothpick or whatever you like I've always used my fingers I'm going to put it on the brass I'm going to be a little bit more careful this time because I don't want to get any onto the suede which has already been applied hold it like this, sometimes makes it a little bit easier see how I'm grabbing it I'm going to find which is the right side, I can see this one here is a little bit more texture to it. It's a little bit greener and I'm going to lay it on top and smooth it out flip it over take my fingers and just press it into place make sure there's no gaps or air bubbles and I'm gonna let this side dry for about twenty minutes before I trim it up the same way I trimmed the other one so you how to do that as soon this is dry it's been twenty minutes, trim this side and the way they do this is you're going to follow the edge line of the first piece of suede see how this looks like, in between the two pieces of Suede we have the brass cuff sandwiched there. You can tell there is a nice lip so that it will make it so that we can stitch into it. If we cut up against the brass cuff we have no place for our needle and thread to go keep trimming this just following the line of the first piece of suede go ahead and inspect your piece again make sure nothing stands out as being too jagged or off if there is anything just trim it off and now we're ready to go ahead and stitch a decorative edge along the outside perimeter to make this look finished and that's what we did here I did a basic beaded edge. I'll show you have to do that now we have a couple other videos from Beadaholique.com showing you how to bead embroider a basic beaded edge and how to bead embroider a pico edge and either one of those edges will work with a bracelet like this I'm going to show you both going to go ahead and put out some 11/0 seed beads I'm not going to tie a knot on the end, you're probably going to have to stop the thread at some point and thread a new piece, I'm personally not comfortable with working with more than about six feet of thread at a time and it took me about two lengths of six feet of thread to finish this larger one So to begin I don't have a knot tied at the end I'm going to pick up a single bead onto my needle and then I'm gonna start at any place along the edge of my cuff but not in a curve. A curve is gonna be harder to create a nice fluid finish to the piece. Start about a half an inch in on the side and going from what is the topside to the backside and then go through both pieces of suede pull my needle and thread through and then I want to leave a tail of at least six inches because at the very end I'm to go back and thread another needle on this to finish off the piece go back up through that bead I just strung if you can hold your tail that does help a bit and pull down now you can use a green thread for this if you don't the threads to show or you can do what I'm doing here for the video where I'm using a black thread so you can see what's happening to continue along pick up another bead go from the top side to the back side pull through and then go back up through the bead you just strung you want these to rest along the top of the edge so help them along once you get a few on here they're going to stay in place in the beginning since we don't have a knot we need to guide to thread and the beads a little bit go through both layers and going from the top side to the back side pull through and go back up through the bead we just strung and pull here is a basic beaded edge and that's what I've done here if you want to do a pico edge very easy to modify this so instead of just stringing one bead, string two and alternate the color here a little bit so I'm gonna put on this nice olive green and pink tone bead and then another one of my darker beads and with those two beads on the needle go the same method through the top side through the back go both layers of the suede pull through now I'm not going to go back through both beads go back through the last bead which is the darker bead if your thread does this which my tends to do especially in the beginning when I have a lot I'm working on just kind of work it out most times it's not actually a knot, it just gets a little bit tangled we've trapped that little lighter colored bead up top it's going to create a little ruffled edge. I'm going to show you that one again take two beads and a lighter colored and darker colored through both layers and then go up through the last bead we strung which is the darker colored one seed bead and one more time and then you're gonna be on your own to bead along the entire edge so I'll show you this looks like from the back you see I'm stitching and this is what it looks like from the front and as you go you can choose if you create a decorative look you could create rather wide stitches as far down as you can go to reach the cuff or in this one here it's a very shallow little stitches you can't even really see thread Go ahead finish beading all the way around the cuff and then I'm show you how to finish this off almost finished beading all the way around and I decided to go with pico edge for this particular project. So I want to add my few last beads so you can see what I'm doing so I'm going to pick up the two beads this is the same process I have been doing all the way along going from the front to the back going through all the layers and pulling and go back up through the last bead and we get to this very last bead that your adding, you'll have to decide if you really do you have room to add a bead or you just pull the threads tight enough but with the previous bead gets pulled a little bit closer to the first set of beads you strung as you're working you'll be able to gage that better so I've completed the entire circumference and now I need to add one more little bead for my pico edge so I'm actually going good then down through what was the very first bead I strung. I got the tail holding back here, this is where the tail we originally started with go down through it and pull. I was actually surprised I was able to get all my bead work done with my six feet of string which was a nice pleasant surprise. So now that I got this down here I'm going to put my needle off my thread and I'm going to thread it back onto my tail, remember I said we needed to leave enough of a tail to put the needle back on it and that's what I'm doing here I'm going to do is go through that last pico edge bead and pull and then go down through the darker bead next to it and now you can see that my threads are side by side so what I'm gonna do is I'm going to, you can leave the needle on or you can take it off because you still going to work with it tie a simple knot tie a surgeons knot over under over under and pull creates a nice, neat little knotted beadwork now I'm going to take my needle with the thread and weave my existing thread up into the beadwork a little bit just trace it along what I've already beaded and we've done that a few times you can go ahead and take your thread zapper and just zap off that thread go ahead put your needle back on the other tail end and do the exact same thing and weave it into you're work. So I want to show you a sample of a before and after this was the original brass cuff that we started with and here's the finished one. You can see we actually added quite a bit of width to the bangle itself and then this does just slide on the wrist very nicely still In the beginning I said I'd show you how you can go ahead and do some stitching on the top side and still use this technique so all you need to do if you want to do something like that is cut your piece like remember how we rough cut it then on the back side before you do any stitching you're going to take your brass cuff and use it as a template and I just actually took a pen I drew a line around it and then I walked it down at even intervals and just made little notch marks just to see where this was going lay and I did that all the way and then I actually measured myself a center point as well and then I was able to see where I was going to stitch on any type of embellishment and this little one here I just stitched it you can see I stitched it directly onto the suede and down through and then what I would do is I would then tie this off and then when I glued my brass cuff I would make sure that I glued it within the lines that I started with so that's all you need to do if you're going to do any type of stitching that's one way of doing it. There are several different ways out there but that's one way I find to be really very easy to make sure that your beadwork lays where you want it to lay so that's how you cover a Cuff Bracelet in Ultra Suede and Add a Decorative Edge