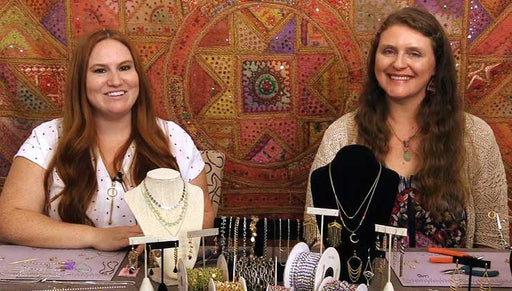
Beadaholique Live Class: Brick Stitch 101

SKU VID-1719
Designer: Design Team
In this Live Class, Beadaholique Designers, Kat Silvia and Alexandra Smith, demonstrate the basics of Brick Stitch. This versatile stitch is great for making figures and unique shapes and we want to make sure you have a handle on the techniques that will help you get there.
Audio Transcript
Note: This audio transcript is auto-generated and may not be completely accurate.
hi everyone welcome back to the Vita Holi design space I'm Kat Silvia and today I'm joined by Alexander Smith and today we are going to be talking all about brick stitch so this is going to be a really basic 101 class so we're gonna just show you the real basic stitch and then kind of show you a couple little maybe intermediate techniques to help you create some of the cool fun shapes that you can with brick stitch so you've probably seen this in many different jewelry designs so we're going to show you a couple of different ways on how to use it how to implement it and of course we have Bryan behind the camera there to field us questions so hey let us know where you're tuning in from ask a question and yeah we're gonna dive in in just a minute excited yeah I'm also really looking forward to the one-on-one aspect but then adding a little more information about how to add the extra embellishments because that's what I'm always curious about when I see a design is I'm like okay but then how did you do that and so that's what we'll get into a little bit yeah where to start with it how to finish it off how to add some little extra jump rings chain yeah we're even gonna be talking about how to read a pattern so real basic stuff you know but that way we want to give you guys a good foundation so that you can go off and kind of understand how a designer you know created a pattern or how they did some of the little jigs and jogs and jumps there so you guys will be able to sort of debunk everything for yourself so if you see patterns around the internet that you want to try to replicate or an idea very much like our patterns we have all of our patterns and PDF form now so those are great and they're colorful downloads for you so you'll be able to kind of print them off and keep them we'll show you what that looks like actually but yeah so I'm excited yeah a fun yeah all right so if you have joined us before welcome back if you're new welcome I wanna let you guys know that every live class that we do we always do a little giveaway so this is gonna be fun so this giveaway is perfect for a beater so what we're gonna be giving away here today guys is we're gonna be giving away some seed beads now I have two different sizes of Miyagi's and you'll see us kind of talk about both here but we have the 11 o's and we have fun colors there and we have the ten oh here so you'll get six seed beads you're also going to get a couple of colors of the Nemo size D thread and we're going to talk about how you can use that in your brick stitch and then just a basic beating thing we're gonna give you two of the fireline one is in the crystal and one is in the smoke so you're gonna get that nice crystal clear white and that sort of gray smoke color there so you're gonna get 50 yards of each and that is definitely enough to get you started for sure and then we're gonna be giving you a pack of these size twelve beading needles you're gonna get a nice thread snip and then you're gonna get one of our beadaholique bead mats I'm gonna move the tray out of the way for a second so you can actually see what the speed mat looks like I'm gonna be working on it today it's really great it has a wonderful ruler at the bottom that goes to 12 inches and then it's got this handy-dandy little thing up here and these are gonna help you with your sizing so it goes from 16 millimeter all the way down to 2 millimeter very cool so just kind of a nice little little guide there for you so if you're shopping the site and you're like wait how big was 12 millimeter you get a nice visual reference of that right there alright so this giveaway can be yours all you need to do is leave a comment like I said just let us know where you're tuning in from or a question that qualifies you to win the giveaway as well but hey if you have anything that you want to share maybe a favorite color of Miyuki or I don't know let us know what you're doing today anything in the comments will qualify you guys to win and we'll be announcing the winner live here when we're done with our class alright so are you guys ready to get started and learn brick stitch I heard yes oh yeah all right so before I start in with the actual stitch here I want to show you again just some of the materials that we talked about when we're talking about brick stitch and this really goes for a lot of bbuing things so here is that 4 pound smoke fire line that's in the giveaway there and this is the big spool but I do want to let you guys know that they do also come in small spools if you want to try to test some things out so here is again this is just 15 yards this is the 4 pound in smoke and then here I want to show you and this is what I'm going to working with here in just a moment this is the 6-pound now when we talk about four pound versus six pound the six pound is going to be a little bit thicker in fact if you want to break it down into millimeters it is going to be point zero one two millimeters for the four pound and point zero one five millimeters for the six pound now that C was very close but the difference really is going to be determinant on the beads that you're going to be using if you're going to be using an eleven O bead I suggest the four pound if you're going to be using a ten o bead you can always maybe jump up to the six pound it might help give your beads a little bit of stability so this is what I'm gonna use here today because I'm gonna demonstrate brick stitch using the Miyuki 10 OC beads now we always recommend a general beading needle and that's gonna be the size twelve beading needle you can also alter that based on the beads if you like we have the size D Nemo and we're going to show you why you'd want to use that instead of the fireline a little bit later I have snips and then another handy tool is the thread zap now the thread zap you can only use if you're using the fireline don't use this if you're going to be using that Nemo it alleges end up kind of burning it and not the way you want it to all right so just a little tip there okay so let's look at what I have here so this is my little swatch of brick stitch now this is a really basic version of it and it's just rose going back and forth so it might look similar if I turn it this way it'll probably look similar to your eye like a peyote where you go across this way and you go up and down and back and forth so you go this way with brick stitch you're going this way so you're building those rows going back and forth there and the stitch is going to be a little bit more of a loop so it's going to be a little different now everything I'm going to about to do here I do want to let you guys know that we do have a pdf version of it and it looks like this now this is a free download on beadaholique.com which of course is where you can get everything that you're seeing here today but this is just a nice little sort of color-coded thing and it's just gonna walk you through exactly what I'm about to show you right now all right so let's actually show you what brick stitch is so again I'm using the six pound and just to show you guys here side-by-side this is the four pound and this is the six pound it's very very similar in fact I'm not even sure it's necessarily showing up there on camera for you but you can just see that this one is a little bit thicker but it still is kind of you know no wider than a thick hair so yay for beading thread all right so I'm gonna use the white beads and the black threads you can really see what's happening here so the first thing we need to note with brick stitch is you're going to actually start with a different stitch naturally of course so you're gonna pick up two beads and go ahead and string holes down and we can go ahead and just leave a nice little tail for ourselves we can tie that off later but now I have two beads strung and what I'm gonna do is I'm gonna take my needle and I'm gonna go back through creating a loop but I'm only gonna go back through that first bead and when I do that they're going to want to sit next to each other and that's exactly what we want just like so all right and this is why the miyuki delicas are really great for this because they sit like little bricks alright so now I'm gonna take my needle and I'm gonna go through the second bead that we strung there and come out the other side so this is what we have now alright so now this is ladder stitch so ladder stitch is going to be just building one bead at a time and I'm gonna go through and just create little loops and bring that together and again these beads are going to want to sit side by side just like so and then we're gonna come up through this next feat here now don't worry you'll notice I'm kind of adjusting as I go just sort of keeping them as tight as I can you can add a stopper bead to one side if you like to this side here and let me just really quick show you how to do that do that in the beginning because I'm not used to doing it but if you wanted to add a little stopper bead you just go through it once and back through same with that little loop there and you can bring that down there and just sort of use it as a little bead stopper there you don't need it with this one that bead isn't gonna fall off because we've already gone through a little loop there so it's entirely up to you but that's how you add a little bead stopper I'm gonna remove mine there and keep on going so now I'm just gonna continue to add ladder stitch and I'm gonna stitch maybe about seven beads or so for my little demonstration here so you're working in a figure eight pattern basically pretty much yes you're going it down through one bead and then up through the just through the bead you just strung so it's really it's a basic stitch and you can do a lot of things with just ladder stitch always make sure you're going the opposite way there and your brick stitch is always going to start with a ladder stitch the only exception is if you're doing a little bit more of a circular brick stitch and we're gonna talk you guys through that a little bit later but this is just for the basic brick stitch here all right I'm gonna see where I'm at alright so that's seven beads so let's say you know what I'm gonna do just a couple more just want to try to get my hand out of the way so you guys can really see you see what's happening that's always the trick with so many starting points of these weaving techniques is the first part is the challenge for just being able to see what you're doing hold what you're doing but the more you build on it the easier it becomes to follow your pattern and hold the piece yeah and that's why I always point out that we have that PDF because then you can actually sort of see what's happening in the little thread path there alright so now I have just nine beads there it doesn't matter if you do even or odd the only difference is that sometimes your tail might be facing up so you'd have both tails facing the same direction but this next step and for all of brick stitch it's not really going to matter we get that question a lot so it depends on what your pattern needs all right now here's a little trick I'm right-handed so what I like to do is this end is my tail right here so what I'm gonna do is I'm gonna flip it over so that I'm always working to to my right and I know you guys are kind of looking at this upside down here a little bit but we work I always work this way now you can go back and forth but it's going to be the same either way alright so now what's the next thing that we need to do well let's see if you can kind of look down the barrel of the gun here and see that these all these little black things right here those are what we refer to as thread bridges now when we say go underneath the thread bridge you're going to take your needle and you're gonna go literally underneath that first little thread bridge right there alright so to do our second row you're gonna pick up two of your beads that are going to be part of that second row going all the way back you're going to go under that first thread bridge there pull it up and now go up through that second bead and this is going to help it kind of sit right on top and this is where you want to just kind of scooch it together so it's gonna sit right on top just like so so that's a bit of an anchoring stitch mm-hmm so then what you're gonna want to do is go down through that first bead so you're kind of making another little bridge there and now you can come back up through that second bead there all right just like that there we go all right and now you're ready to add on and to actually start doing brick stitch so here's how brick stitch goes you pick up one bead and you look at the next thread bridge that's in your row there and you're gonna sneak your needle underneath there and this does get easier when you have a larger piece and then what you're wanting to going to want to do is to come back up through that very same bead that you just added so you're creating a little loop and you can kind of see as I pull it together there you're creating a little loop there that's underneath and it's going to secure that bead right on top so these are going to sit like little bricks so your beads are always going to have that jig jog in between them so again we get a big question and we're going to be talking about this as to why you would want to do brick stitch over peyote stitch now I like that brick stitch builds a certain way it builds this way kind of going out but if you wanted to do a full brick stitch bracelet your first row of ladder stitch is going to need to be the length of your bracelets you'd have to do a six inch ladder stitch or 7 inch ladders to ensure a sit stitch excuse me or however you want however long you want that bracelet to be so that make sense okay now I know that you did a brick stitch bracelet and you'll have to show us how you started that one yeah because that one is actually going to showcase some increases and decreases and we're going to talk about that here almost just just in a minute when I just get to the end here alright so all I'm doing is you just add one beat at a time you go under that thread bridge bring it up and go up through that bead now I'm doing my best to try to keep my fingers out of this you guys can see it but we do have this full tutorial video that will walk you through and also in that instance the camera is over my shoulder so you'll get to a chance to you know see it not upside down a little bit sorry I tried to do this upside down and try it you know I'm always impressed by the dance instructors who can do things backwards but sadly I am not that versed in doing it beating backwards I'll have to add that somewhere along the line alright so when you get to your the end of your row again it'll sit like this so we have the same number of beads you're just gonna see that the turquoise beads here have one that juts out to that side and the white beads have one that juts out to that side now again watch what I'm going to do I'm going to take my work and I'm gonna flip it over so I'm working the same way so what happens next so now we're back to that first thing and we're going to add two of our white beads we're gonna go down through that first thread bridge there there we go come up through that second bead just like so down through that first one and up through the second bead there you go if you ever get lost the name of the game is to follow your thread path you never want to create a pass over a bead so if you kind of get lost or you're trying to you know finagle your way to create a different type of pattern let's say you're trying to work on a shape basically you just want to try to follow what's gonna happen there in terms of just going down through your beads so if you needed to kind of get your needle to the other side you would just sort of step down and I would do it one bit at a time keep in mind a lot of seed beads especially these mio keys are glass so it is possible to crack a bead and you definitely don't want to have that happen in the middle of your beadwork or a needle right or a needle right and you definitely don't want a needle to crack - I've had my fair share of those alright so I'm gonna continue to do this entire row here which is just a few more beads you can see how quickly the sort of natural brick stitch works up you just got to focus on your thread bridges there now if I was doing this for real I would probably use the crystal fire line because I didn't want to show the edges but you can see that if you look at the top you're not really seeing any of that thread in there there's no it's not quite like loom you're not really gonna see any you're not really gonna see any threads coming through there alright so just one more here these are the size 10 miyuki delicas right exactly that's the largest size that those come in yes sometimes I wish they'd be bigger is these designs up sized would make wonderful ornaments oh yeah absolutely okay so here's what we have now so again you're always gonna have that white row just because I've done the opposite here you're always going to have that white row having that little increase on that side and the teal beads are going to have an increase on this side so if you just kind of flip it over you just keep on working down that way and then I just want to show you the brick stitch bracelet that Alexander was speaking of now this one was really fun to do but this focuses on increases and decreases so this bracelet was done going up and down all the way working this way so starting with those little rows there and then kind of building it up and then building it down and building it up and building it down so this is a brick stitch bracelet so you guys can just sort of see and this is a great little comparison just to see side-by-side these are the 10 O's and these are the 11 O's they really have quite a quite a size difference I must say yeah so there you go so when you were talking about doing a brick stitch or sorry a ladder stitch all the way across a bracelet you're referring to using much larger beads than these you could do with 11 oh so you would just have to realize that if you're creating that first row of ladder stitch it's coming all the way out here to the side and then you'd brick stitch all the way brick stitch all the way brick stitch all the way so it's possible and you can do it but your pattern is gonna look really similar to a peyote pattern just the way that they sit you might as well do peyote right you can choose either one whichever you whichever you're feeling like yeah so to achieve what's here it which is the increases and decreases now naturally brick stitch will increase but Alexandra's gonna demonstrate how to do a decrease and that way you can get some really interesting shaped patterns that's right over here I've got a little swatch prepared similar to cats in contrasting colors also in the size 10 oh my yuki delicas so what I'm gonna do is start another white row by bringing up two of my beads just as she did now instead of going to the first thread bridge which will create an increase I'm gonna skip to the second thread bridge in and I took my needle under bring those beads down they kind of flop together until you get it secured which is why you do these extra stitches for instance this is still off to its side but you'll notice that that extra past that you do is what's necessary to get these two beads to sit the way you want well thread got stuck on my previous increase there but there we have the two beads sitting nice and flat now what I would like to show you also is instead of going all the way across in a regular bricks brick stitch layer what I'm going to do is alternatively come back in the other direction and demonstrate to you how to do a little embellishment using ladder stitch and what that does is it lets you do an extra increased oops I took up two beads let me get one off of there you want to do one beat at a time when you're doing the ladder stitch increase so I've got my one bead and I'm coming back around through that edge bead I'm gonna help it along and get it to stack just the same way as when you're starting your initial ladder stitch row secure that with a little figure eight pass and you'll see that bead is off farther than the previous increase now I could continue that just by taking bead by bead and weaving in ladder stitch to create a little extra embellishment by sending my increase off to the side and where this is useful is in a design such as this and I've blown it up here so you could see the little arms on the Snowman and so just by doing the ladder stitch off the edge I was able to achieve the embellishment like that and that will also be good for little legs off of ladybugs or wings off of penguins or different sorts of ins and outs that you're gonna see on our table as we start to focus on our on our pattern now if I wanted to come up into my next row of brick stitch off of this I would just bring my needle up take on two more beads and coming through the end thread bridge is going to give me the usual increase and so forth so there's that now while I have you over here there's another little embellishment that you will also see in some of our patterns which is super useful and this is when you've reached the peak of your weaving to where you have a couple of beads and the rule with Brooke stitches you're never going to end up with just one bead on the end because of the nature of the weave and so what you'll want to do if you need a bead a single bead on the end of your design you're going to take one on and coming up through one end bead you'll come down through another after you've threaded on that bead and where it'll do is bring the bead sitting sideways and that's not against the rules it totally allowed and it's super useful so once you've got that on there and you've tied off your thread that's your opportunity to take a little jump ring which we found that this size it's a four millimeter 22 gauge over a millimeter 22 gauge fits really nicely through that bead to create an attachment to make a charm hang an earring that sort of thing so definitely wanted to show you that yeah and I'm just gonna hope we have a question sure um so Susan on Facebook hi thanks for joining us she is asking do you have to use delicas yeah I just wanted to use delicas today because it's easier to kind of demonstrate how they're gonna sit together you can absolutely use Toho's you can use a more rounded bead we have the Miyuki rounds we have the Toho rounds and actually I have the the Toho rounds here this is an 11 oh version so you can just see how they're a little bit more rounded there but you can absolutely use round seed beads and if you'll just look here this is what we're talking about and we're gonna be touching on this later this is a little more of an advanced technique but this is circular brick stitch or if you're going to brick stitch onto a form and this uses Toho and they really do it quite lovely in this particular version there so you can absolutely use rounded seed beads you can also use cube beads as well that was sort of what our original video was based on is actually using the little four millimeter Miyuki cubes mm-hm and the next question is yes so we get this question a lot actually the difference is excuse me this from YouTube she is asking what is the difference between fireline for fishing and fireline for beating so the fireline for beating you can you can use fishing line if you want but this particular fire line is and I'll say it properly it's micro fused braided bead thread so this is actually going to be a little it's going to have a heat bonding to it so this is what you're gonna want to use I don't recommend using kind of a generic string or a fishing line for something like this I just think you're just gonna be happier with the result it's not going to tangle I think anyone who's fished can definitely give you a horror story of fishing line tangles but I would use the actual bead thread the difference is that it's kind of going to be that micro it's basically going to be burned and bonded together and then stretch so it's gonna have a little bit more of that strength to it but I would recommend actually going with with be thread for this I do want to take a second to show you that decrease one more time I noticed we had a comment about that so let me so if I can just bring you guys in here really close I'm just gonna reiterate what Alexandre just did and this is just because I have my little guy here ready so you're gonna take on two beads and I'm gonna do it in the opposite color there and instead of jumping into that first row you're gonna jump into the second thread pass right there and I'm just going to get my needle under there so you can see where I'm going so we're going right there on that second one there because you want to kind of bring the beads in as opposed to allowing them to jump outwards and now this thread here is bonding it to that bead right there so if you wanted to you can go back through there or you can just come up through this second bead I always recommend if you want to just kind of secure it for yourself go through that first bead and this is what I mean again by when you when we talk about like oh just find your thread path there so when you scooch it down nice and close there you can come through that second bead if you want catch that thread bridge again you can do it in one little step there and then come back up through this bead so that's how you can see that decrease kind of happened there and then you can do the same on the other side because when you get to that other side there you're gonna see that it's naturally going to decrease because you're going to bring that teal bead and it's gonna sit inside and then when you go to add that next row of white you just do that same starting point so the decrease only happens on the start side of that bead weaving and then you just end it where you need to end it and when you turn it around that's kind of how you can get that tapered look and that's what you're going to need to do if you're creating something like this guy here where you're just tapering all that down so it'll kind of come to a point there so that's sort of how that decrease swass so those are the natural increases in decreases now that brings up a question for me that I wanted to bring up here regarding decreases that go a little bit farther into a design than just that second thread Ridge exactly so for instance in this little pumpkin from here to here you're having to jump not just the first thread bridge and not just a second but the third thread bridge in and so for people to know how to make that jump I just wanted to kind of discuss how we can send our needle in and out of beads to get where we need to go but like you were saying following your thread craft path and not creating extra thread bridges yeah but it's what you need to do when you're working with these different shapes and trying to get your your beads in a row yes so so let's take a look at this pattern for a second I'm just building up this row so I can actually show you how to do that but if you look over here at this pattern what's happening there is yeah you're kind of getting your beads in through one now take a look at let's say probably the easiest one to explain is my little ghost here so here's him he's so cute him for this actually gonna set him on the grade oh yeah better so for this the thing that you want to do is if you look at a pattern you're gonna want to start at the widest point it's just going to make your life a lot easier so that you kind of start at the widest point and then you can do those decreases and then here's one of those examples where you're going to want to jet in but you want to do the decreases and then you can kind of leave an extra long tail to go down and kind of take care of the the feet position there and so let's let's describe the starting point for that if you are beginning at the widest point in your design say how much thread did you use for this little guy I always work off of a wingspan you can add thread in brick stitch there's there's something saying you know you can't do that but for example I would leave a good three four feet of a tail just to make sure that I have enough to get around and they right because also the other thing too is that if you look down here at the bottom you're not only adding pieces like excuse me you're not only adding beads you're kind of jumping over so you are doing a couple little extra circles with your thread to kind of get it to where you want it to go so you want to make sure that you have enough for that so for this one for the top portion I want to say I used about five feet and for the bottom I left three feet but I think that was overkill but that's just to kind of be on the safe side so when you normally do it I would see okay so this one which went only one way it only decreased there you can leave a tail of you know five six inches just because you're gonna end up tying it off anyway so if you do something like that you just need to have all of your thread on one side if you do something and the opposite you'll have all the thread mixed right so now on that same topic for instance this one which was a bit more complicated on the one hand but on the other easier to gauge half and half exactly so for this one if I were to have used mm I think it was again about five feet of thread I would have saved at least two and a half feet for this side and used two and a half feet for that side so that's that's basically a two and a half foot or three foot tail and err on the side of caution I would say use three feet if you're not sure you know yeah yeah so if you're trying to jump over and do a decrease like a bigger decrease so this is where that road just sort of naturally ended for me right so you can see that I've got that tapering going down that side but this side let's say I want to come in and be a couple ends on the inside you just kind of go back through because don't forget that bead is anchored so you're not going to undo your thread by going down through at the next bead and you create a nice little clean thread bridge there and then you can go up through that next bead and let's say I want to go even further so I'm going to go down through and up through and I'm so glad we're addressing this because this is the sort of instruction that you you just can't get into a write up all right and so just face-to-face one-on-one it's really good to be able to see yes you are allowed to do that and yes your thread bridges will be tucked in and you're good to go yeah so I did do a double thread bridge on those but again you don't really see it it shouldn't look any different than like a ladder stitch sorry so now I'm coming out of this bead here now I want to add let's say I want to add two more so now I can pick up two seed beads and go right into under the Neath that next thread bridge there because that's where I want it to sit and then this is just like as though we were adding another row here so you can just sort of build this up go back up through that second row so this is still that same sort of basic stitch of an idea now the other thing too that I want to talk about is what if that was all I wanted to do and now that's anchored but I'm coming out of the wrong bead well what you can do is you can actually go back down through that first bead and then maybe we go back down through this bead here that's kind of adjacent to it but it's gonna get that thread to disappear just like so and I can come back up through those two beads and now I'm ready to be coming out of this bead but everything is anchoring so you see how I did that so when you're turning your thread around one thing that you can do is turn it around in the row beneath you because you do have that little opportunity to create a little bit of a loop and it'll allow you to come out of a new little bead there so that's what we mean and that's what we're talking about when we say follow your thread path mm-hmm now conversely since we're on the topic of try to get your thread directed in different ways what I want to show here since I didn't finish this this thread off is that I'm going to actually send my needle straight down the side diagonally of all those beads and that's how you can get your needle all the way back to another area of your design and that's good to reinforce the side as well and since that's more secure what I can do now is slide on that little jump ring like I was mentioning and then I want to just show you on the table here where this has become very useful in securing some of the charms that we've designed so you'll see how easily that jump ring slips in and how useful it is for creating it into a component your work is now officially a charm so just down here in front of the camera are all the little sorts of holiday charms that we created and you'll see here how cat has strung two jump rings on either side of the bat to create that focal which I've done similarly here with a holly leaf and you can just do some really neat things creating components out of your work yes so we do have every pattern that you're that you guys are seeing right here does have a tutorial but basically it is a basic brick stitch and then I did a little video that is tips for advanced brick stitching which will walk you through all how to do kind of some of those increases and decreases but once you get a nice handle on brick stitch what I would encourage you to do is to create patterns of your own and we do have another download here so this is what the grid looks like you can hopefully see it it's a little faint on camera because we obviously want your designs to pop through but it'll show you how the beads sit so you can start to design different things yourself now I do want to point out a different way to make a component because there are a couple of different ways to do this now for example this guy here and also these guys I'm gonna bring one of them up here because this is so cute and tiny so this is a little brick stitch kitty cat and this is a little Chevron now you're looking at the brick stitch and it doesn't sit the same way as some of the other components you'll notice for this guy here the beads the holes are up and down and for both of these designs they're side to side now the differences is just where you start so for example for this kitty cat face and for the chevron here you're going to actually start with a base row of ladder stitch on side and then you're just going to do your decrease on one side and then stay with that increase on the other side and then you're going to kind of turn it around and you're gonna do your increase on the one side and your decrease on the other side so that's how you get that type of shape if you didn't want to sort of taper it down to a point but you can also see the tapering down to a point that happens here but all those beads are facing sideways so that's another way of how to do brick stitch but it is the same it just is the difference of the pattern so if you're looking at a piece let's say online or something and you're like oh how did they do that that's how they did it they started on one side and worked their way up as opposed to starting at the bottom and working their way vertically there so it's kind of a horizontal versus a vertical but they are both brick stitch so in the interest of keeping this as basic as we can I'm just gonna go over some of the beautiful projects that we have here and then we're going to talk you guys through what you can do with brick stitch we're going to talk a little bit about that circular brick stitch but if that is something that interests you guys let us know we're happy to do a whole class just about circular brick stitch there's a lot of different variations and that we're gonna show you that in just a little bit if you're just joining us we are doing brick stitch 101 I know we've talked about a lot of the complicated things with brick stitch but I just wanted to show you the basic and a couple of basic techniques that you can use to make a lot of these little figurines that you're probably seeing all over the place and they're really really sweet but if you are just joining us I want to remind you we do have a giveaway so get some questions in let us know where you guys are tuning in from if you guys are watching this on the replay please do still ask questions I will be answering those throughout but if you guys are here with us live thank you and this is the giveaway that you could win here today it's over $50 worth of we have some beautiful seed beads we have some 9mo thread we have some of that beautiful fire line that bead thread and we have some needles and a pair of snips for you as well all right so be sure to keep getting those comments in there guys and we're gonna keep talking about some of the other brick stitch ideas okay so you're probably wondering when would I use my mo well let's talk about this guy down here now this uses Nemo at the top and at the bottom you could switch it around and do whatever you like but the reason for the name out here is it's going to be a really nice thread that is going to allow those little fringy pieces to lay nice and flat so this is a nice little fringy bug stitch here and what i did is i basically did the top portion of this guy which is a full brick stitch sort of triangle or excuse me diamond you can see the top of the triangle and just a little tiny decrease is what I did to achieve this but instead of adding that bottom portion I just sort of cut it off and then I decided to add the fringe there at the bottom so that's how that pattern kind of came together and so each of those designs you use the widest point as your starting point yes that's how I like to work in this design you can start with the with this shorter end and sort of increase it I just like to have that nice big long centered anchored row for myself it just works that works out better that way but this is a perfect example where if you start at that center point you're gonna want enough thread to do all those fringes and to complete that bottom section so leave a good you know just err on the side of safety leave a good 5 feet of thread as a as a big big long tail and then work your way up with I'd say maybe 3 or 4 feet of thread just again it's easier to have a little extra thread than it is to cut it off and tie it in and weave it in because you know you want everything to sit really nicely and what you once you start getting knots and everything in there it can be a little tedious all same mm-hmm so yeah so we have some just other cute little guys here and these these are really fun so we used two we got a little carried away but with the holidays we were very excited so we did some great little Halloween charms and these could be you know little earrings you could you could swap it out on a finished necklace and just sort of add a little necklace it's just entirely up to what you guys are thinking and then this isn't a cute little earring this little Christmas tree and Alexander did these wonderful little patterns and the Holly that candy cane I love this one this looks like if you did this on a much bigger it could be a great little Christmas ornament just what I was gonna say so all of these is a few upsides to the size 10 and I know that you did we have a video on some beautiful ornament designs that cat did they would all make really great Christmas ornaments too so I do want to talk again um kind of gonna put this guy down here next to a very similar counterpoint there which is how to create that little space in there and I love this because you can create that negative space and basically you're just gonna work up one side and then kind of go back and forth and work down the other side now this one again you can see that orientation of those beads you're gonna want to start at one side and kind of work your way up and then sew it together and kind of you know like you were saying it's two halves of a whole you can can then kind of just bring them together right so all right so let's talk for a second about the circular brick stitch that we keep circling back yeah so you have some great examples over there so why don't you walk us through kind of what you've been doing there with some frames and styles there well so you can see down here that by weaving your thread around the edge of a frame you can brick stitch beads in layers in really wonderful ways so the frame you can go inside of it or you can go outside of it and you can actually incorporate different sizes and styles of beads as well which is a wonderful look embellish with little petals even adding charms I yeah I've really gone going overboard so you can inlay circular brick stitch for rings and it's a great way to feature little charms and so brick stitch on the form is one circular technique and then another is around a bead again we have wonderful videos detailing the process for each of those and the embellishments and all different types of videos if you want to check those out but again let us know if this is a facebook-like live clasp that you would be interested didn't we have lots more to say about it I've had a great time working with it and very interestingly Kat was describing that she's much more pattern oriented and so the brick stitch forms over here are more her cup of tea thread I'm more circular mind if I go I really enjoyed this circular brick stitch yeah and I have this this was this was a really fun design and I wasn't quite sure it would work out but I'm glad it did yeah but this is sort of if you don't have a full ring and you need to connect it together you can just go back and forth on these rows to create what looks like a nice little sort of Fringe effect it's a wonderful design oh thank you and um so the basic thing that makes circular brick stitch a little bit more complicated is that it takes a little bit of guesswork as far as how many beads you can fit on it now even if I used all the same size of beads here which I did not those are six eight 11s and eights you get to decide exactly how many beads so you actually kind of play around with a thread bridges because one thread bridge does not equal one bead anymore right so so that's where it can get a little complicated so I don't want to necessarily dive into that too much today but in case you're curious as to what makes it so much more advanced or intermediate rather and that that's why what's funny again is you say that it makes it more complicated and I think oh there's freedom in that freedom innit so that is a brick stitch 101 we're gonna get our giveaway winner here in just a second but if you guys have any last little questions like I said we're still gonna be monitoring this feed even after we're done so if you're catching the replay no worries we're still here to answer questions and you can always join us on Facebook live every Wednesday at 9:30 a.m. Pacific time that's when we usually do our vtable Wednesday and we kind of just do a little check in with us and you know let us know what we're working on and you know that's a good chance for us also to answer any questions if you guys have just general beating questions be sure to hit us up there as well yeah and like Kat was saying we have PDF versions of all these designs that you can print out big so you can really see what you're working with and you can ask questions in the comments if you're curious about any of these patterns and we will hook you up with those yeah that's always really fun is to actually have the pad and I think especially when you're learning something the bigger it can look the easier it's like okay I get I get what's happening here and you know if you guys ever need help being watched through a little bit of a pattern or just need a little extra help with something we're here for you guys let us know and then have fun creating your own - yeah if you guys do create some stuff go ahead and add it to our Facebook gallery you can just send us a message with the photo and I'm happy to upload it into our customer gallery and those are really fun yeah all right Brian do we have our giveaway winner yeah all right congratulations to Flynn bass from Facebook thank you so much Lynn for tuning in and we're gonna send this giveaway off to you all you need to do is send us an email at service at beadaholique.com and we are gonna get your shipping information and we will send this out to you so again that's service at beadaholique.com congratulate and of course you guys if you miss out on the giveaway or are curious about anything here everything you've seen here is at beadaholique.com for shopping we are here our customer service is here to help you guys out anything you guys need hit us up all right thanks so much for joining us guys I'm Kat Sylvia Alexandra Smith we'll see you next time bye you

Customer Reviews

Based on 7 reviews Write a review

You recently viewed

Clear recently viewed