How to Make a Stretch Cord Bracelet with Seed Beads

SKU VID-1701
Designer: Kat Silvia
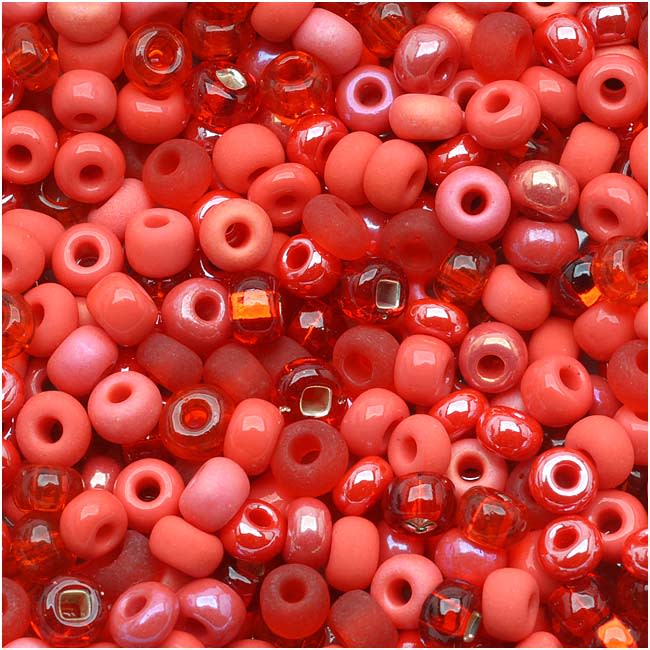
In this video you will learn how easy it is to make a multi colored stacking set of stretch cord bracelets using Opelon stretch cord and seed beads. By adding a small dab of glue it is easy to secure these bracelets for extended wear. Choose your favorite color combination and stack 'em up!
Audio Transcript
Note: This audio transcript is auto-generated and may not be completely accurate.
hi this is kat with beadaholique.com and today i'm going to be using a couple of different sizes of seed beads and a couple of different sizes of czech fire polish just to get a really fun organic look so you can see my finished piece up here now these are all little individual bracelets and you can see I've broken one out here and it just gives it a nice little style there to add in the 800 and the 600 beads along with some of those fire polish so I'm going to be making another one of my single bracelets here and to do that I'm going to be using the opal on stretch cord so I have a big eye needle that's gonna help me out as well I have a pair of snips and I have a little bit of glue so I'll show you how to get a nice secure stretch bracelet okay so let's go ahead and dive in and then I'm gonna start talking about the beads that we're gonna be using so I am going to cut off about ten inches or so of my opal on so what I'm gonna do is I'm gonna string on a little bit of that opal onto my big eye needle now you can use a bead stop on one side if you like or you can just kind of hold it with your hands this works out really really quickly okay so because we're at the starting point I'm gonna start by adding a couple of the 6o beads and I have a couple mixes here so what I'm gonna do is I'm gonna add two of my little red mix here and then I'm gonna move on over here to pick up a couple of the metallic a Tomek so you can just see the little nice little size there and I'm gonna pick up another one here and just start picking up your beads however you like you can pick up random colors sizes any sort of pattern that you want especially if you are making a whole bunch of these you can really have a lot of fun and then you just slide them down on your needle and you can slide them down there towards the end alright so we're just gonna keep picking them up I recommend a totally random order you can have a lot of fun with this again all of these are nice little mixes so each bracelet will be totally unique and I kind love that okay so I've got some seed beads going on there so let's jump up here so I have three different sizes of Chuck fire polish I have a six millimeter a four millimeter and a three millimeter so that three millimeter is gonna be nice and small which is gonna be great so it's gonna almost look very similar to one of those six o beads pick up a few more here and I love using this coral color so again like I said I have a couple of mixes here and then I do have a couple solid colors see ya so the solid color I have here which is my base color it's my beautiful coral color that is the Preciosa sol-gel and those come in really rich summery colors and all those links are down below there for you if you'd like to check some of those out and this works with a lot of different seed beads today I am using the Czech seed beads but you can also use Toho or Miyuki I just want to go for a nice big kind of round size alright so now I'm at the point where I want to add in another fire polished bead and I'm gonna bring in one of my four millimeter beads just to give it a little extra sparkle and just focus on changing up that size alright and we're just gonna keep going here and I'm just going kind of randomly but when you put it all together it does look really really nice and this makes a wonderful stacking bracelet so if you are into stacking up an armful of bracelets these are really really fun ok let's see now I think I'm gonna add a couple more of my coral beads here and I'm going to add on one of my Czech fire polish beads alright so then we're gonna continue yeah let's break out some of those red beads those are beautiful mm-hm I'm just adding and adding and you just add as many beads as you need for the length of your bracelet because obviously this is going to come together at the very end so let me go ahead and start to bring out my ruler cuz I want to make a six and a quarter inch bracelet so it's gonna be six and a quarter I'm almost there and you want to make sure not to pull it I just kind of let it slack so almost at 6:00 in the quarter so I'm going to keep adding a few more beads now because we added a couple of those big ones in the beginning you're gonna want to do the same where you add maybe another big one because what's gonna happen is we're gonna do a little knot and then we're gonna run it back through so you want to make sure that you don't have the little itsy-bitsy tiny beads right at the front so you can see I've tapered off a little bit there so I need to add maybe another bead let's go with one of these guys here there we go let's see okay so now when a couple too many let's see here let's take off some from the front all right so now I have that big bead there at the beginning so what I'm gonna do is I'm gonna take off my little big eye needle making sure I'm at the right spot I think I want to add one more back on and this is this is why I recommend using the big eye needle it's just a lot easier to pick up those beads and it doesn't hurt your opal on at all okay so I'm where I want to be I'm gonna remove that so now I'm gonna take my two ends here and this is why you want to cut off about ten inches or eight inches or so just more than what you're gonna want because you're gonna want a little room to tie so now we're gonna bring our two ends together and I'm just gonna tie a simple overhand knot just bringing that all the way around and bringing those together and now just sort of holding that with your fingers just go ahead and tie another overhand knot and bring that down there and give it a nice little little tug you don't want to pull too tight otherwise you're gonna have your little bracelet here kind of look crunched and you don't want that to happen but pull it nice and nice and snug there so now what we're gonna do is you're gonna take that cord and run it through a couple of adjacent beads now if you need to string on your big eye needle again to get this to work easy and let's go ahead and do that I'll show you how that looks I was like I'm just having a little trouble getting it through there so now we're gonna go through a couple of those beads and I did end up with a couple couple little ones there but easy enough to kind of pull that through it'll get nice and tight in there let's go ahead and remove that and then if you've done what I said correctly by having a couple large beads on the other side we can do that on this side as well without having to add our needle the other side okay so now we have our little knot there now you don't need to run your cord all the way through like we have done in the past because these are so delicate when you're working with larger beads we have a nice video on how to secure your stretch cord to help you with that okay so now let's come in so we recommend using the GS hypo cement for this mostly because it has this really great little pinpoint needle end that will help you really get your in there and on that not so we're just gonna come in and we're just gonna coat or not I'm all sides there there we go and now go ahead and slide that big bead right over that knot so you're gonna kind of hide that knot a little bit and then you can bring in your other cords just like so on the sides all right so now what I want to recommend you do is let this dry for a little while a couple of hours so you can kind of do with this all in one so if you're gonna make you know eight or ten of these bracelets you can do so and then once that's dried coming to the ends here and then kind of trying to get my hands out of the way so I can just you can see so we have our little end there and what I recommend here is again this is why the GSI placement is so great come in and sort of fill that little bead right there with just a little bit of that glue and then you can come in with your snips or your scissors and trim that off so you get a nice little closure there on one side and then you just simply repeat that on the other side here so again this is why you kind of want those bigger beads there at the end and the closure once you get to doing this you know it can just be two or three beads next to each other so you can kind of start to plan your patterns but then this way you will have a nice secure bracelet and no little extras hanging out nothing coming out of it so I also then recommend you let this dry for a little while before you try to stretch it and wear it and pull it over your wrist and all that good stuff oops I just want to put my glue in there we go alright so it's super super easy we recommend the opal on for this you can create all kinds of fun little bracelets and don't forget we have lots of mixes and the six OS and the eight OS for you to play with so choose your favorite color and combination of seed beads to create your own personal look and stack them up on your bracelet for a fun colorful arm of bracelets thanks for watching if you've enjoyed this video be sure to hit that like button also hit that subscribe button and that bell as well and of course you can see everything here over at beadaholique.com

Customer Reviews

Be one of the first to leave a review! Write a review

You recently viewed

Clear recently viewed