|
Calypso Wire Wrapped Earrings in Apricot - Exclusive Beadaholique Jewelry Kit SKU: KE-GP-035R $20.99 |

|
Sharp Flush Cutter Pliers - For Cutting Beading Wire (1 Piece) SKU: XTL-5600 $23.99 |

|
Baby Wubbers Quality Fine Chain Nose Jeweller's Pliers SKU: XTL-0020 $32.99 |

|
Eurotool Nylon Jaw Pliers Chain Nose- For Scratch-Free Wire Work SKU: XTL-0074 $14.49 |
hi this is Alexandra at beadaholique you how to make the Calypso wire wrapped earring kits by beadaholique so this exclusive kit is available on beadaholique.com and comes in four beautiful color ways including apricot ocean plum and teal in this video we'll be putting together the plum variation and when you buy this kit you'll receive everything you see here including size eight OC beads three millimeter metal beads two by three millimeter czech glass faceted micro spacers as well as some beautiful three millimeter Swarovski crystal pearls you'll get a full spool of artistic wire in 28 gauge a pair of Bali style ear ear hooks and some Nunn design wire frames what you want receive are just a few basic tools that you'll need including flush cutters chain nose pliers and possibly a pair of nylon jaw pliers although if you don't have those that's fine so let's get started I'm gonna bring in my ruler and begin by cutting my wire so open this up and I'm going to cut twenty inches to start sometimes you'll need your pliers to kind of get the wire off the spool so let me measure my 20 inches 15 and 20 use my flush cutters to cut that off and I'm first going to take up my Nunn design wire frame now let's decide which is the front side and for the purpose of this design I'm taking this straighter edge on the left and I'm going to overlay my wire about an inch and a half or two maybe a quarter inch down from the top loop over the top and with that tail I'm going to begin wrapping around the edge of the frame six coils my wraps are loose but we'll tighten those up once we're ready once I've got my six there we go I'm heading the very end of my tail in toward the center of the piece and either with my fingernails like so or with my pliers I'm gonna squeeze together those wraps and make sure they're nice and straight and tuck in my tail and clip it with my flush cutters and now I'm gonna take the remainder of my wire and bring it through the center of my frame so that it's on the underside of the opposite edge of the frame and I'm ready to string on my first layer of beads which is going to be five of the eight Oh seed beads my wire is acting as a needle and I'm gonna string those all the way through down to the coil that I made and coming from the underside on the opposite edge again I'm going to come around six times stacking my coils against each other there's 28 gauge wire is very malleable now you see it's got a little kink in my wire so what I'm gonna do is just press the wire away from itself to undo that you may find this happens to you and here's where I'm gonna pull in my nylon jaw pliers and just straighten that wire out alright so continuing I've got my six coils pinching with my fingernails or alternatively I could take my chain nose plier and squeeze those coils together I've come through the center and underneath the opposite side of my frame and I'm ready to add on my second layer of beads which is four of the metal beads these are hollow so sometimes you have to kind of press them up with your finger bring those down and through and I'm gonna flip my frame over so that I'm working on the right-hand side since I am right-handed and start to coil around the opposite edge six times I went my wire again this is a little bit of length to work with at the beginning but it's best to start with one single length of wire and that way you're not having to reattach multiple times or five skip that up a little bit and six all right I'm coming through and across my frame take my pliers and squeeze those wraps together and I can adjust as I go these are sliding sliding up and down along the frame so that allows some flexibility so coming down and through I'm ready to add on my third layer of beads which is eight of these micro spacers five six seven and eight now we've standardized the counts on each of these beads and you'll be receiving a few extras of each of them just in case one gets away from you or isn't quite the right size you'll find that because we're using a variety of sizes and shapes that you may have a little extra space on your wire or not enough in which case feel free to adjust the number of beads again we've standardized this for the purposes of our kids to make it as user-friendly as possible no six okay coming through the frame and across underneath the opposite side I'm ready to add on my fourth layer which is eight of the eight o beads straight my wire out a little bit and particularly with these eight o beads they're designed to be a standard size but they are just sometimes a little wider or a little thinner so you may want to adjust the number that you put on there three four five but we find that these numbers have worked for us across the color palettes there's eight and I need one more nine so there's my fourth row of eight o beads I've got nine on there and I'm going to come around six times and six and when my coils are wide apart its easiest for me to double-check my count and then I can just squeeze them together with my plier and I'm ready for my fifth row which is going to be seven are the Swarovski crystal pearls there we go all right that fills the space coming from under the opposite side and coiling six times around the edge sometimes when you get in the rhythm of it your coils can be nice and tight together and then you don't even need your pliers and there's six coming through and underneath the opposite side and I'm ready to add on ten of my eight Oh seed beads coming through the center underneath the opposite side I'm coming around six more times there's six I'm going to use my player to tighten this row up the unique thing about this kit is that it includes a real variety of textures and finishes that give a nice natural organic feel to these artisan earrings okay so now I'm ready to add 11 of my micro spacers I'm on to row 7 so adding 11 beads get those down in the center and create my coils there's six coming through the center tucking my rows together come up on each of these and give them a little squeeze all right through the center and I'm ready to add on my eight throw of beads which is seven metal beads there we go coming around the opposite side okay there's my six tuck those together and begin my last row which is going to be ten of the eight o beads double check my count here I've got five and five for ten and see that my wires have scooted along the edge a little bit but that's okay because we'll be readjusting once we're finished get them all a nice tight squeeze with the pliers so I'm coming from underneath and I'm gonna do six final coils I mean this last row I want to make sure they're nice and tight okay that's my sixth coil there so I'm going to clip the extra wire right at the point where the very tip is going to tuck into the center of the frame if that a good squeeze and at this point I can make some micro adjustments kind of straighten things up but you notice that it's got sort of a organic look to it and that's part of the charm of the piece so also what you can do from behind is give those beads a little bit of a push forward and that will give them a straightened out look as well kind of fill that out now all we need to do is add our earring hook so for that I'm gonna bring over my Bali style your hook and with my plier just gonna gently open that top loop forward a bit slide my earring right on and close it up in there we have the plum version of these Calypso earrings these are available exclusively at beadaholique.com thanks for watching
Related Videos


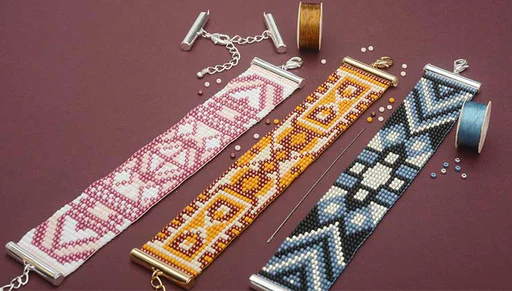
How to Make the Loom Bracelet Kits by Beadaholique
In this video you will learn how to make the Exclusive Beadaholique Loom Bracelet Kits from start to finish. You will see how to set up your loom,...
View full details

How to Make The Hamptons Necklace featuring Austrian Crystals - An Exclusive Beadaholique Kit
In this video you will see how to make The Hamptons Necklace, an Exclusive Beadaholique Kit featuring Austrian crystals and Pearls. You will learn...
View full details

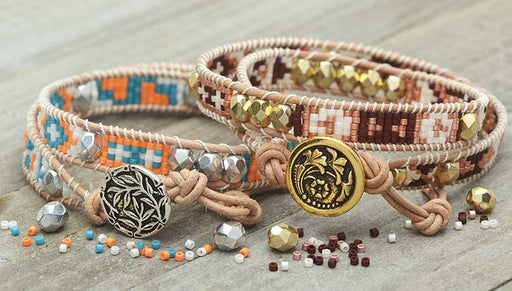
How to Make the Mosaic Double Wrapped Loom Bracelet Kits by Beadaholique
In this video, you will learn how to make the Mosaic Double Wrapped Loom Bracelet Kits from start to finish. You'll see how to set up your loom, b...
View full details