Note: Components and tools listed within this INSTRUCTIONS box and the printer-friendly PDF, if available,
may have been discontinued since this project was published. Refer to the PURCHASE COMPONENTS and TOOLS AND
OTHER SUPPLIES sections for current availability.
- Cut 15 inches of wire with your wire cutters.
- Take your ball head pin and your length of wire and starting right next to the ball head portion, begin making a tight coil of wire, wrapping the wire around about 3-4 times. Use your chain nose pliers to pull the wire and to also tighten the coil as much as possible. Keep the rest of your wire length pulled to the side.
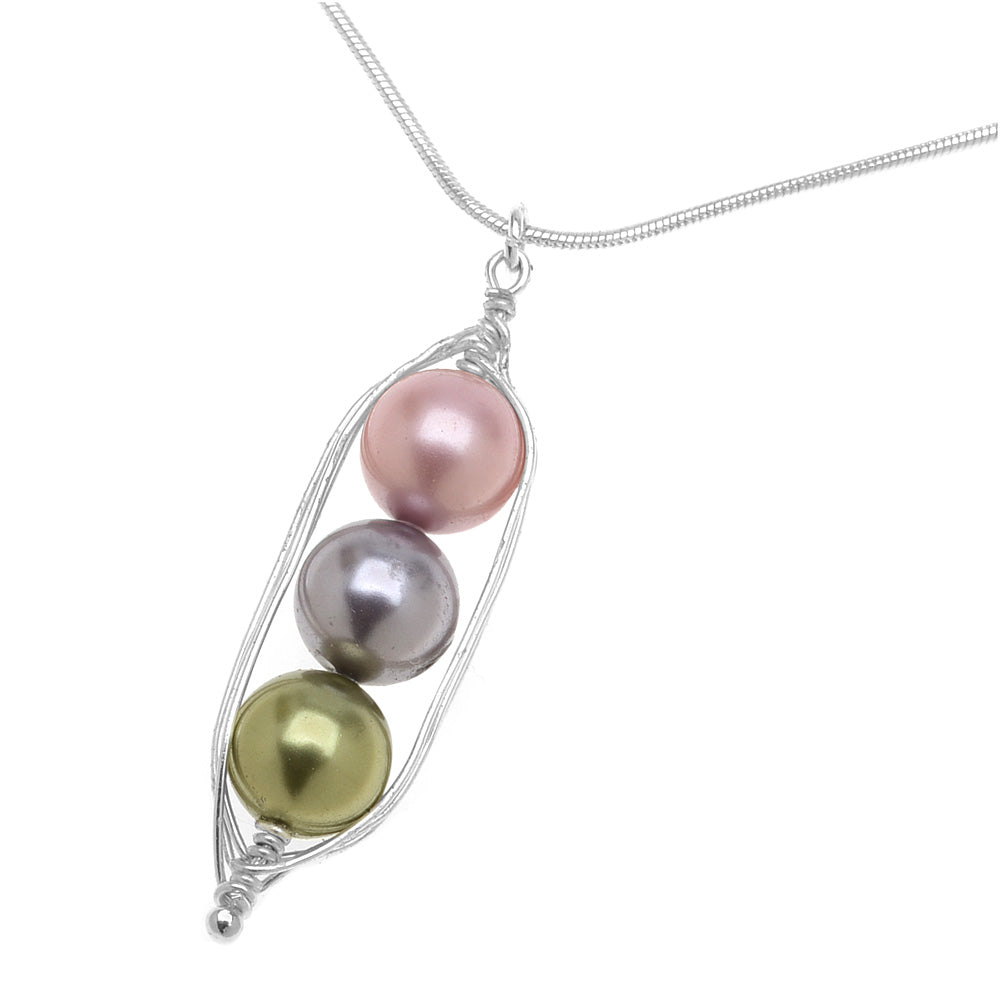
- Next, slide on the following Austrian crystal pearls onto your ball head pin: 1 green, 1 purple and 1 pink.
- Then, take the rest of your length of wire, bring it up and line it against your pearls on the right side, going all the way up to the other end of your head pin. Take the wire and make a few tight coils by looping it around the headpin (like how you did previously next to the ball head portion of your head pin). Your wire coils should be right above your pink pearl. Make sure to coil the wire quite tightly because this will be the initial form of your peas-in-a-pod design. Bring your wire down the other side of the pearls and coil it around the base near the ball of the headpin.
- Use your pliers to tighten the coil and straighten out the wire again on both sides.
- Repeat the above process two more times, by bringing your wire from one side of your ball head pin onto the other end, coiling it about 3 times tightly around the head pin, and going down the other side. The wires are going to try to overlap one another, so try to hold them in place when you are wrapping the wire. Make sure to keep your wire as straight as possible on both sides of the stacked pearls. Refer to photo for assistance.
- You should now have 3 wire segments on either side of your pea pod.
- Next, snip off the excess wire with your wire cutters.
- Now at this point you probably only have a small portion of the head pin sticking out of the top. Take your round nose pliers and create a simple wire loop with the head pin. Snip off any excess.
- Now you are going to press the wire in to hug the pearls with your fingers. You are done with your wrapped wire focal.
- Using your chain nose pliers, open up your jump ring and slide it through the simple wire loop on your focal. Before closing the jump ring, open up the clasp on your chain and also slide on your chain. Close with your pliers.
- You're done!
WHAT YOU'LL NEED: (scroll down for purchase options)
- WCR-2430 - Artistic Wire, Silver Plated Craft Wire 24 Gauge Thick, 10 Yard Spool, Tarnish Resistant Silver
Project uses 15 inches. You will need 1 package.
- SWP-8013 - Austrian Crystal, 5810 Round Faux Pearl Beads 8mm, 25 Pieces, Powder Rose
Project uses 1 piece. You will need 1 package.
- SWP-8021 - Austrian Crystal, 5810 Round Faux Pearl Beads 8mm, 25 Pieces, Mauve
Project uses 1 piece. You will need 1 package.
- SWP-8041 - Austrian Crystal, 5810 Round Faux Pearl Beads 8mm, 25 Pieces, Light Green
Project uses 1 piece. You will need 1 package.
- FHP-5319 - Beadalon Silver Plated Ball Head Pins - 22 Gauge - 2 Inches (24)
Project uses 1 piece. You will need 1 package.
- AXC-98911 - Silver Plated 1mm Snake Chain Necklace With Clasp - 16 Inches
Project uses 1 piece. You will need 1 package.
- FJR-5140 - Silver Plated Open Jump Rings 4mm 21 Gauge Thick (100)
Project uses 1 piece. You will need 1 package.
RECOMMENDED TOOLS:- XTL-5600 - Xuron Sharp Flush Cutter Pliers - Wire/Soft Flex
- XTL-5511 - Beadsmith Jeweller's Micro Pliers Chain Nose Flat Nose
- XTL-5514 - Beadsmith Jewelry Fine Round Nose Micro Pliers


 Earn Reward Points with your purchase of project components or tools.
