Instructions for Making the Abacus Bracelet Kit

SKU VID-0611
Designer: Julie Bean
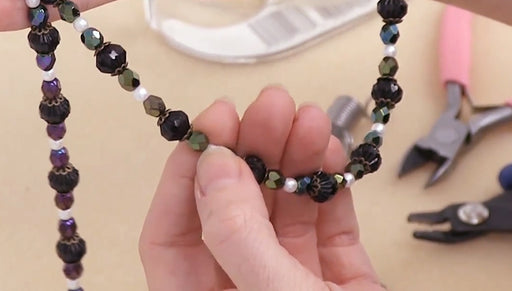
In this video you will learn how to make the Abacus Bracelet, an exclusive jewelry kit from Beadaholique.com. Each kit comes complete with all the supplies you will need to make the project, all you need to provide are the tools. This kit is great for beginners or to give as a gift.
Audio Transcript
Note: This audio transcript is auto-generated and may not be completely accurate.
you Hi, this is Julie with beadaholique.com beadaholique.com and this is named because as you can see it's got these little slider beads which are very reminiscent of the beads on it abacus which is an ancient counting tool so included in this kit are all the items you see right here and you're going to get a tube of e6000 glue which is a very strong industrial-strength glue you're going to get a nice long length of this rubber plethora cord a clasp set has a recess here they're going to be able to put glue in two of these nice wide spacer beads and a dozen of these little gold beads in terms of tools you're going to need you need a ruler you're also going to need a couple pieces of wire or toothpick some scrap that you'll be able to use to apply the glue and pair of scissors so to begin we're going to cut our rubber lengths and we're going to need six strands that are six inches long each and this is going to make for an approximately seven and a half inch bracelet so if you want yours to be longer or shorter go ahead and adjust this first step accordingly and as you can see you're going to have a lot of left over pleather cord gather all your chords together okay now we're going to open up our bottle of e6000 glue you can see that it's sealed to break the seal there's a little point on the opposite side of your cap go ahead push it down and the glue will be released you'll want to work in a well-ventilated area when you're using these six-thousand go ahead put a nice generous amount on your applicator which it could be a toothpick scrap piece of wire whatever you're using I'm going to squeeze out some more and I'm going to put it into that recess and I'm just going to fill fill it up fill that bottom make sure it gets along the sides and then close my cap back up take all of my cords make sure all the ends are the same length that they're even here bundle them together and stick them into the glue and I'm just pressing them in place one quick note I have my hook facing in you can see these are naturally curling on their own now at this point set it down to dry for a half an hour so I've let this dry for a half an hour ideally I really like to let each 6-thousand glue overnight so I'm going to show you a little tip just to make sure that your strands stay in place I just have some tape here and I'm just going to put it over the clasp and the strands and all this is going to do is it's just going to hold them in place as I continue working on my bracelet just like this okay and you can see I at this point don't have them super tight I have the tape around the base of the clasp because what I want to be able to see how these strands lay before I squish that tape down you'll see what I mean in just one second so we bundled all the ends together to stick them into the clasp but now I want them to lay end on end flat so just going to kind of look in there see how they come out of the class because I don't want them overlapping each other and I just want to form nice neat little rows there we go and at this point I am going to squish my tape down which is also going to have the effect of holding my rows in place so now walking along the rows of rubber because I don't want them to overlap I'm going to get to the other end of my bracelet and I'm going to slide on one of my sliders now remember I cut these all to be an identical length but they look uneven and that is just because of how they are curving so slide this in slide this down and I want it to be about an inch and a half from the end of the clasp so now what I'm going to do see now they look a little bit more even but we're going to actually trim them at the end anyways I'm going to place two slider beads on each end okay slide them all down and you'll see this end slider is going to prevent them from sliding down towards your clasp now I kind of like it that these are all nice neat rows so that the beads can just slide freely if you wanted to do a variation on this kit you could actually start to do something like this where you tangle the cords up but for my purposes I'm going to keep these guys from falling off okay so now I'm going to again make sure that my rows are nice and straight and not overlapping there we go and I want to slide on the other wide slider so this is what we've got so far and what's nice as this cord really does curve on its own so just double check that all your rows are straight and at this time if you want you can pull it so you have more room in there and if you wanted to you could glue these sliders in place I actually like them just being free but that's up to you so now I'm going to go ahead line up all of our cords again and at this point I want you to trim them so that they're all even there we go we're going to take our East 6000 the other end of our clasp another little toothpick or piece of wire as an applicator fill that recess with glue be pretty generous with the amount because you want it to coat all the sides okay now I'm going to bundle these together and stick them into my clasp and I'm really pushing them in because I want them to make sure that they touch that glue and that glue really seeps into them okay you might want to before this end is totally glued make sure that it's going to line up with the hook which it does and then you're just going to go ahead and let this dry overnight if you are concerned that your cords are pulling out at all just take a piece of tape like you did before push those into place and wrap the cords and that's just going to stabilize them as it dries okay and then after this dries and you're all done go ahead remove the tape in the morning and I do just like I said I like to err on the side of caution let that dry overnight and this is what you're going to end up with and now these do slide you could glue them in place and these slide as well and again you could glue them but I really like to be able to just play with them I like that they move so this here is your finished abacus bracelet and you can find the exclusive kit on beadaholique.com you

You recently viewed

Clear recently viewed