|
Wire Elements, Tarnish Resistant Gold Color Copper Wire, 26 Gauge 34 Yards (31 Meters) SKU: WNT-2633 $10.45 |

|
Artistic Wire, Copper Craft Wire 20 Gauge Thick, Tarnish Resistant Brass (6 Yard Spool) SKU: WCR-2033 $4.59 |

|
Eurotool Dual Utility Bench Block 3 x 3 Inches - Steel Anvil With Wood Base SKU: XTL-0264 $23.99 |

|
Eurotool Nylon Jaw Pliers - Round Nose SKU: XTL-0072 $14.49 |

|
Sharp Flush Cutter Pliers - For Cutting Beading Wire (1 Piece) SKU: XTL-5600 $23.99 |

|
Xuron Jeweler's Super Fine Pliers Chain Nose Flat Nose SKU: XTL-5450 $25.99 |

|
Beadalon Large Beading Mats - Prevent Bead Rolling 13 X 18 Inch (Set of 2) SKU: XTL-9935 $6.75 |
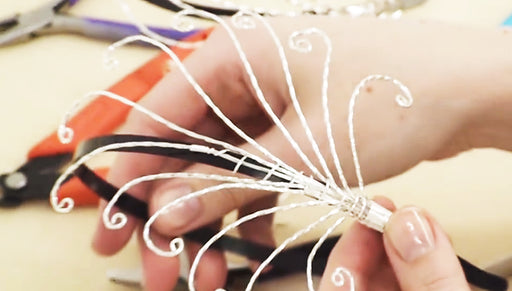
Hi, this is Julie with Beadaholique.com and I'm going to show you how do this little basket weave figure eight pattern with wire wrapping you can see I have this necklace and we taped another video showing you how to do the different components that went into the earring which also translate to other pieces at this particular necklace as well but for this video I want to focus just on this little technique right here of creating that little woven pattern between two thicker stands of wire using a thinner wire so I've got twenty gauge wire here and because I'm just showing the technique I'm not going to worry about the length that I'm cutting cut two of equal lengths here now if you are going to a piece like this and you can see that these two wires actually bend I went in different directions and did a little curve on them, you'll want to allow for that when you start your wire wrapping so you'd start perhaps in about midway for however long you want your loops to be but for this technique video I want to show you how to do that wire wrapping so if you're wires are not straight try to straighten them out your hands if that doesn't work you can take a pair of chain nose pliers grab the tip and then take a pair of nylon jaw pliers and just try to straighten out by pulling and that does a pretty good job for this particular project we are gonna actually bend the wires and just remember that wire is great because it is so pliable and you can bend it out of shape and back into shape at your discretion so I've got twenty gauge here for the thicker wires and twenty-six gauge for the thinner wire and I'm going to hold my two wires together line up their ends I'm actually going to take the top part and bend it a little bit just like so holding my wires together I'm going to take the end of my twenty-six gauge wire and place it between my thumb and forefinger so that I'm holding it and going to take the wire around the back side and then go through the little "v" I made scoot it down so it's resting against my fingers and twist around that same front rod now I'm going to take the wire and go all the way around the back and this time I'm gonna go behind both wires up through the "V", so I'm just wrapping around that bottom wire here and then I'm going to scoot it down with my fingernail so that it lays against the wrapping I already did now I'm going to take the wire and go back up and go over both pliers the reason I twisted these out of shape a little bit it's just so that it gives me a little wire gap and then also I can see how they're supposed to be orientated so I can twist them around as I'm working 'cause they are gonna move so now I've gone up and over both wires and go through my "V" and into the middle and go back up and over the top wire and this becomes a pattern for you. It'll start to make sense and then what you can do scoot your wires together with your fingernails so now I'm going back behind both over the bottom one and through the "V" scoot it down back around and then up and over both down through the "V" again and wrap the wire around the top one again and over now back down crossbow through the back through the "V" so I just am wrapping around the bottom one loop back around. Now up over both through the "V", just wrapped over the top one back around go back behind both wires through the "V" just wrapping around that bottom one up and over through the "V" wrapping around just the top one back wrapping behind both through the "V", just wrapped around the bottom one wrapped around both the front and through the "V" wrapping around the top one around the back of both through the "V" again wrapping just around the bottom one wrap it around, go over both and through the "V" scoot it down if you need to wrap it over just the top one wrap around the bottom of both scoot down and this is what I'm getting I'm going to do a little bit more and then if my wires twist you can tell where they're supposed to be because you did that little "V" where they were both coming out so where I left off because I need to go around over the top of both in the front through the bead wrap it around the top one around the back of both wrap around the bottom one wrap around the front of both wrap around the top one through the back wrap around the back of both wrap around the bottom one wrap around both in the front twist as need be and this is what we're getting and you can see that that is the pattern here that we created in this necklace I'm going to do just a couple more because I know it can be hard to grasp this but it will make sense and you'll get into a rhythm where it'll just go very quickly for you I'm gonna move my fingers up just a little bit so I'm gripping the wire so they stay together again wrapping around the top going back behind both, wrapping around the bottom scooting down going over the front of both wrap it around the top one and behind both wrapping around the bottom one scooting down as need be wrapping over the top over both moving my wires as I need to. I'm going to do one more, wrapping around the top one behind the back of both wrapping around front one up around front the of both wrapping around the top one back behind both and scooting down as need be so there we have our wrapping and what you can do is once this is done you can see that I've curved this a little. So then you can manipulate this how ever you want. It's actually quite strong you can bend it and do whatever you want once you've done your wrappings and you can see that we also got other details here in this necklace really quick I just want to show you how to wrap just around the wire itself and that is very very easy this is a little bonus here on this video I'm going to cut my wire all you need to do is you can either go ahead and make your curve first or you can do it after hold your two wires together straighten this one out and you just wrap just wind around and around and around and you're pinching the wires together to keep that tail in place and then if you notice that it climbs on top of each other, just undo that one and then go back to the wrappings and then if they end up too far apart you can just scoot them down with your fingernail and continue your wrappings so that is all it is to wire wrapping and the little basket weave figure 8 pattern I did it will make sense, it will click, in the beginning it does take a little bit to figure out which direction you're going in but be patient you'll be able to create a lot of really fun designs using wire. Go to www.beadaholique.com to purchase beading supplies and to get design ideas!
Related Videos


How to Use the Beadsmith Twist 'n' Curl Wire Coiling Tool
In this video, learn how to use the BeadSmith Twist 'n' Curl Wire Coiling Tool to make jump rings, wire beads, and other coiled wire components.


How to Make a Wire Wrapped Feather Headband
In this video, learn how to make a headband with a twisted wire wrapped feather embellishment.


How to Make a Wire Wrapped Gemstone Jewelry Set
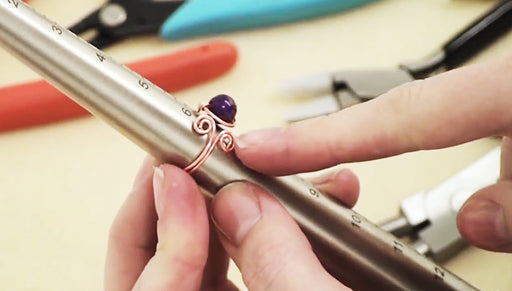
In this video, learn how to make a wire wrapped necklace, earrings, and ring with gemstone beads and spiral accents.
