
|
Waxed Cotton Cord 1.5mm Round - Black (5 Meters/16.5 Feet) SKU: XCR-4300 $3.29 |

|
The Beadsmith Mini Macrame Board For Braiding 9x6 Inches SKU: XTL-6120 $13.99 |
Related Videos

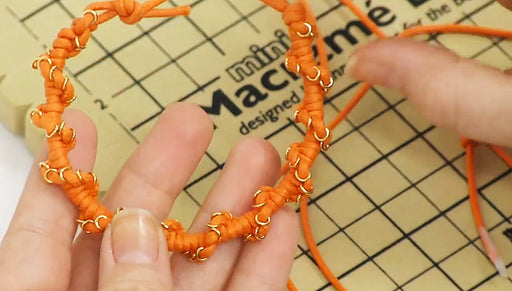
How to Use Closed Jump Rings in Macrame Half Hitch Spiral Knots
In this video see how to use closed jump rings to embellish a macrame spiral of half hitch knots. This is a great way to embellish a simple bracele...
View full details
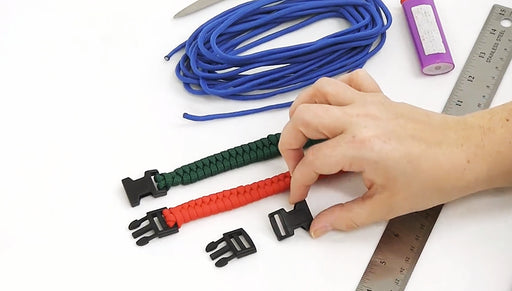
How to Make a Fishtail Paracord Bracelet
In this video, you will see start to finish, how to make a Fishtail Paracord Bracelet.